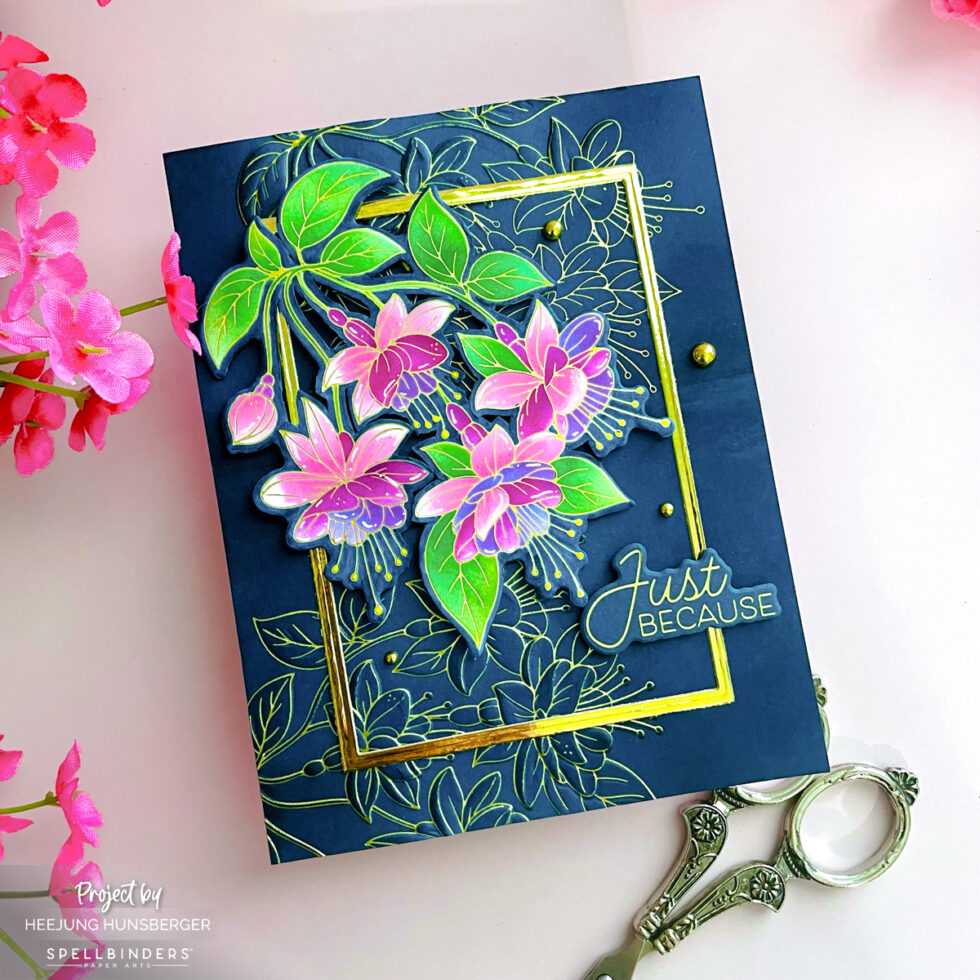
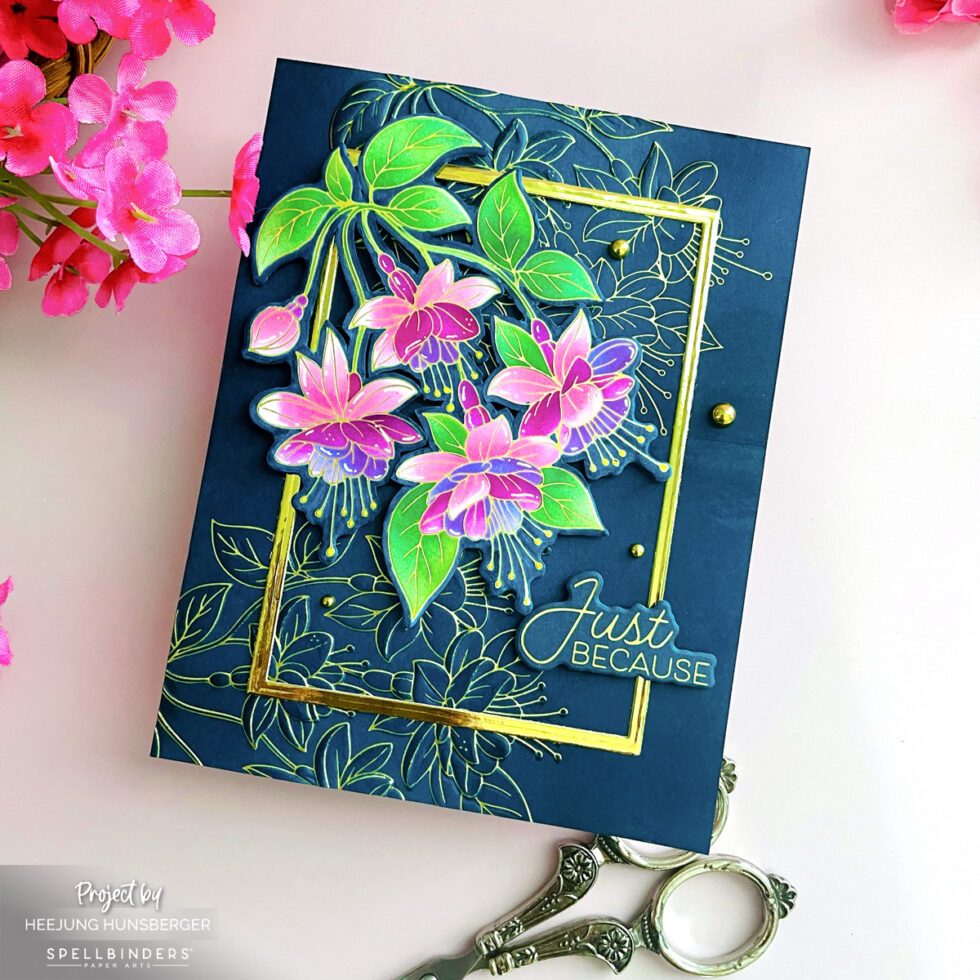
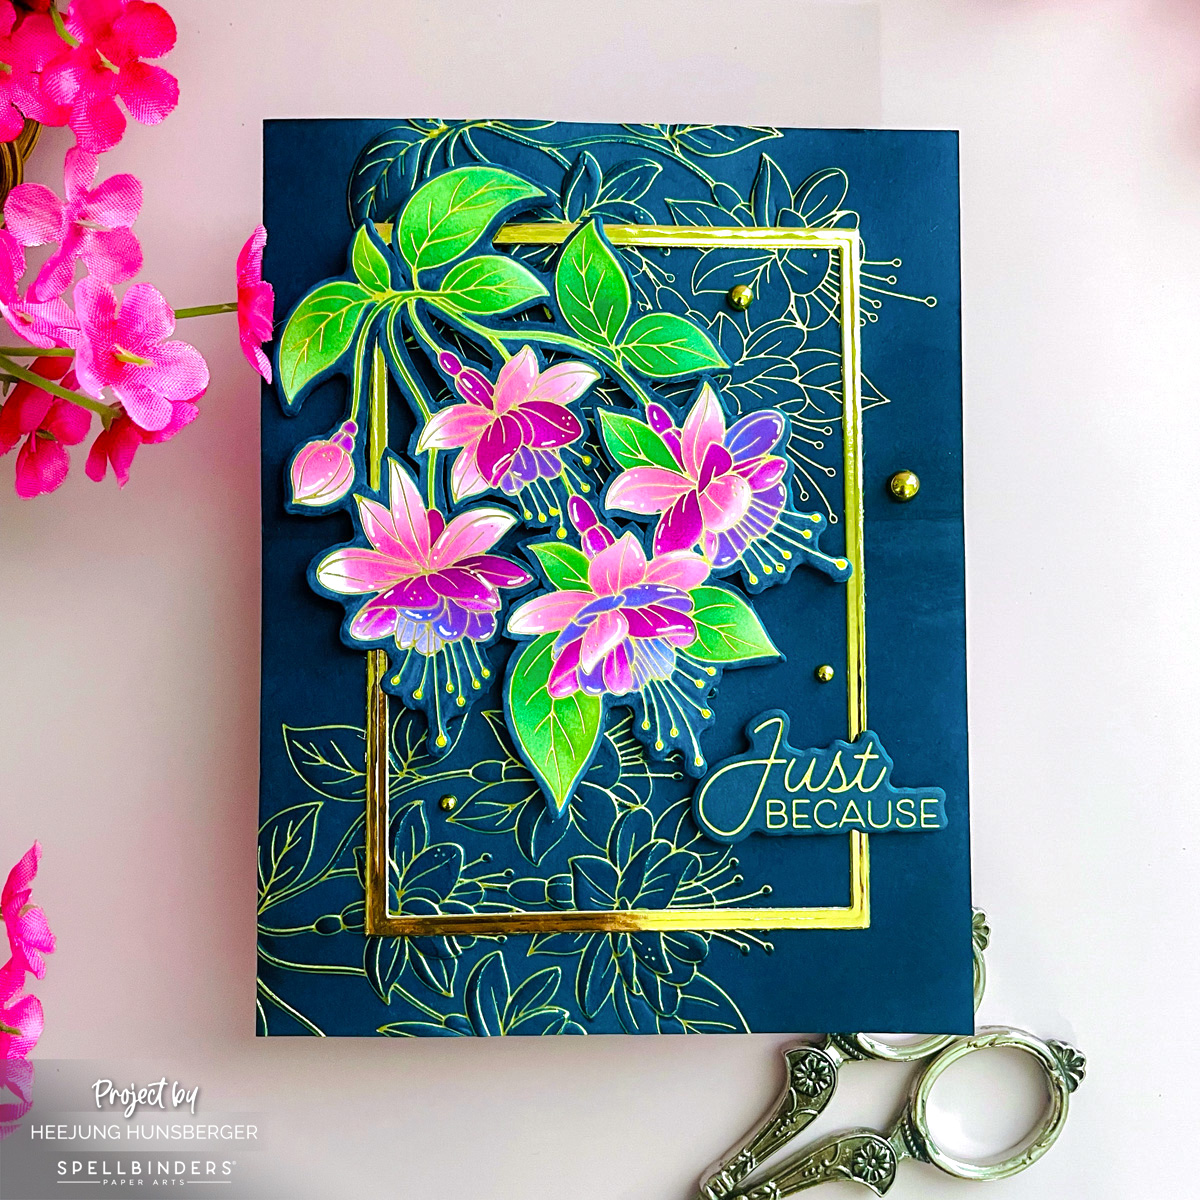
For this project, I wanted to create a sense of deep elegance and drama using the Magical Fuchsia Collection. By combining hot foiling with 3D embossing on dark cardstock, the florals seem to glow against the moody background. This technique adds incredible texture and a luxurious feel to the finished card.
Creating the Dramatic Background: I started with Oceanside cardstock and used the Magical Fuchsia Glimmer Plate Set to hot foil the floral images at the top and bottom in Matte Gold. To add depth, I aligned the Magical Fuchsia 3D Embossing Folder over the foiled images and embossed the panel.
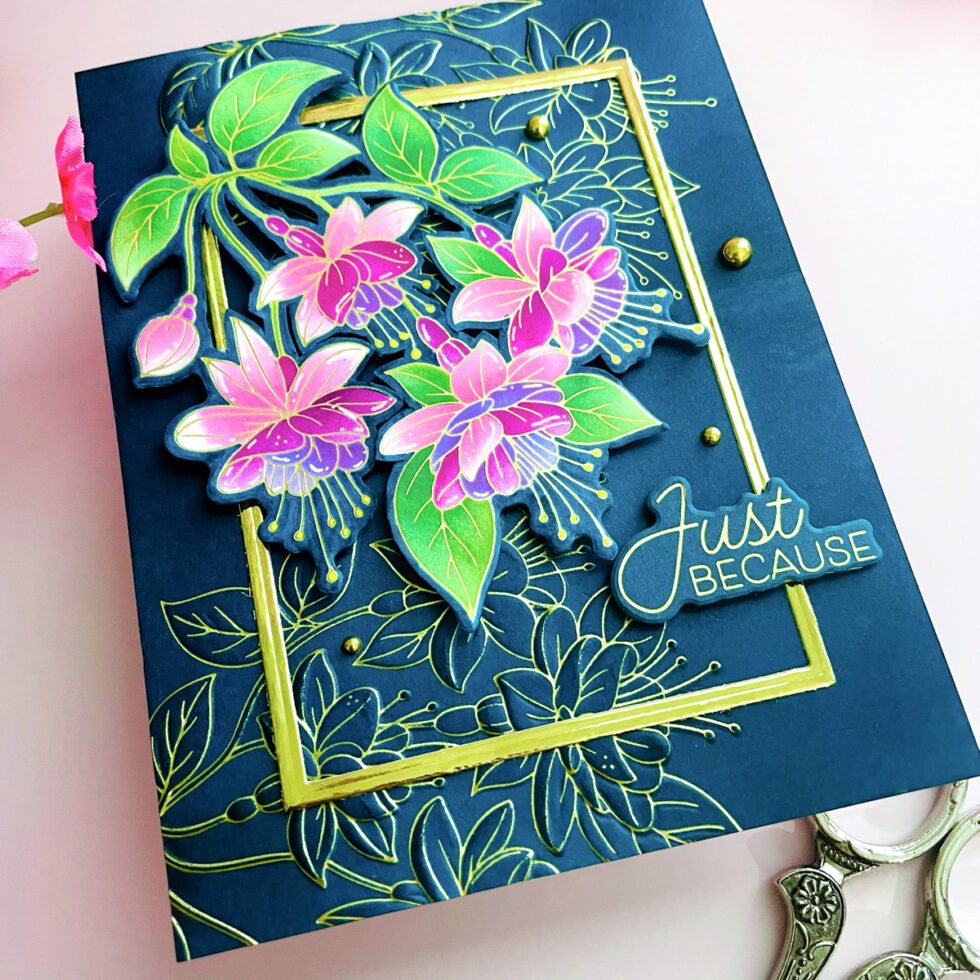
Inking for Depth: To make the center pop and add more dimension, I blended Altenew’s Teal Tempest ink around the edges with a blending brush. This creates a beautiful spotlight effect on the focal point.
The Golden Frame: I die-cut a thin rectangular frame from gold cardstock and adhered it to the center, providing a structured focal area for the main elements.
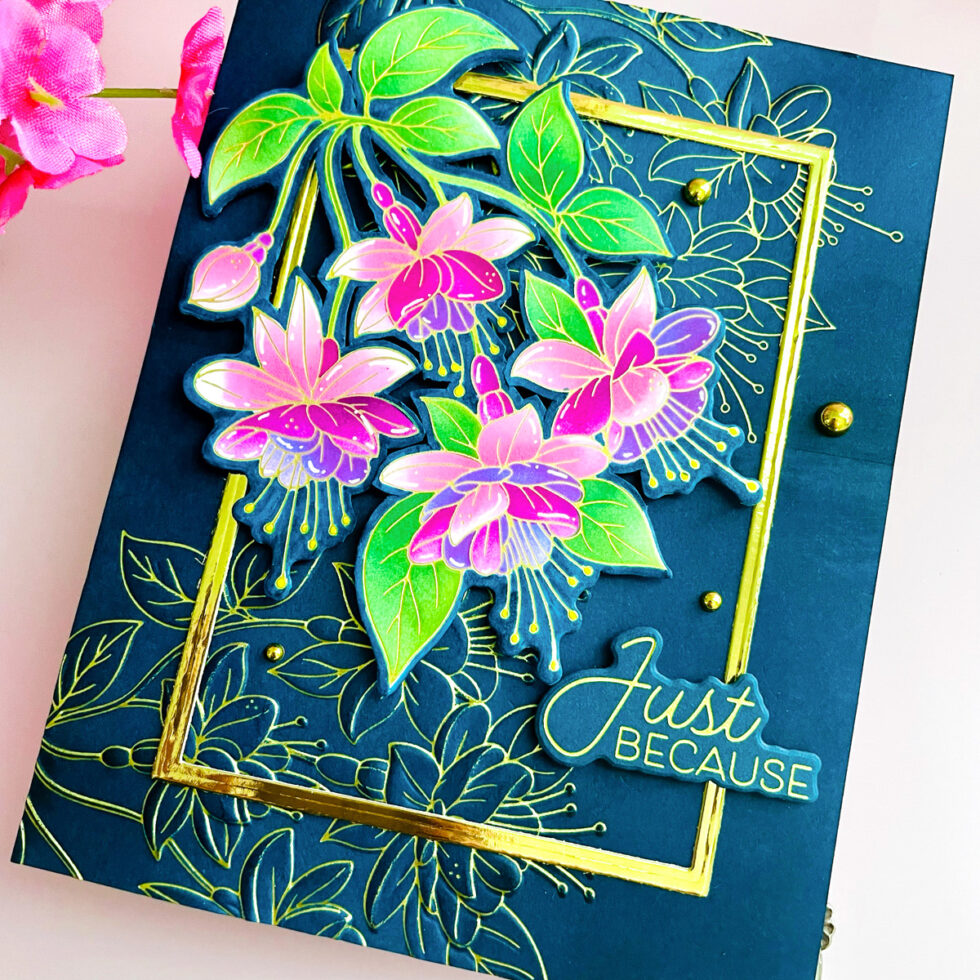
Stenciled Color & Precision Cutting: I hot foiled the main fuchsia branch in Matte Gold on white cardstock. Then, I used the Layered Magical Fuchsia Stencil by Alex Syberia Designs to blend rich, vibrant colors onto the flowers. To achieve a truly intricate look, I used my scissors to fussy cut and remove the tiny white spaces between the stems and leaves.
Fussy Cutting for Precision: The main fuchsia branch was hot foiled in Matte Gold on white cardstock and colored with alcohol markers. To achieve a truly intricate look, I used my scissors to fussy cut and remove the white spaces between the stems and leaves, making the floral spray look much more delicate and realistic.
Seamless Blending: After the detailed cutting, I used a dark teal marker (BG7.2) to color the remaining white edges of the die-cut piece so it would blend perfectly with the dark background.
Finishing Touches: I popped up the main floral and the “Just Because” sentiment with foam tape for extra dimension. Finally, I scatteredgold embellishmentsto perfectly complement the foiling and add a touch of sparkle.
I love how the matte gold foiling stands out against the dark, inked background—it really gives the flowers a magical, luminescent quality. Taking that extra step to trim away the small gaps in the die-cut really makes a difference in the final professional look. I hope this project inspires you to try foiling and detailed cutting for your next elegant creation. Thank you so much for joining me today!
Happy Crafting!Heejung Hunsberger
SUPPLY LIST
When you make purchases through affiliate links, it won’t cost you anything extra. Thank you so much for your support! 🩷
2 thoughts on “Dramatic Foiled Fuchsia Card”
That’s a really beautiful effect. The way the foiling and embossing create that glowing look is fantastic – it really elevates the card.
That’s a really beautiful effect. The way the foiling and embossing create that glowing look is fantastic – it really elevates the card.
thank you very much