Today, I’m excited to share five festive holiday cards I created using the wonderful Holiday Magic Collection. This collection is full of charming details, and I had so much fun mixing and matching the dies, embossing folders, and rub-ons to create these holiday scenes.
Here’s a detailed look at how I made each card:
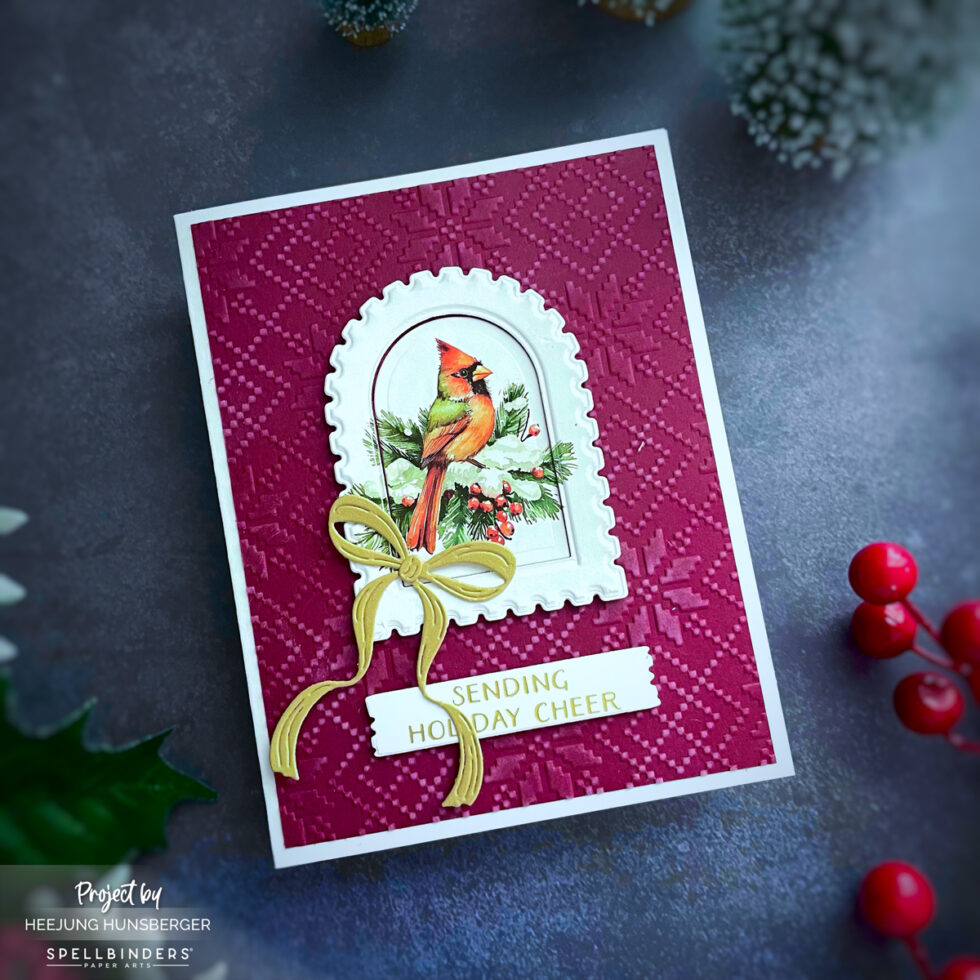
Card 1: Sending Holiday Cheer
For my first card, I wanted to create a striking and dimensional background. I started with Mulberry cardstock and used the Nordic Noel Embossing Folder to create a beautiful textured pattern. To make the pattern pop, I lightly rubbed white pigment ink over the raised areas.
Next, I created the focal point by rubbing on a beautiful cardinal image from the Magic Rub-ons set onto white cardstock. I then used the Postage Stamps 3D Emboss & Cut Folder to both emboss and die-cut a decorative frame for the bird image.
I attached this frame to the card background with foam stickers to give it an extra lift and dimension. I also die-cut a gold ribbon from gold brushed cardstock using the ribbon die from the Christmas Cocktails die setand added it to the frame as a final embellishment.
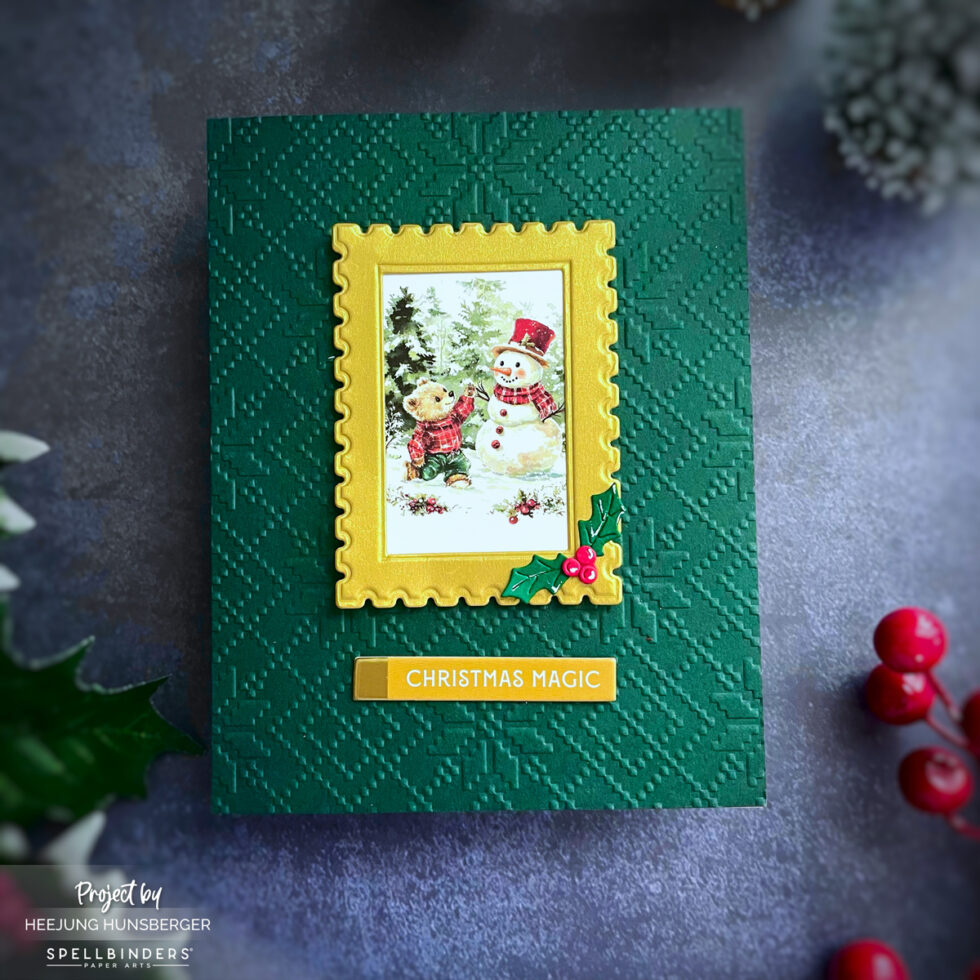
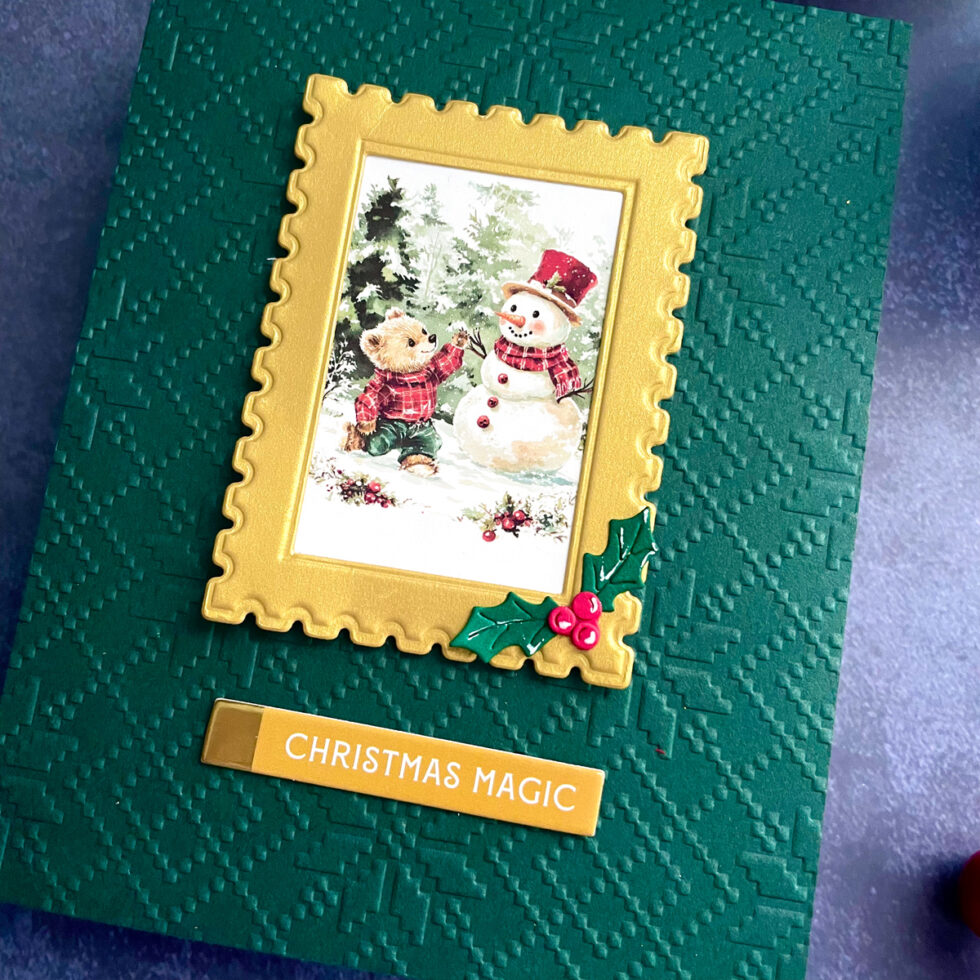
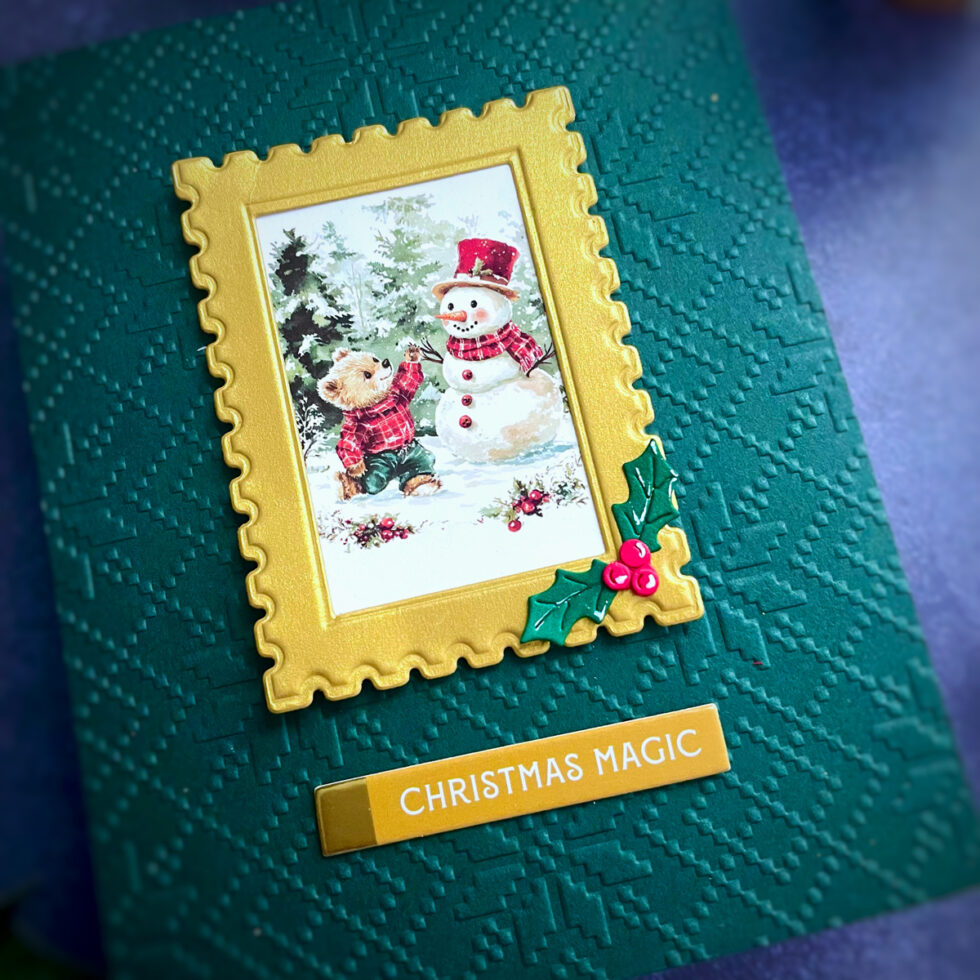
This card features another textured background, this time on Hunter cardstock, using the same Nordic Noel Embossing Folder.
The main image is a sweet snowman and teddy bear, which I created by rubbing on another image from the Magic Rub-ons.
I used the same Postage Stamps 3D Emboss & Cut Folder, but this time I created the frame from a stunning gold brushed cardstock. This gave the image a lovely, luxurious border.
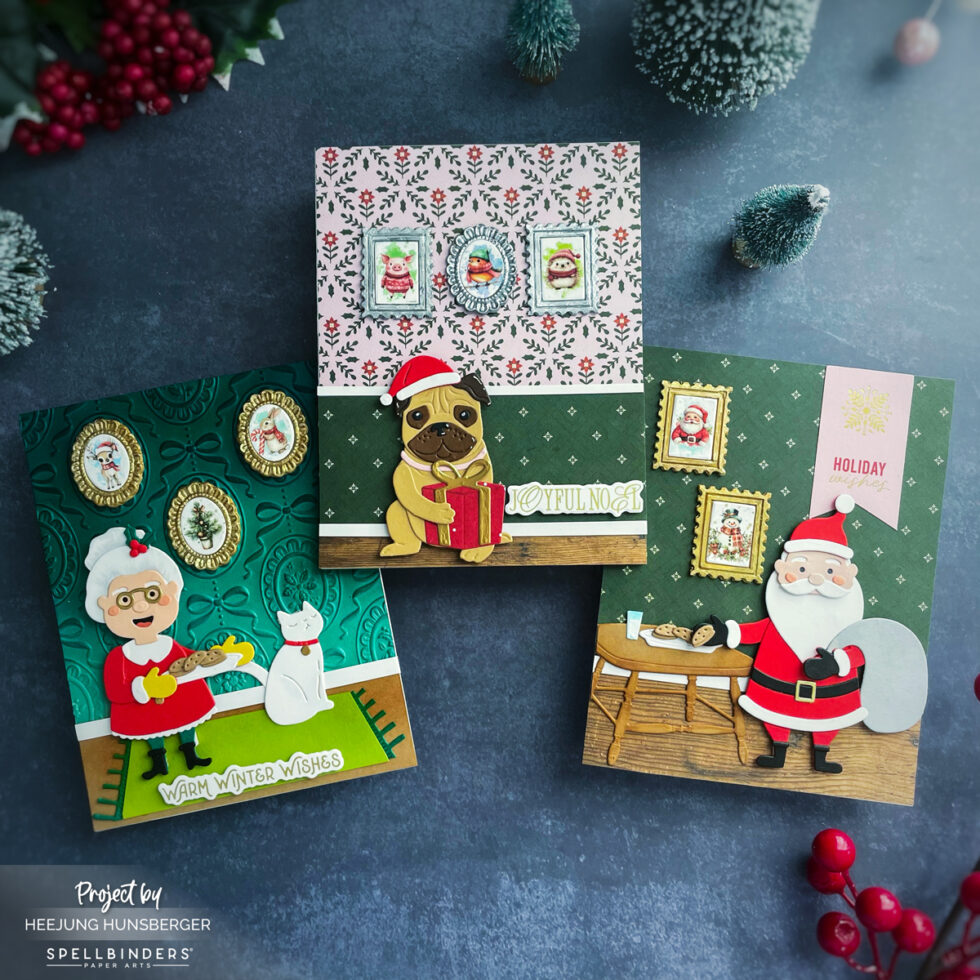
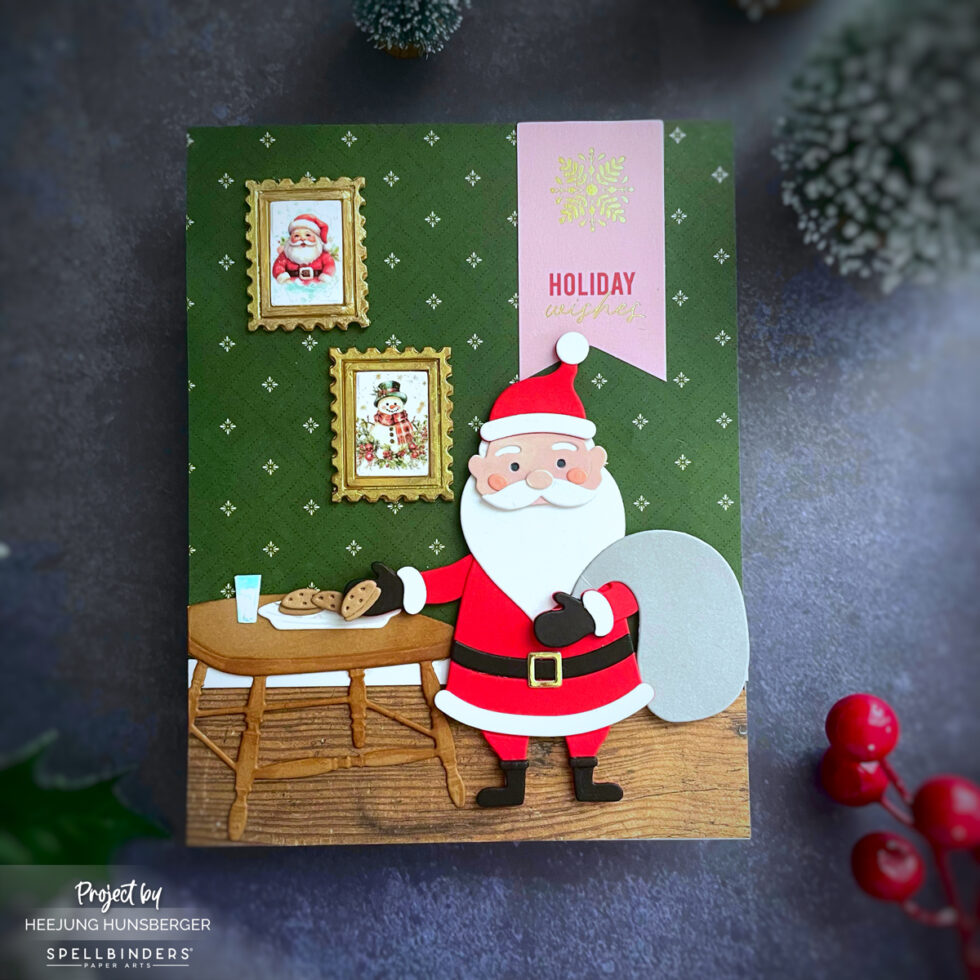
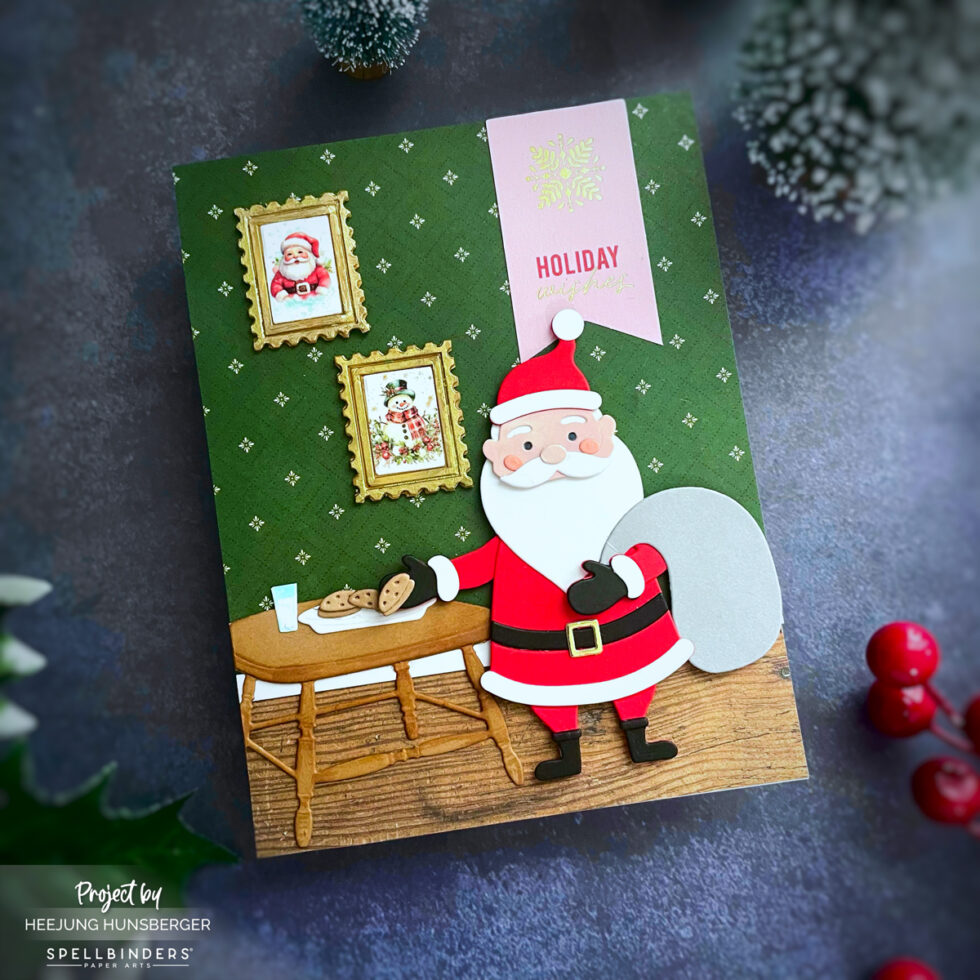
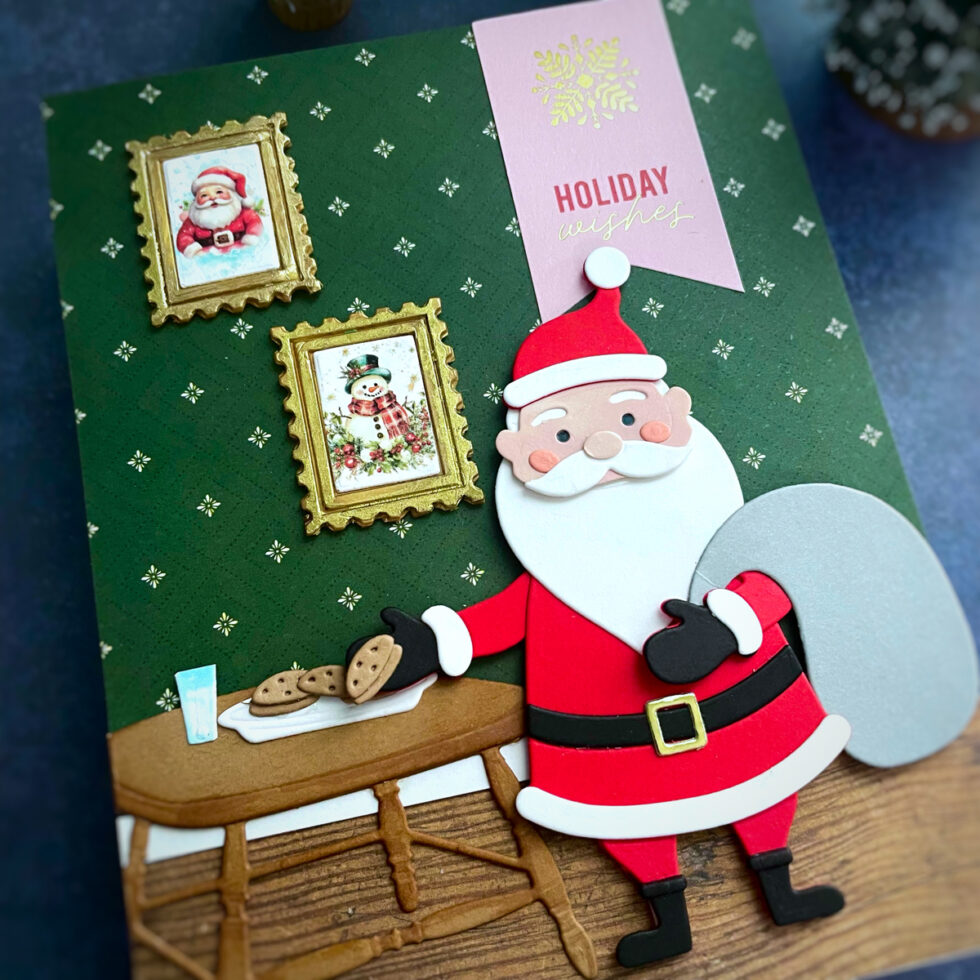
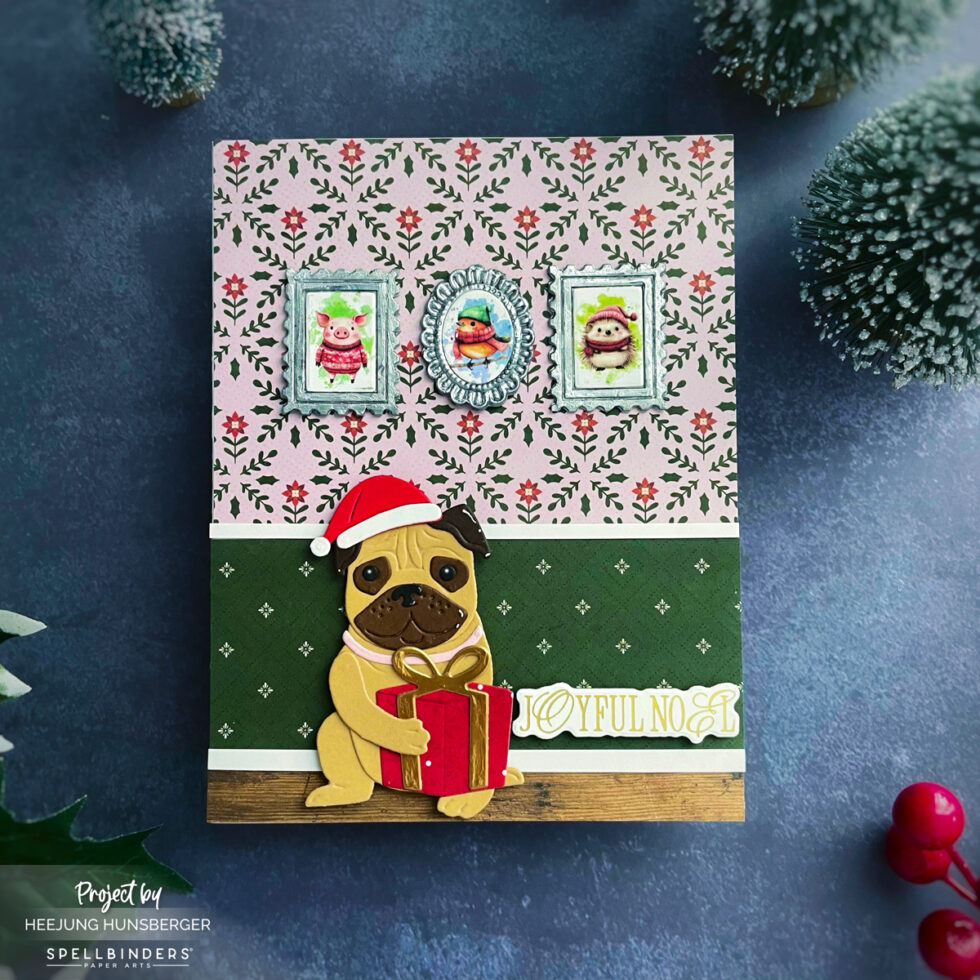
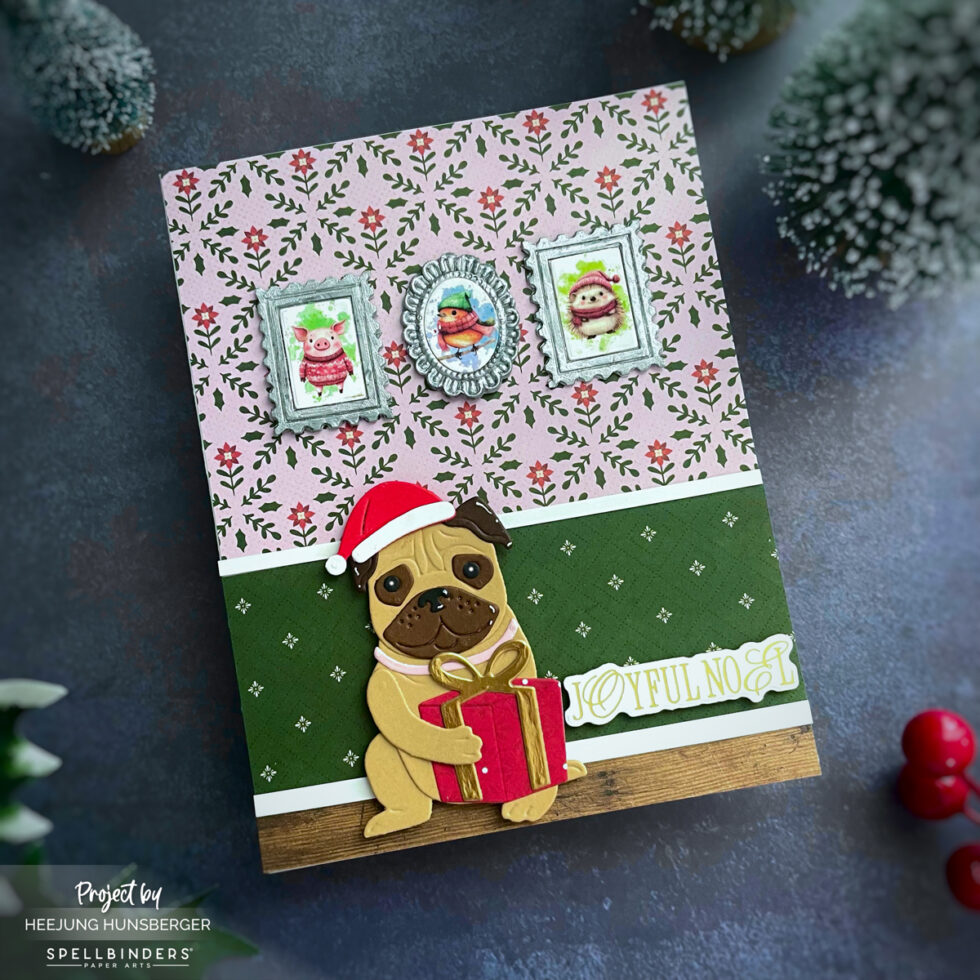
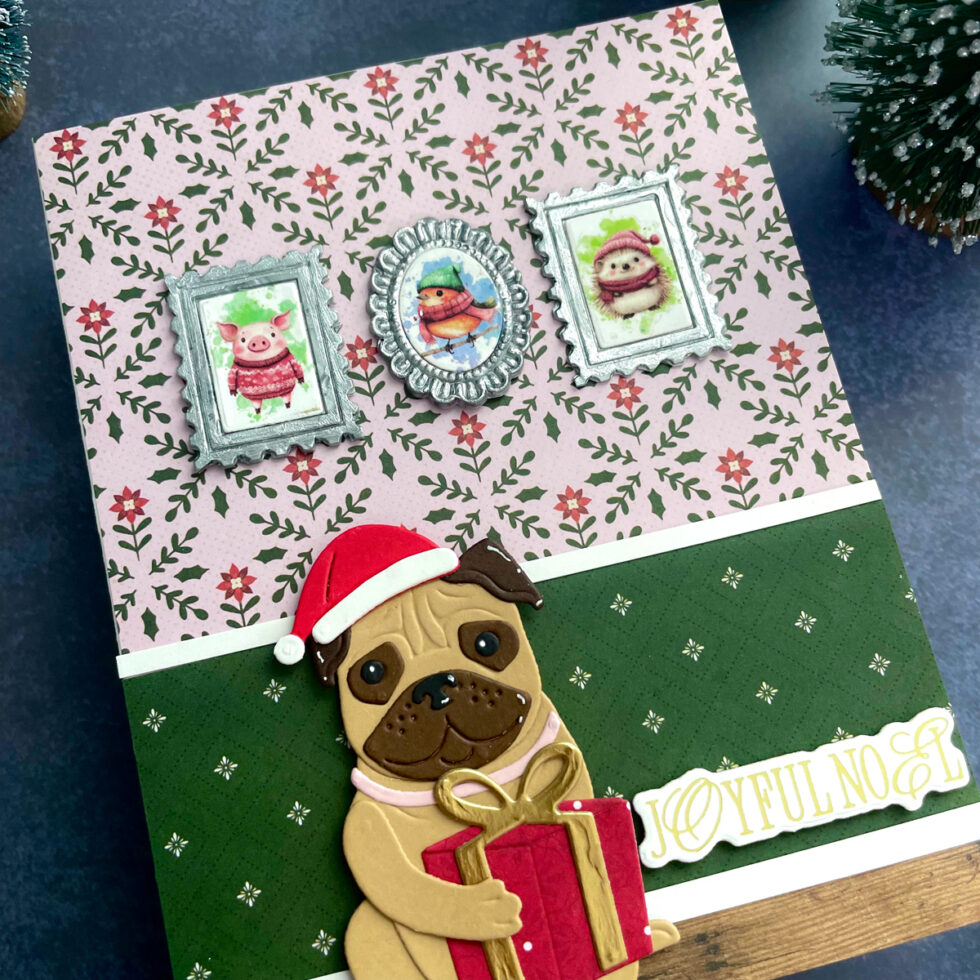
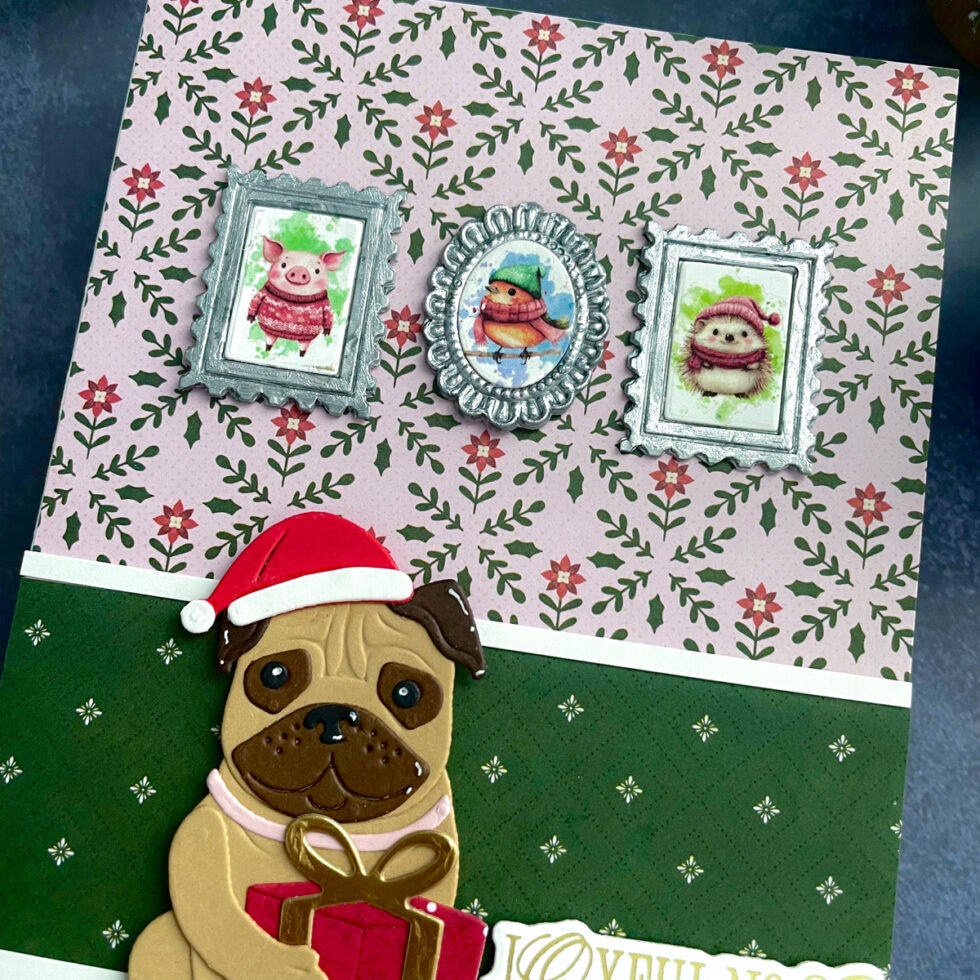
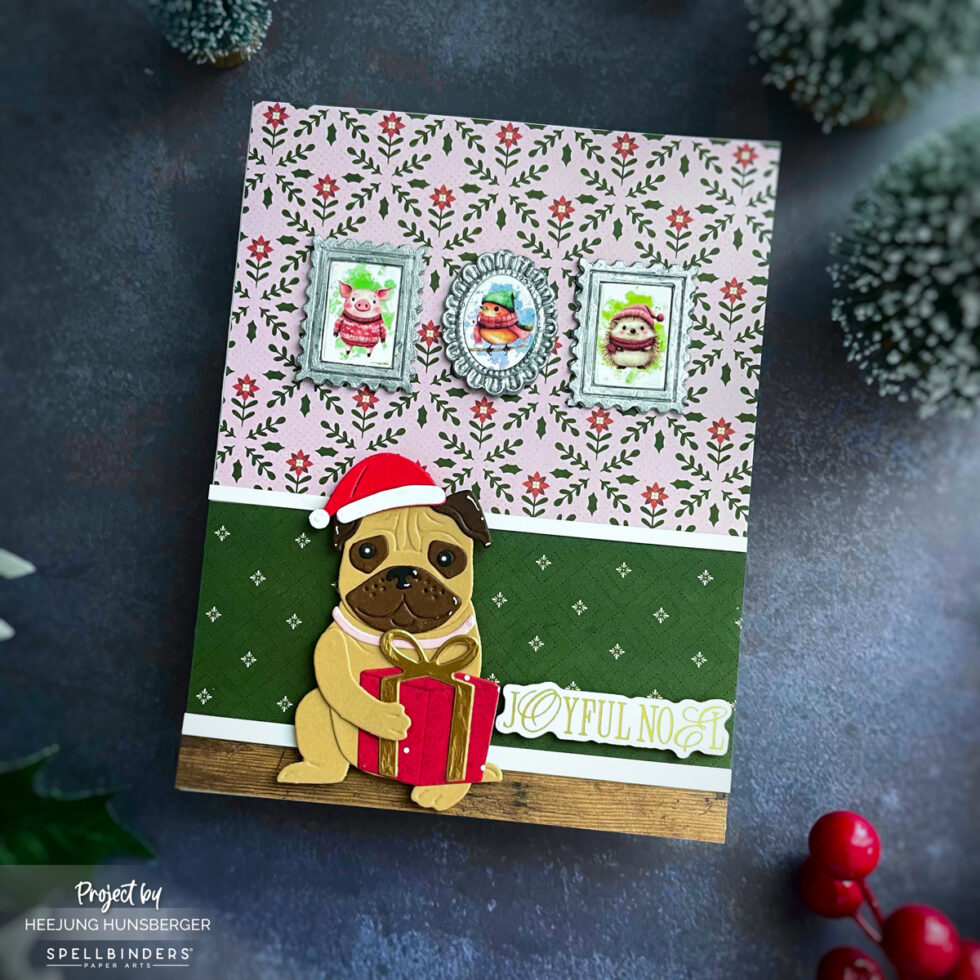
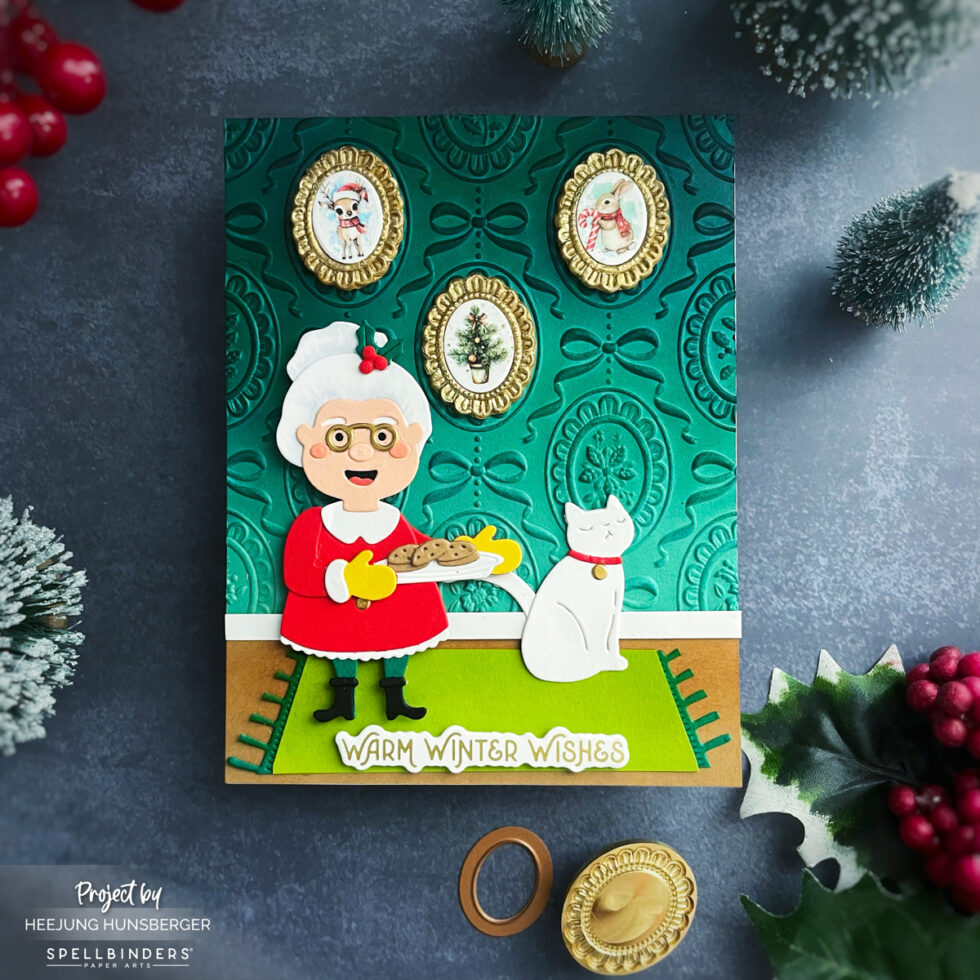
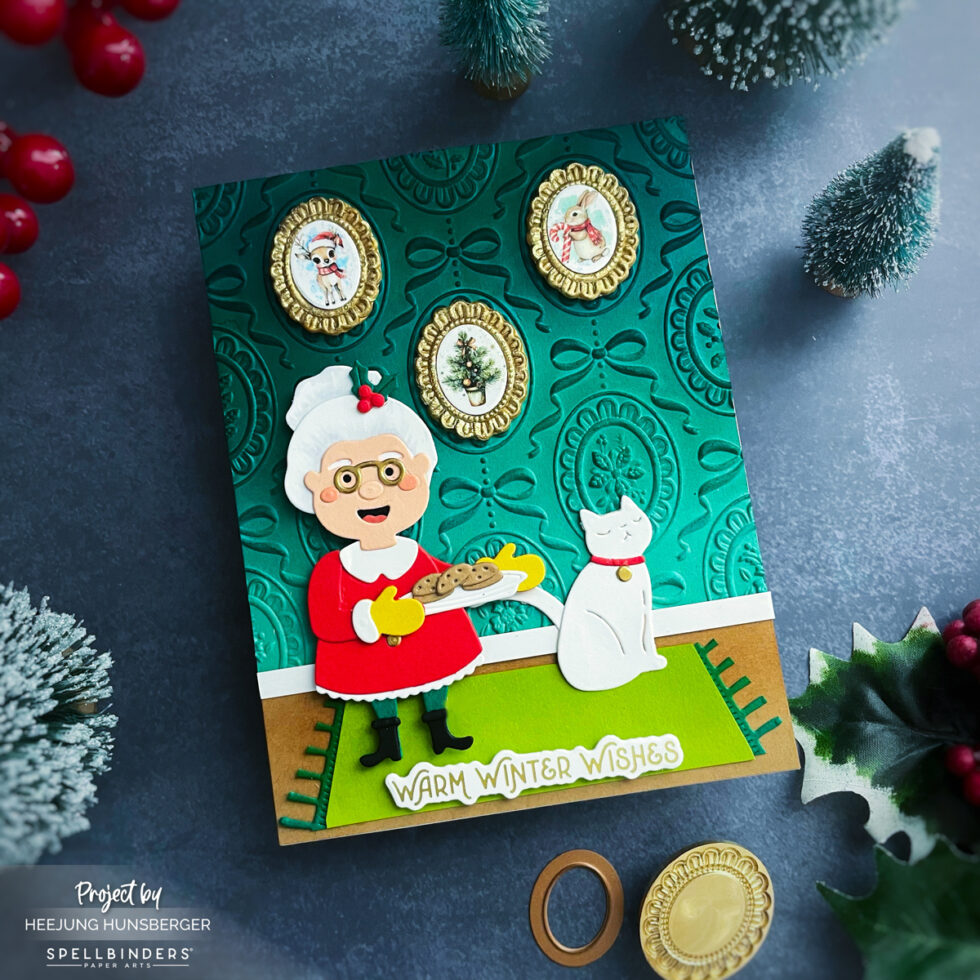
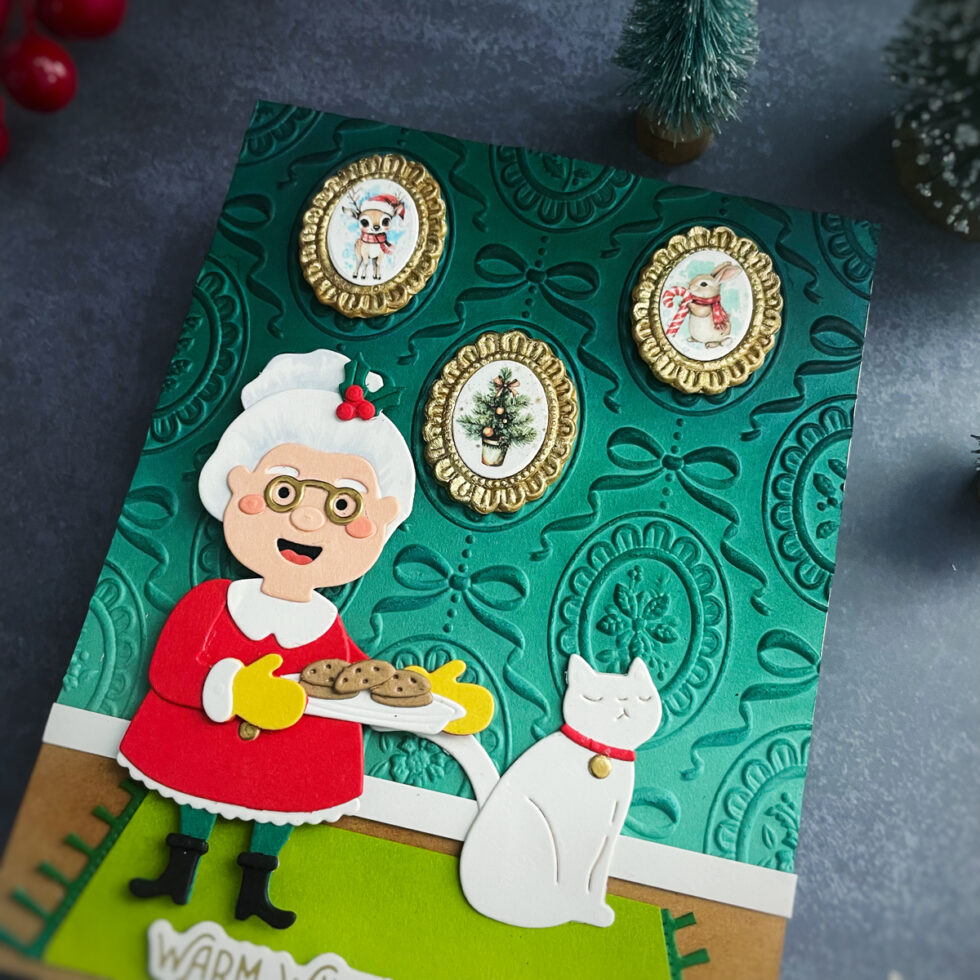
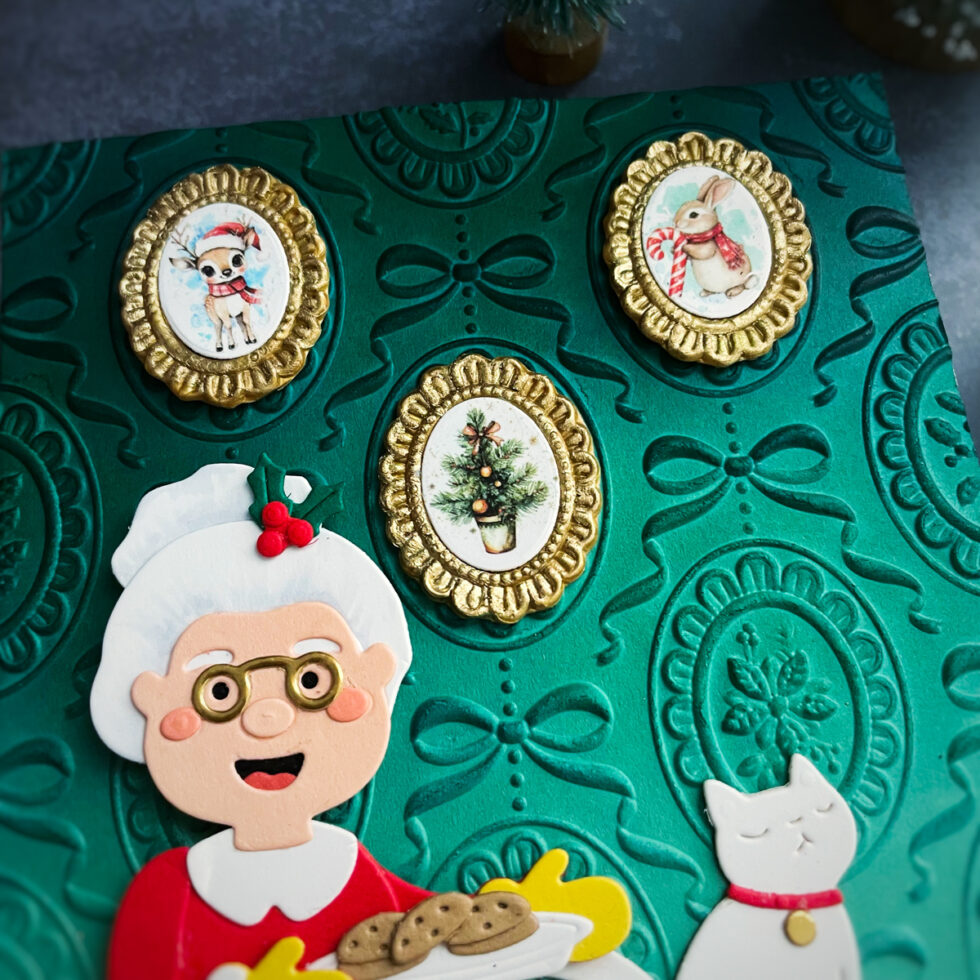
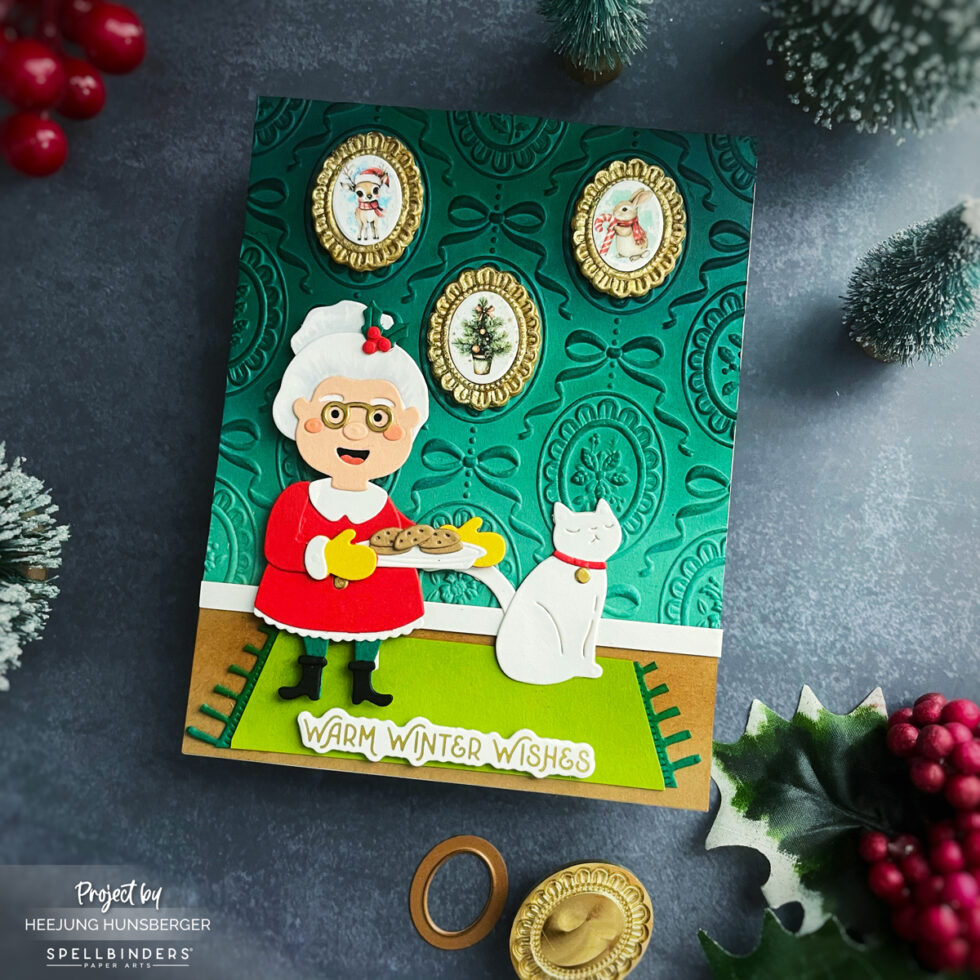
For the next three cards, I used a fun, consistent technique for the smaller framed images. I rubbed small images from the Holiday Magic Rub-ons onto cardstock. Then, I used the tiny dies from the 2-Pack Frames Wax Seal Stamps set to die-cut the images. I created wax seals using gold or silver metallic beads, trimmed the edges of the seals, and glued the die-cut images on top to create charming little picture frames.
Card 3: Santa's Sweet Treat
I used a patterned paper from the Merry Moments Paperpad for the wallpaper background and a wood-patterned paper for the floor.
I hope you enjoyed this look at my five cards. The Holiday Magic Collection has so many wonderful pieces that work together to create truly magical holiday scenes!
Happy Crafting,
Heejeung Hunsberger
SUPPLIES LIST
When you make purchases through affiliate links, it won’t cost you anything extra. I am grateful for your support!