Spellbinder-Yana’s City Holiday Collection

Hello, everyone!

Today, I’m sharing four cards I made using the beautiful new Yana’s City Holiday Collection from Spellbinders. This collection is perfect for creating festive and unique holiday projects.

Let’s take a closer look at each card.

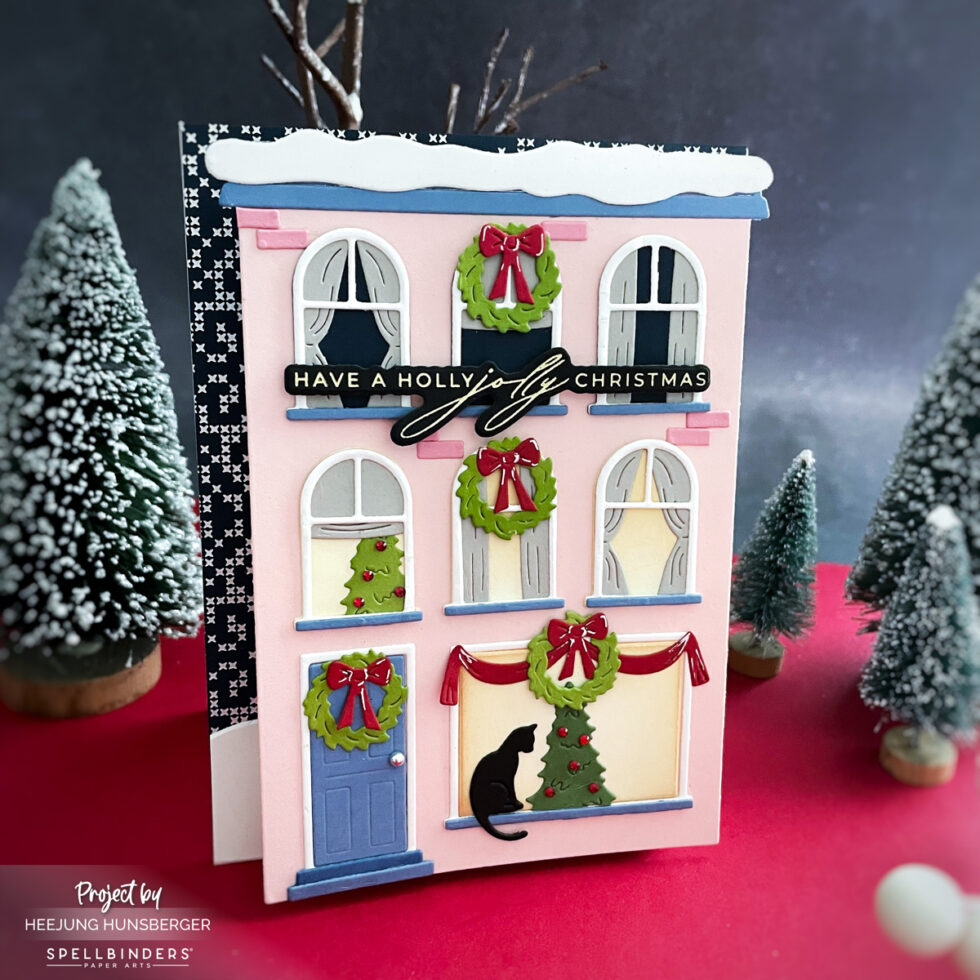
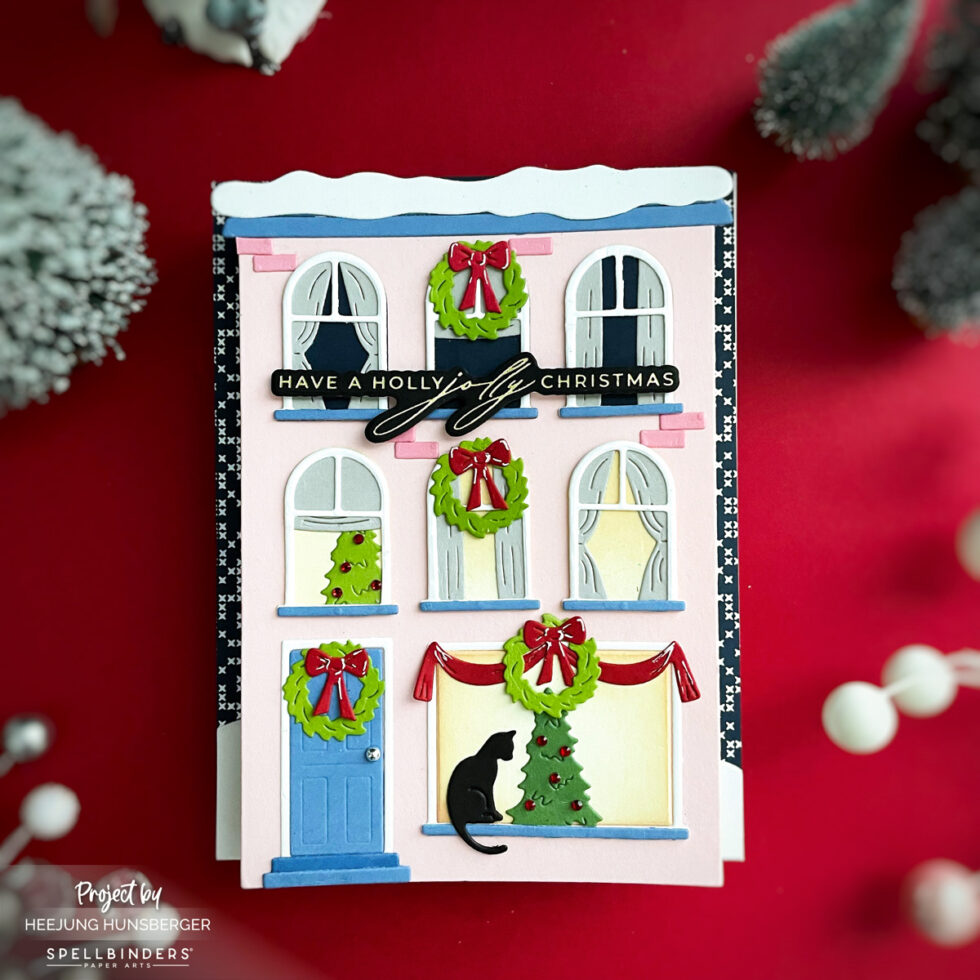
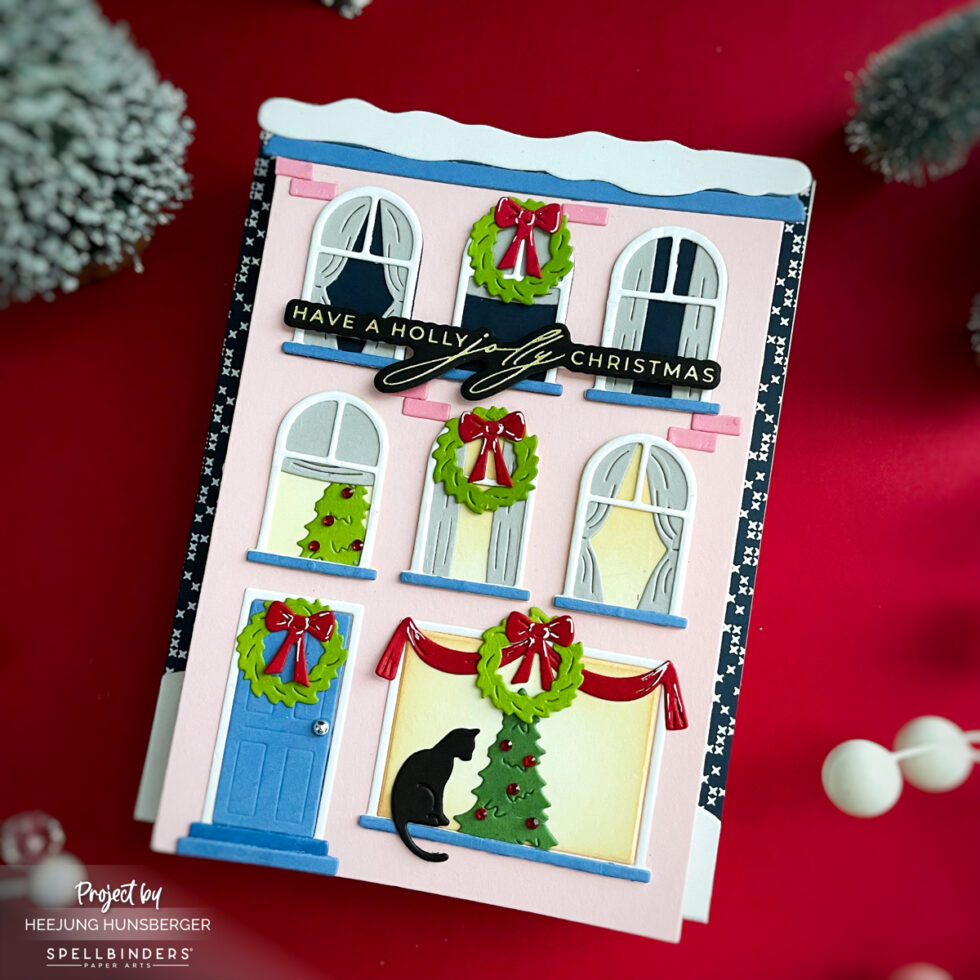
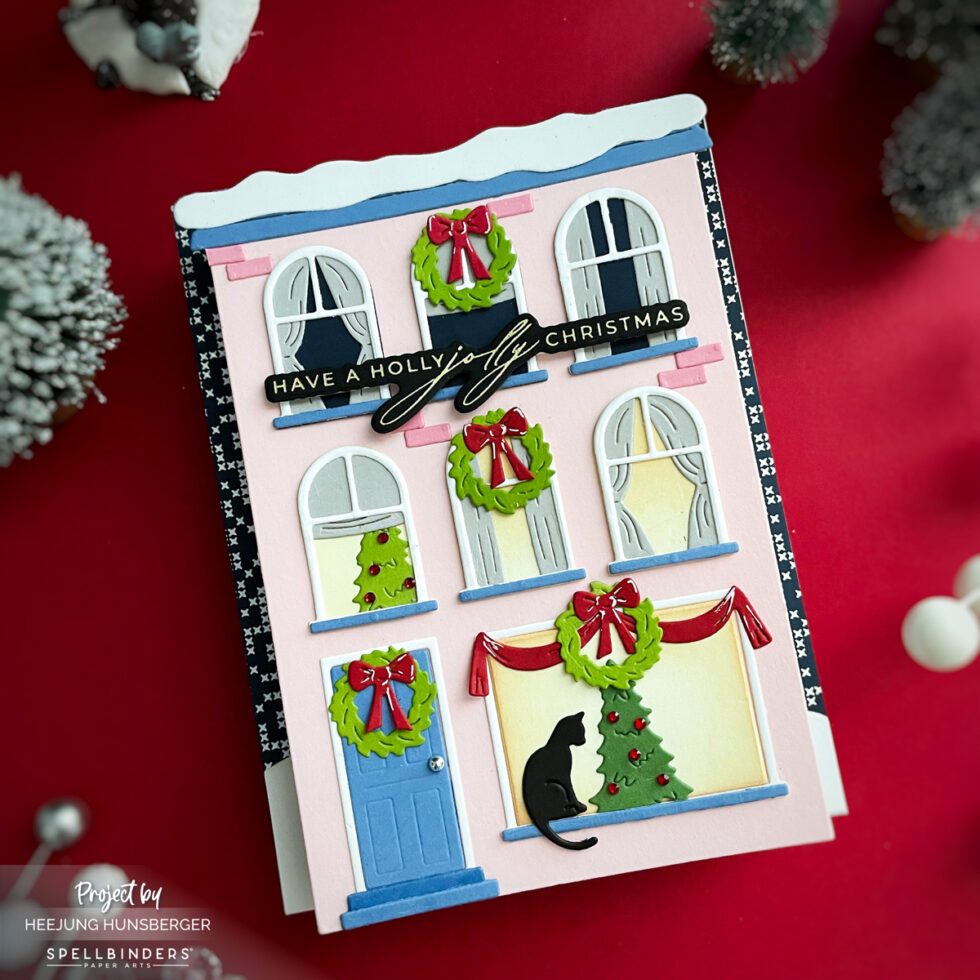
Card 1: City Holiday Pop-Up Card

This card features a charming city building as a pop-up element.

Instructions:
  1. Create a background by hot-foiling the Petite Criss Cross Press Plate with Speckled Prism Hot Foil onto Indigo Cardstock.

  2. Use the City Holiday Die Set to create the building elements.

  3. Hot foil the sentiment from the Christmas Cheer Sentiment BetterPress Plate with Gold Hot Foil onto Black Cardstock, then die-cut it and attach it to the top of the building.

  4. Attach the building pop-up element behind the main panel so that the building pops up when the card is opened.

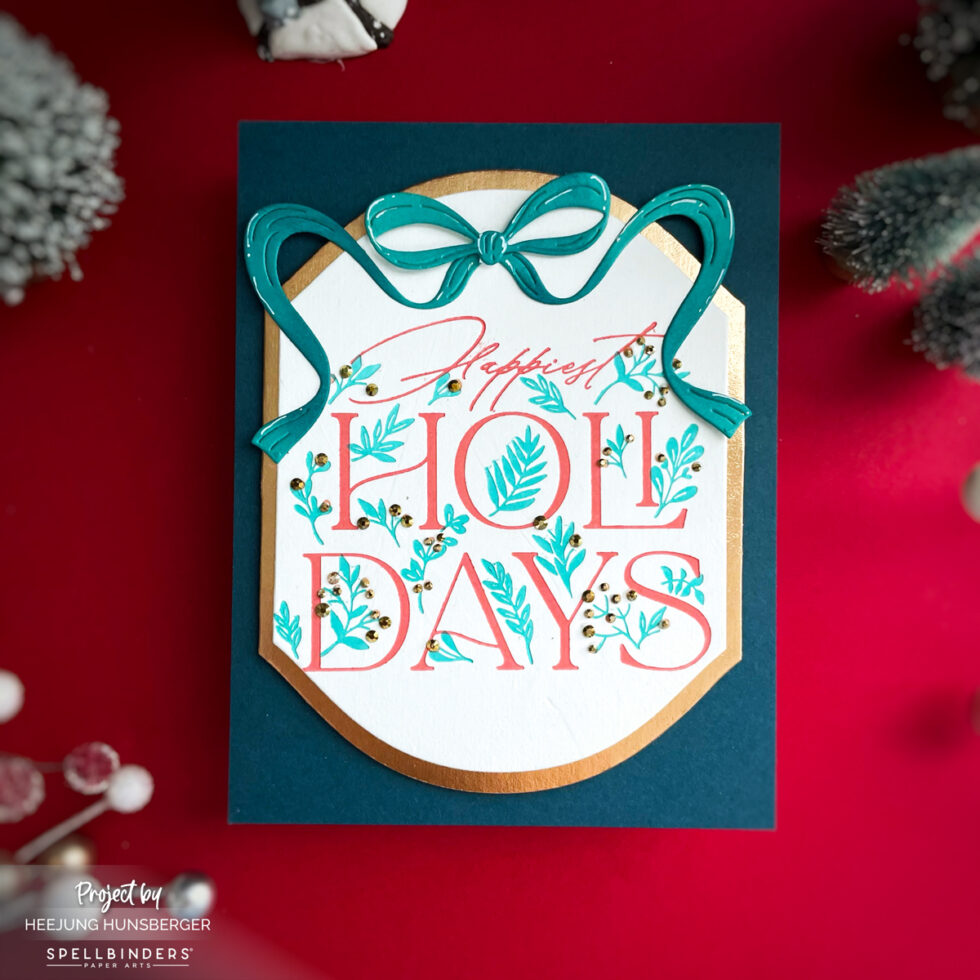
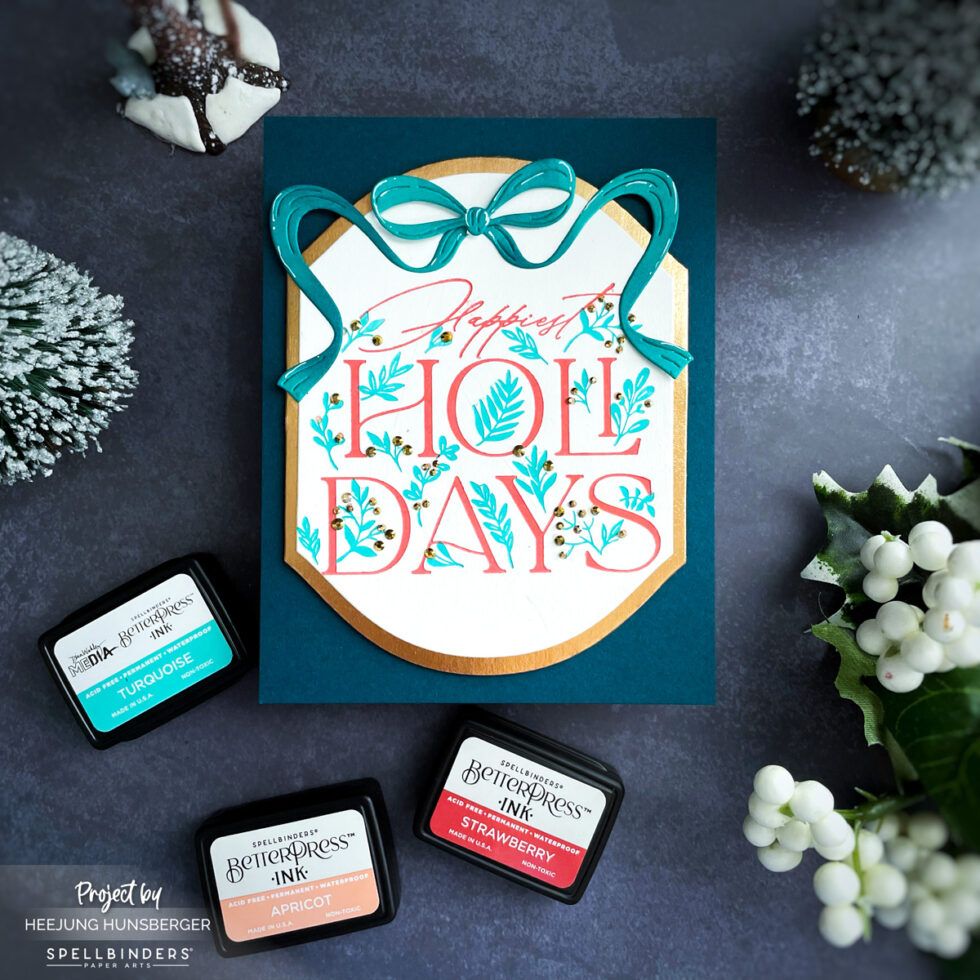
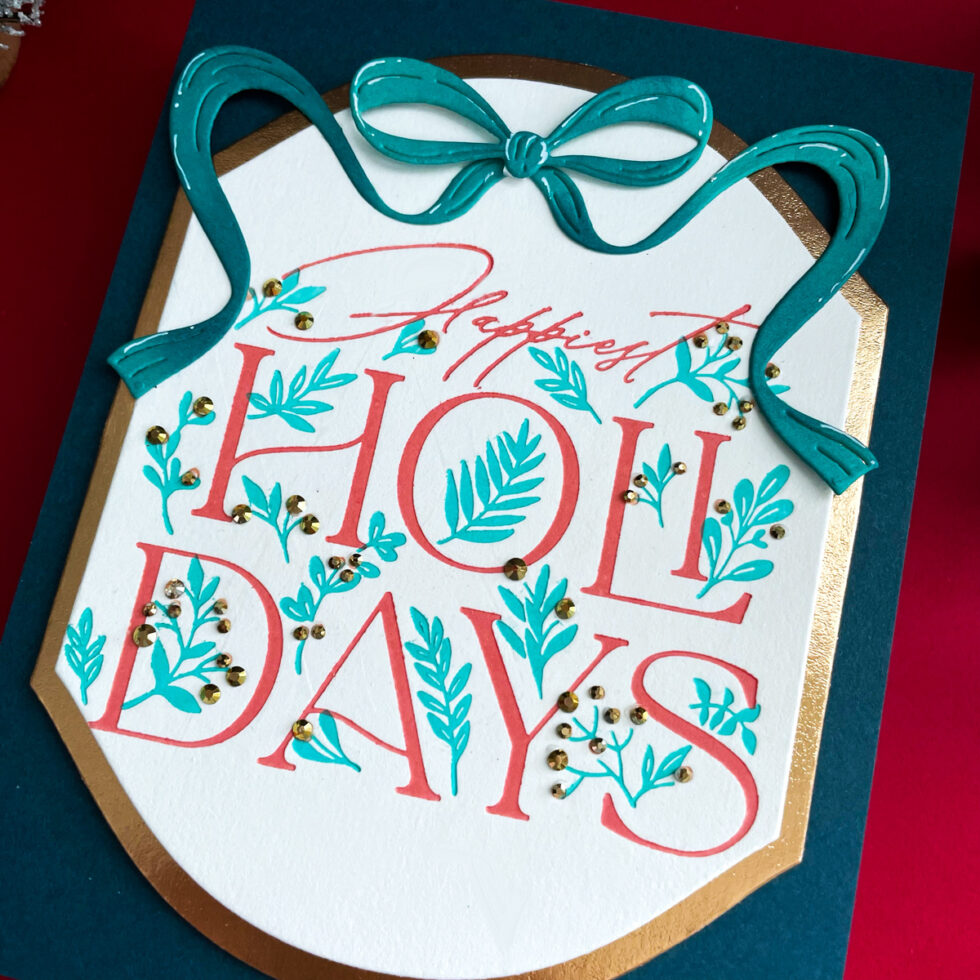
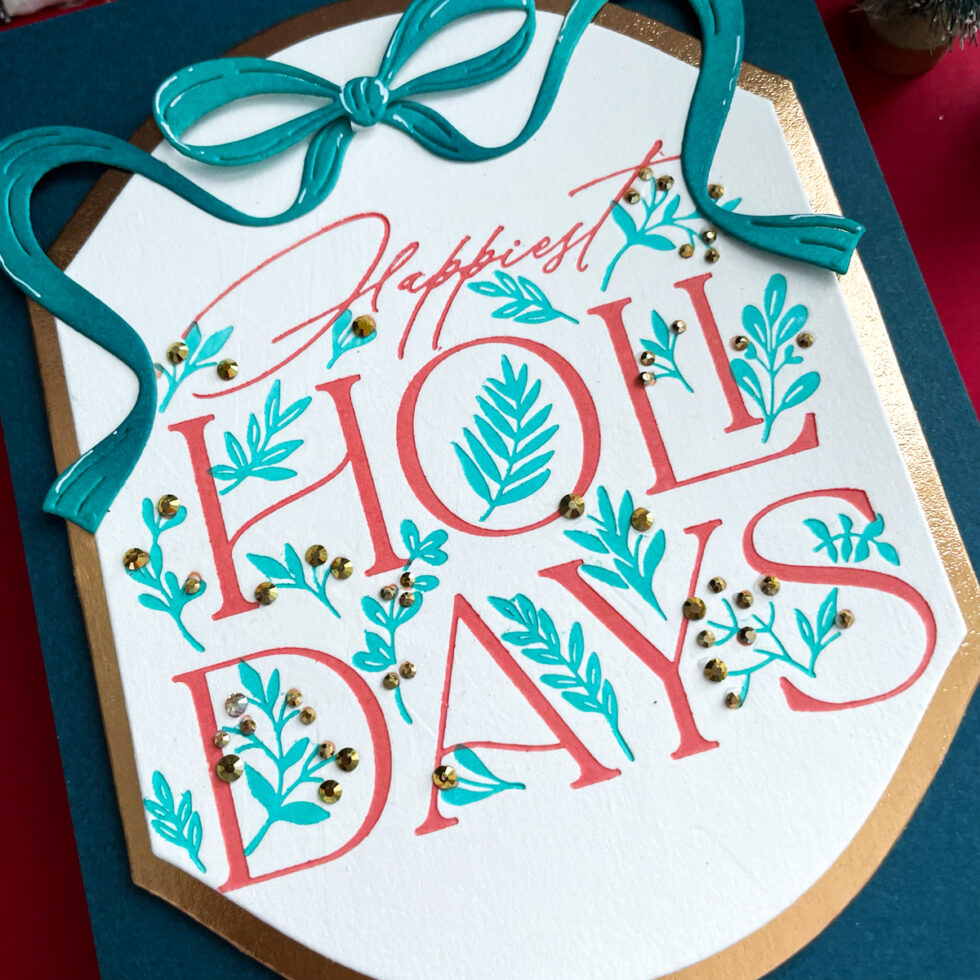
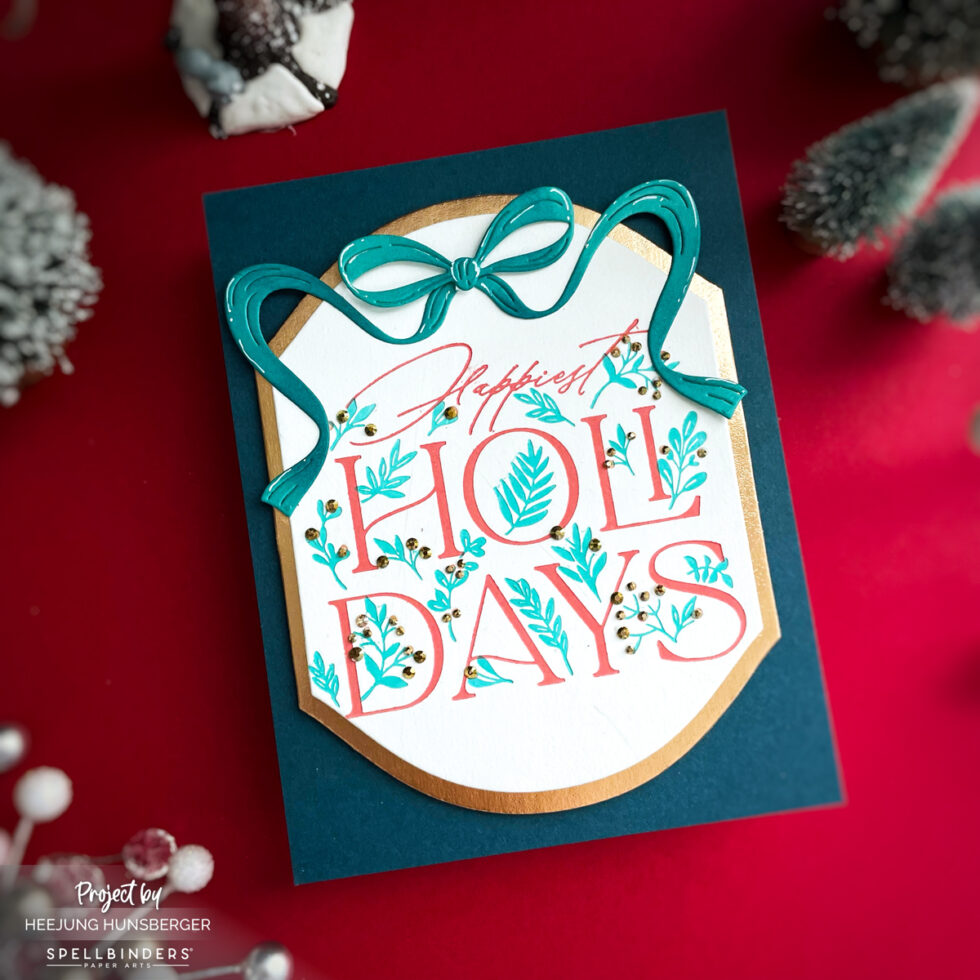
Card 2: Happiest Holidays Card

This elegant card features a beautiful sentiment with a mirrored arch frame and a festive bow.

Products Used:
  1. Better Press Plate: Happiest Holidays Registration Press Plate

  2. Die: Mirrored Arch Labels Die, Gifting Bow Die

  3. Ink: BetterPress Strawberry Ink, BetterPress Hydrangea Ink (Turquoise)

  4. Cardstock: BetterPress Specialty Paper, Gold Metallic Cardstock, Oceanside Cardstock, Bluespruce Cardstock

  5. Embellishments: Gold Gems

Instructions:
  1. Using the Happiest Holidays Registration Press Plate, press the sentiment onto BetterPress Specialty Paper with Strawberry and Hydrangea inks.

  2. Die-cut the pressed panel with the Mirrored Arch Labels Die.

  3. Die-cut the same shape from Gold Metallic Cardstock and mat it behind the pressed panel.

  4. Adhere the matted panel to an Oceanside Cardstock card base.

  5. Die-cut the Gifting Bow Die from Bluespruce Cardstock and attach it to the top of the sentiment panel.

  6. Finish by adding Gold Gems as accents.

Card 3: Christmas Cheer Cracker Card

This card showcases a festive Christmas cracker and a sentiment framed by a beautiful bow.

Products Used:
  1. Better Press Plate: Christmas Cheer Sentiment BetterPress Plate (for hot foiling)

  2. Embossing Folder: Molded Frame 3D Embossing Folder

  3. Die: Gifting Bow Die, Christmas Cracker Die


Instructions:
  1. Hot foil the sentiment from the Christmas Cheer Sentiment BetterPress Plate onto Oceanside Cardstock using Matte Gold Hot Foil.

  2. Place the foiled panel inside the Molded Frame 3D Embossing Folder and run it through your die-cutting machine to create the embossed frame.

  3. Use a blending brush to add shading to the corners of the embossed frame.

  4. Die-cut the Gifting Bow Die from Gold Metallic Cardstock, and the Christmas Cracker Die from Poppy and Waterfall Cardstock.

  5. Die-cut the foliage elements from Rainforest and Fern Cardstock.

  6. Assemble and adhere all the die-cut pieces onto the card panel.

  7. Add red berry embellishments to complete the design.

Card 4: Holiday Crackers Card

This card features multiple Christmas crackers with a textured background.

Products Used:

  1. Embossing Folder: Starry Snowfall 3D Embossing Folder

  2. Die: Christmas Cracker Die

Instructions:

  1. Create the background by embossing Seaside Cardstock with the Starry Snowfall 3D Embossing Folder.

  2. Using the Christmas Cracker Die, create two crackers from Blush and Mulberry Cardstock.

  3. Die-cut the foliage elements from Bluespruce, Rainforest, and Waterfall Cardstock.

  4. Die-cut the “HAPPY HOLIDAYS” sentiment from the Christmas Cracker Die set out of Gold Mirror Cardstock.

  5. Assemble the crackers and foliage on the embossed background.

  6. Attach the “HAPPY HOLIDAYS” sentiment with foam stickers for added dimension.

I hope you’ve enjoyed these holiday card ideas.

The Yana’s City Holiday Collection is so versatile and fun to work with, allowing you to create beautiful and festive projects.

Happy crafting!

SUPPLIES LIST

When you make purchases through affiliate links, it won’t cost you anything extra. I am grateful for your support!