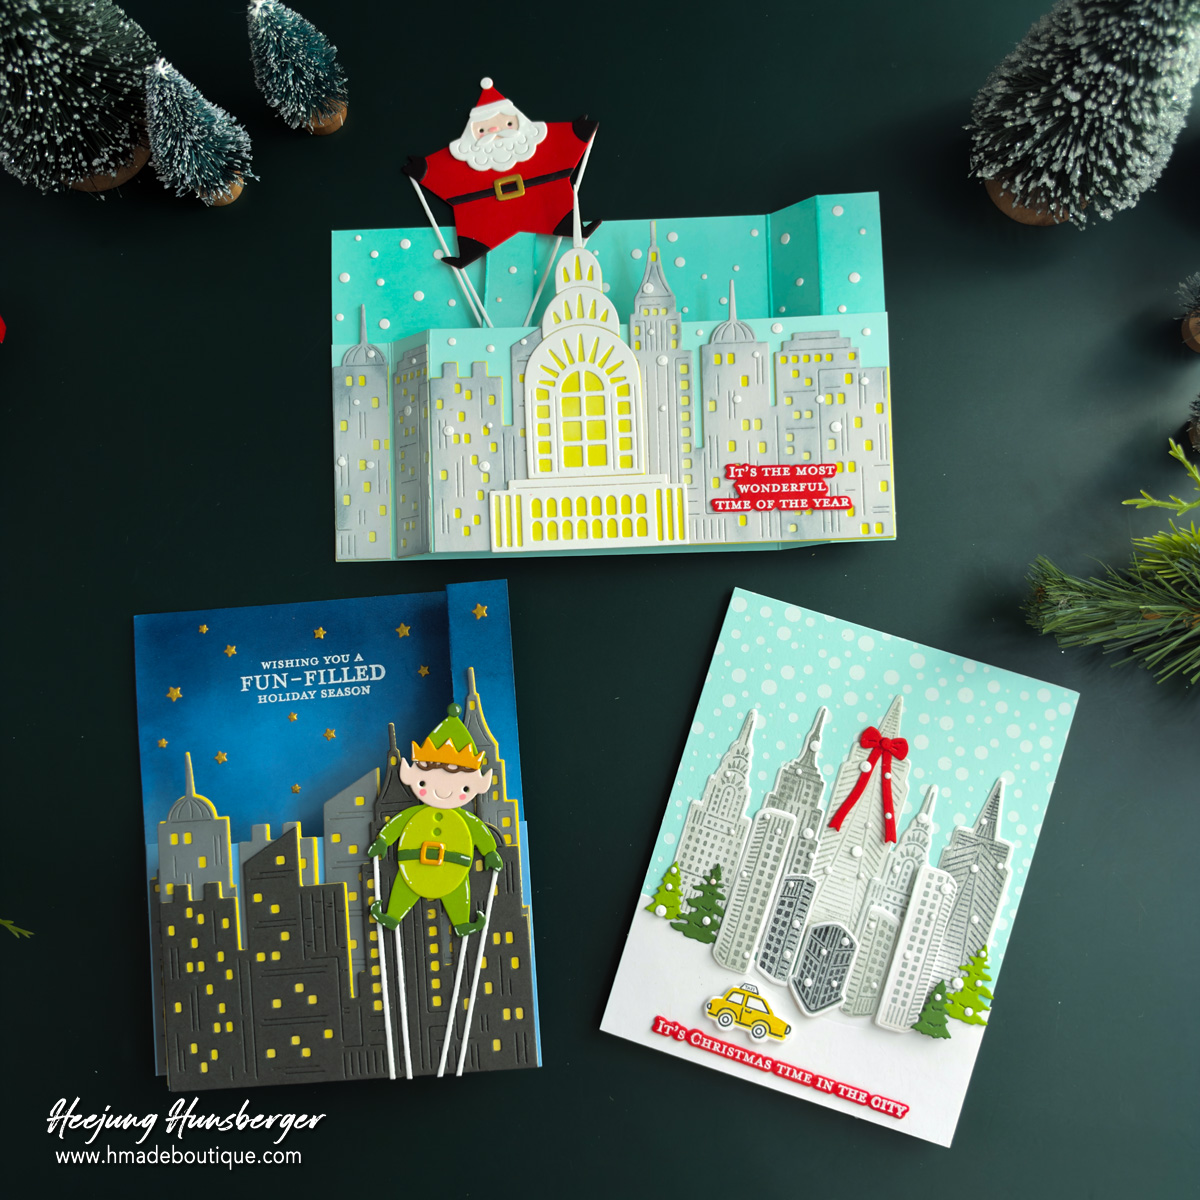
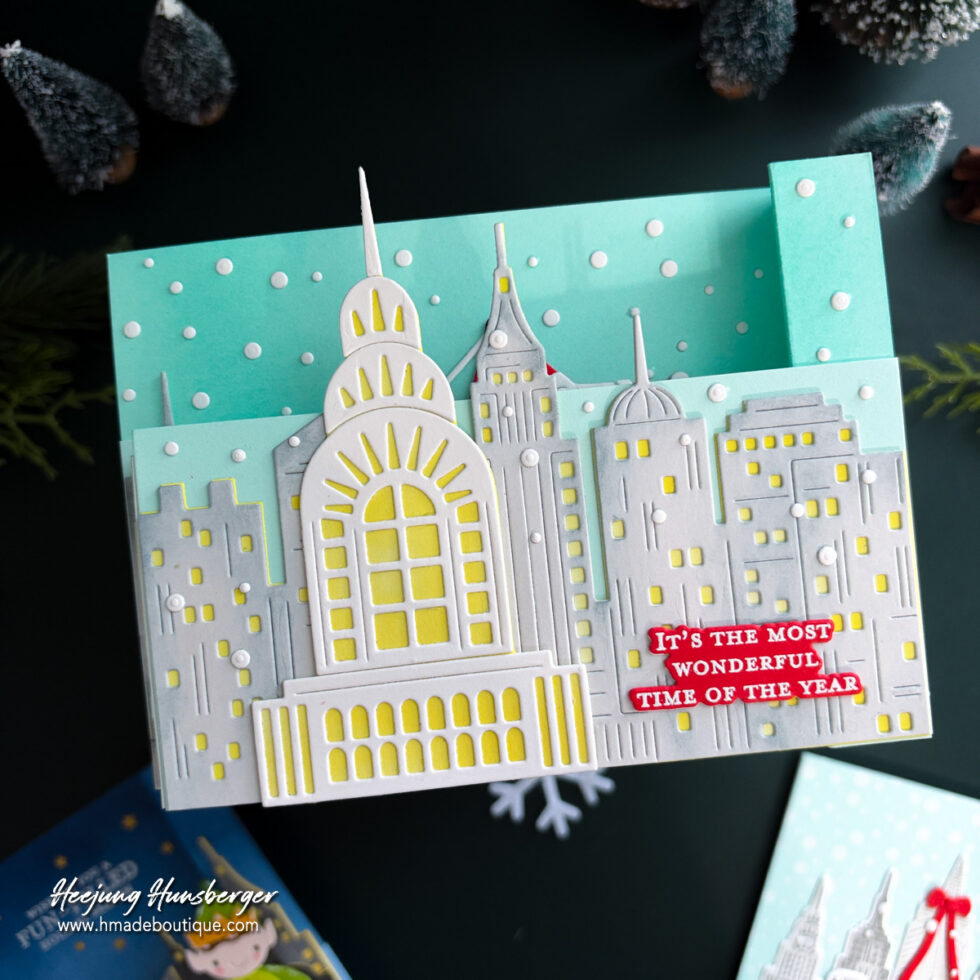
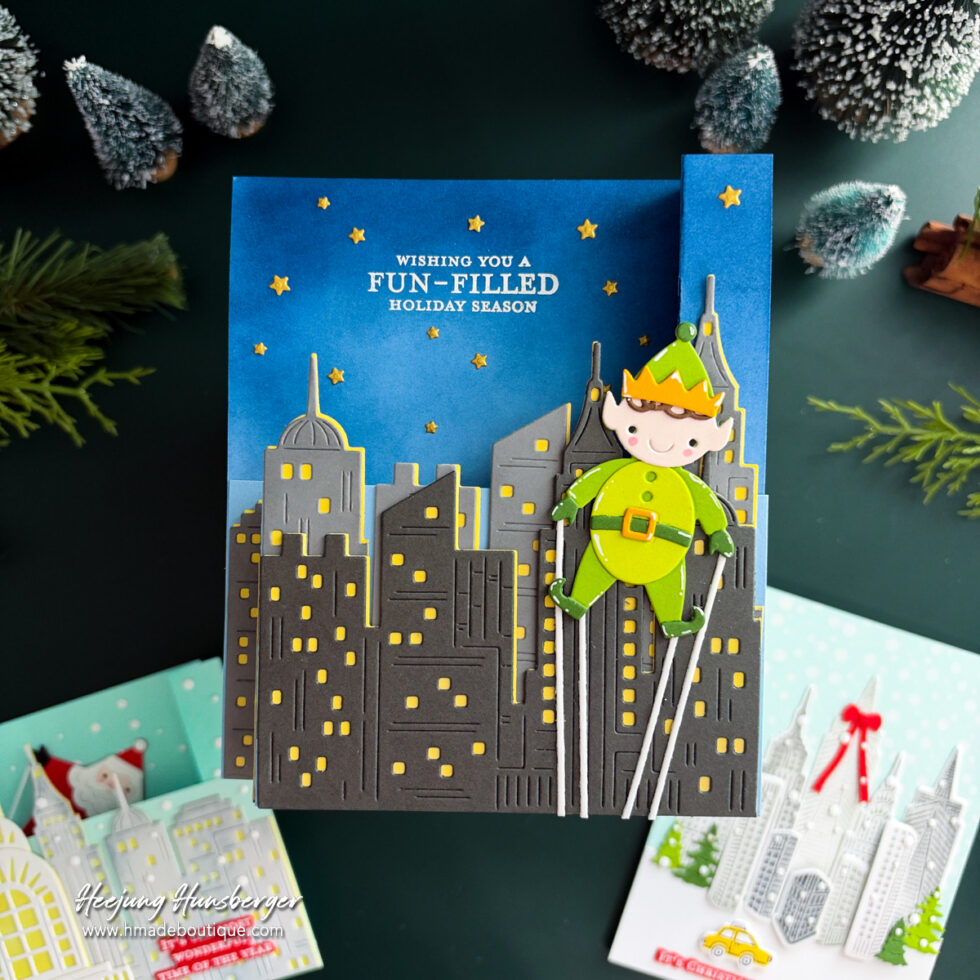
Today I’m sharing three Christmas cards I made with October’s Hero Arts “Parade Day” Collection.I loved the big parade balloons floating over the city. It feels just like a holiday parade in New York!
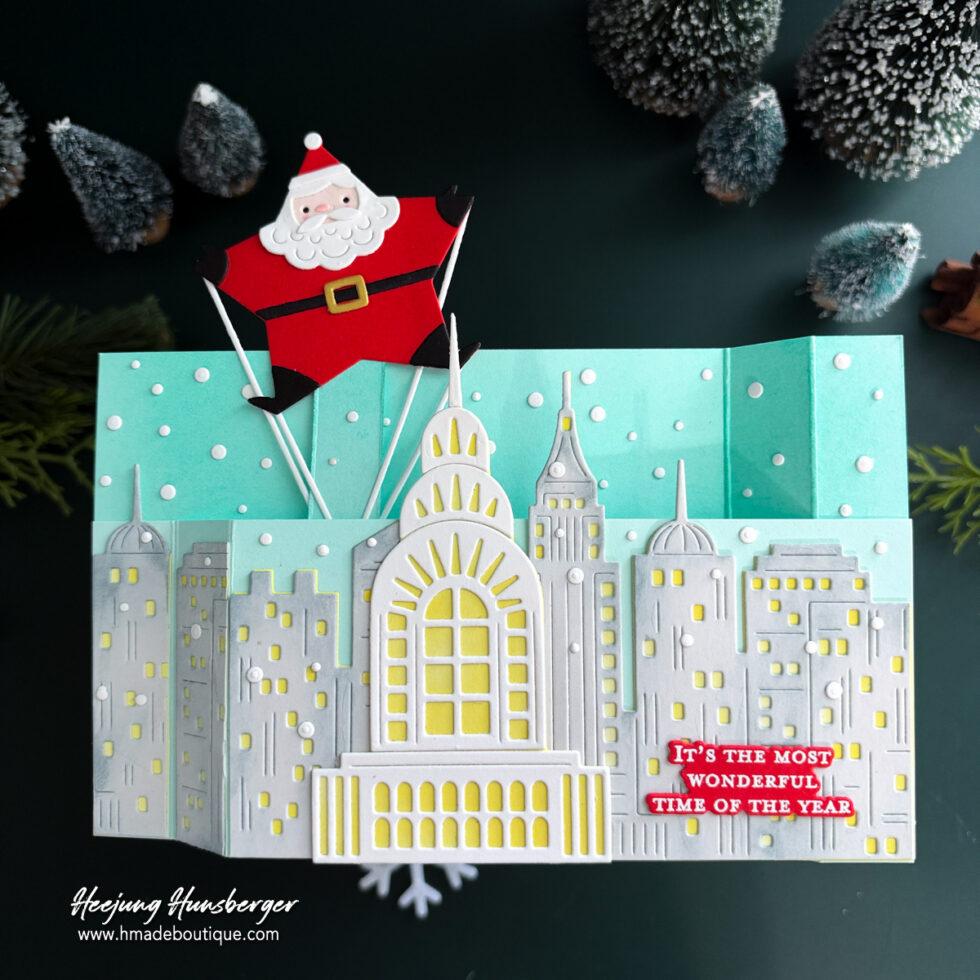
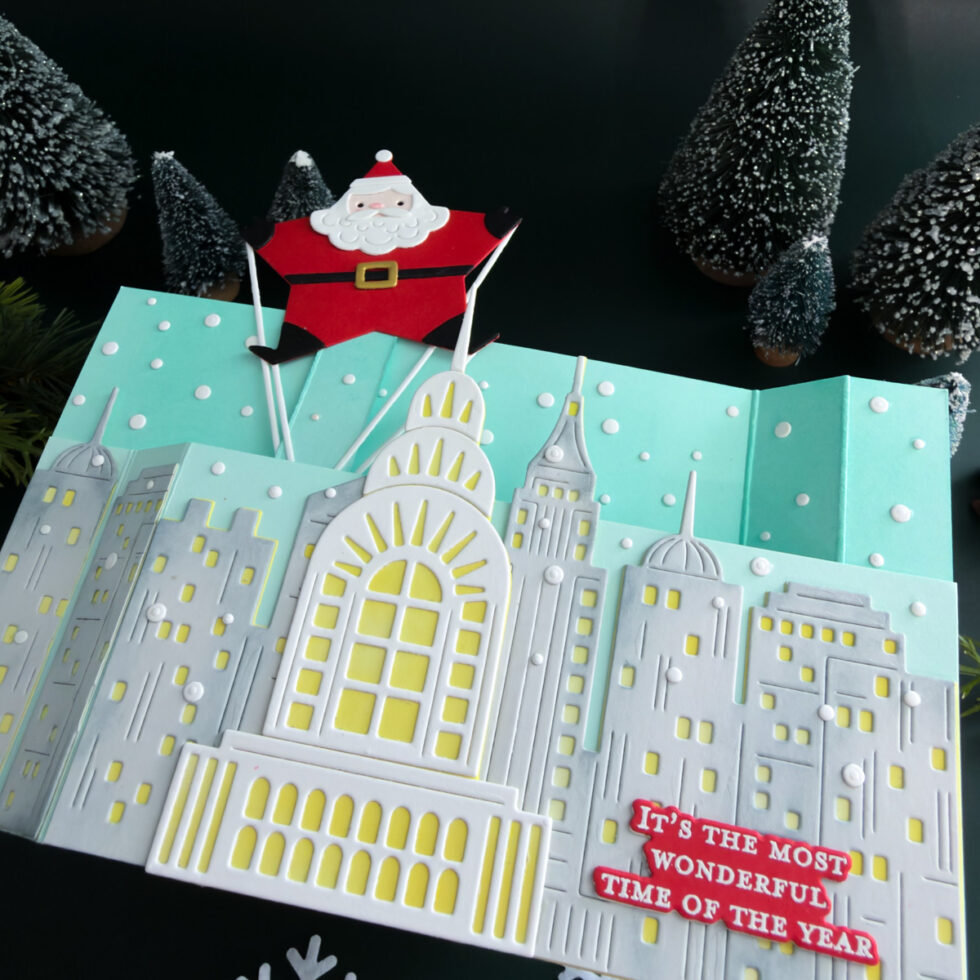
I made two of them as wiper cards, so a cute balloon pops up when you pull the sides of the card. The last card is a regular card with a snowy city scene. I hope you enjoy them!
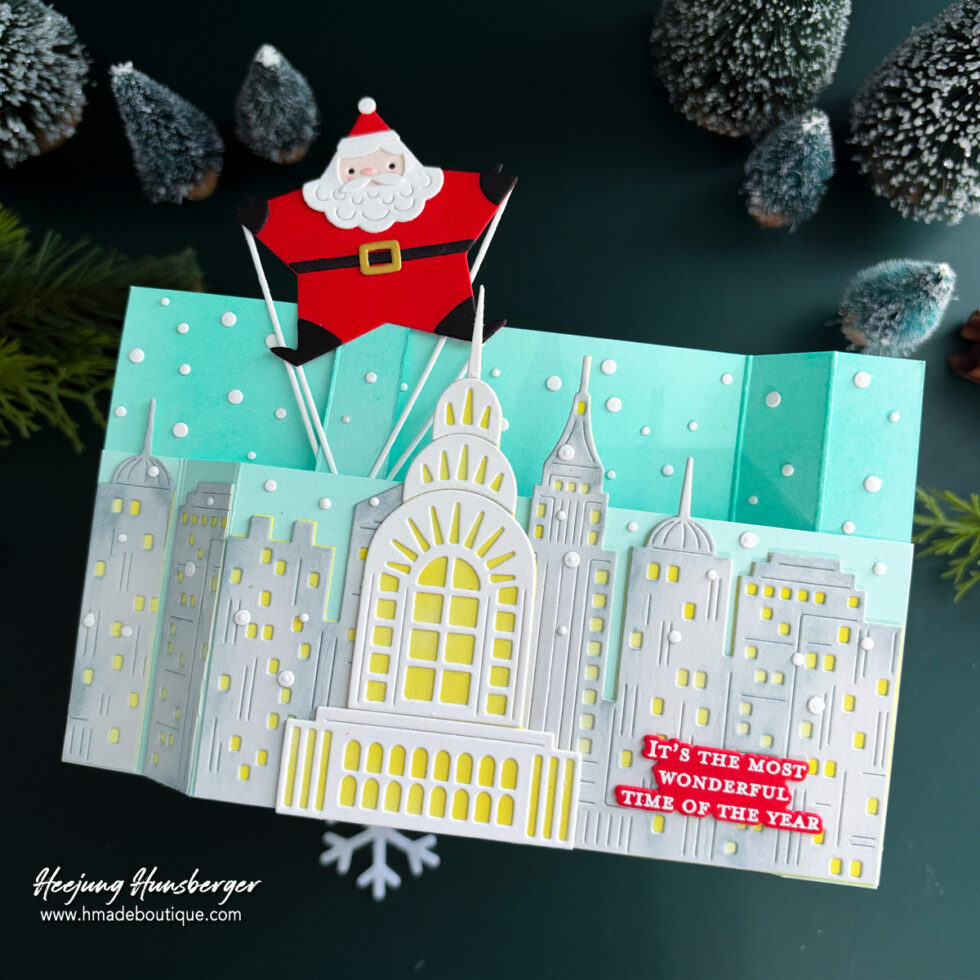
Santa Wiper Card
Card Base & Background:
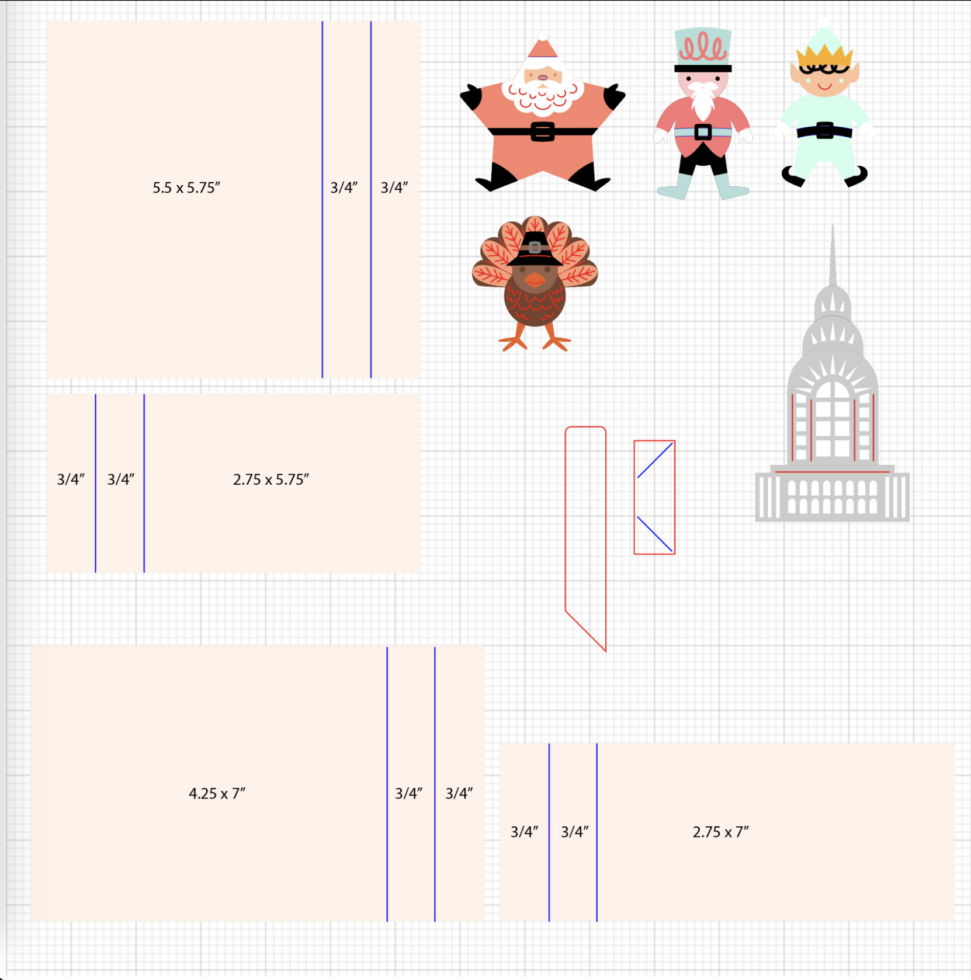
This is a landscape A2 wiper card, and the finished size is 5.5″ x 4.25″. I cut two pieces of Seaside cardstock for the base — one at 4.25″ x 7″, scored at 3/4″ and 3/4″ from one end, and one at 2.75″ x 7″, scored at 3/4″ and 3/4″ from the other end.
Then I built the wiper mechanism with the interactive dies from October’s “Big Fun” Die Set.For the background color, I used a blending brush to add Pool ink to only the top part of the Seaside panels, so the top is a deeper teal and it softly fades down.
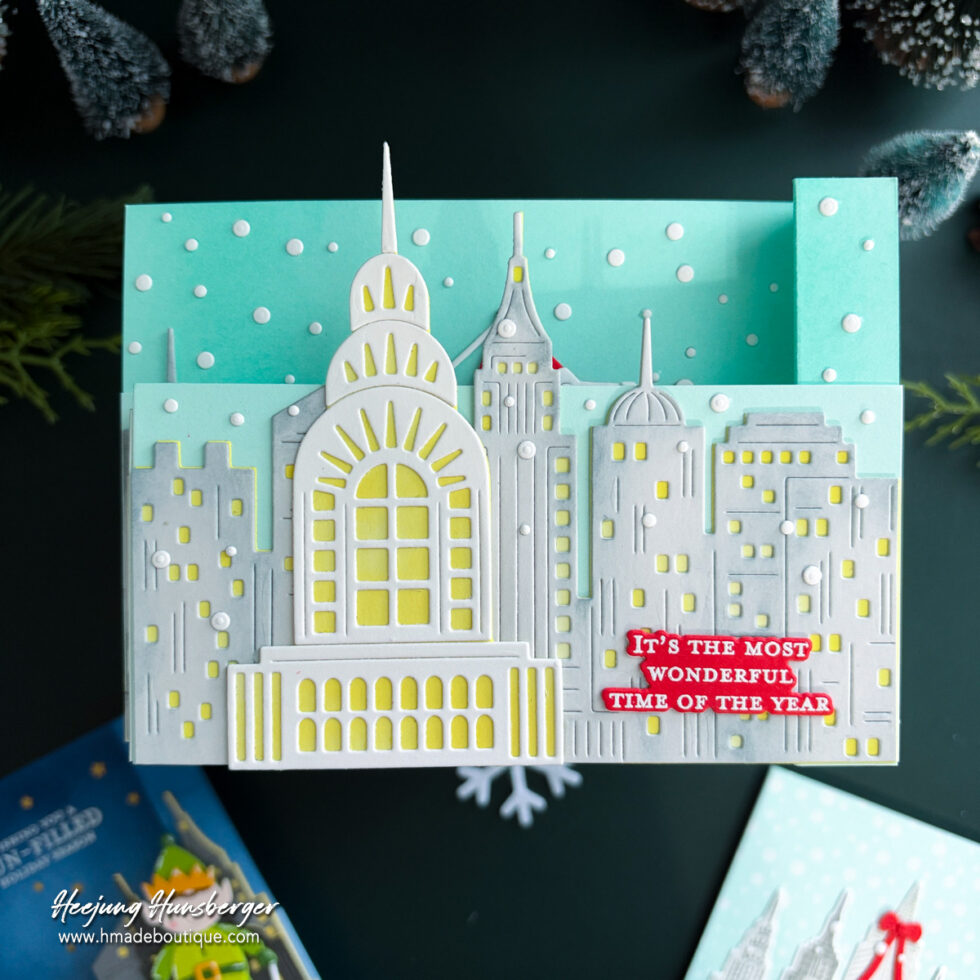
Focal Images: I die-cut the buildings on the sides with October’s “City Skyline” Die Set in Fog cardstock. Behind them, I placed a white backdrop layer that I colored with yellow inking, so the yellow shows through the windows like light coming from inside the buildings.
The big building in the center is from October’s “Big Fun” Die Set. I die-cut it in white cardstock and placed a yellow-colored die-cut layer underneath it, so the yellow also shines through its big windows. Then I die-cut the small snowflakes with the snowflake die from the City Skyline set and glued them on one by one, over the background and the buildings.
Wiper & Sentiment:
When the card is closed, Santa hides behind the buildings. When you pull the two sides, he pops up over the city on his thin white strings, just like a big parade balloon. I die-cut Santa with the Big Fun set in black, Poppy, and white cardstock and built him piece by piece. For the sentiment, I used October’s “The Holiday Season” Stamp & Cut Set. I stamped the sentiment on Poppy cardstock with VersaMark ink, added white embossing powder, and heat-embossed it with my heat tool. Then I die-cut it and glued it on the lower right of the card.
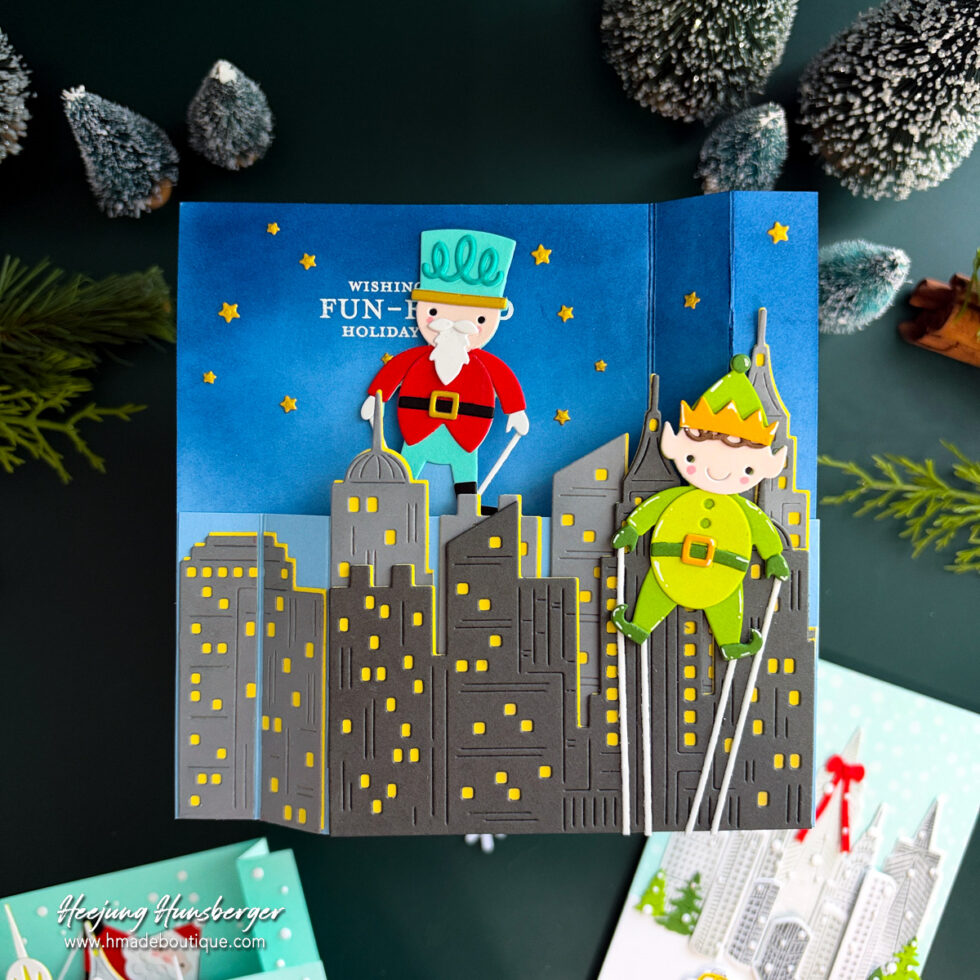
Two Balloons in the Night Sky
Card Base & Background:
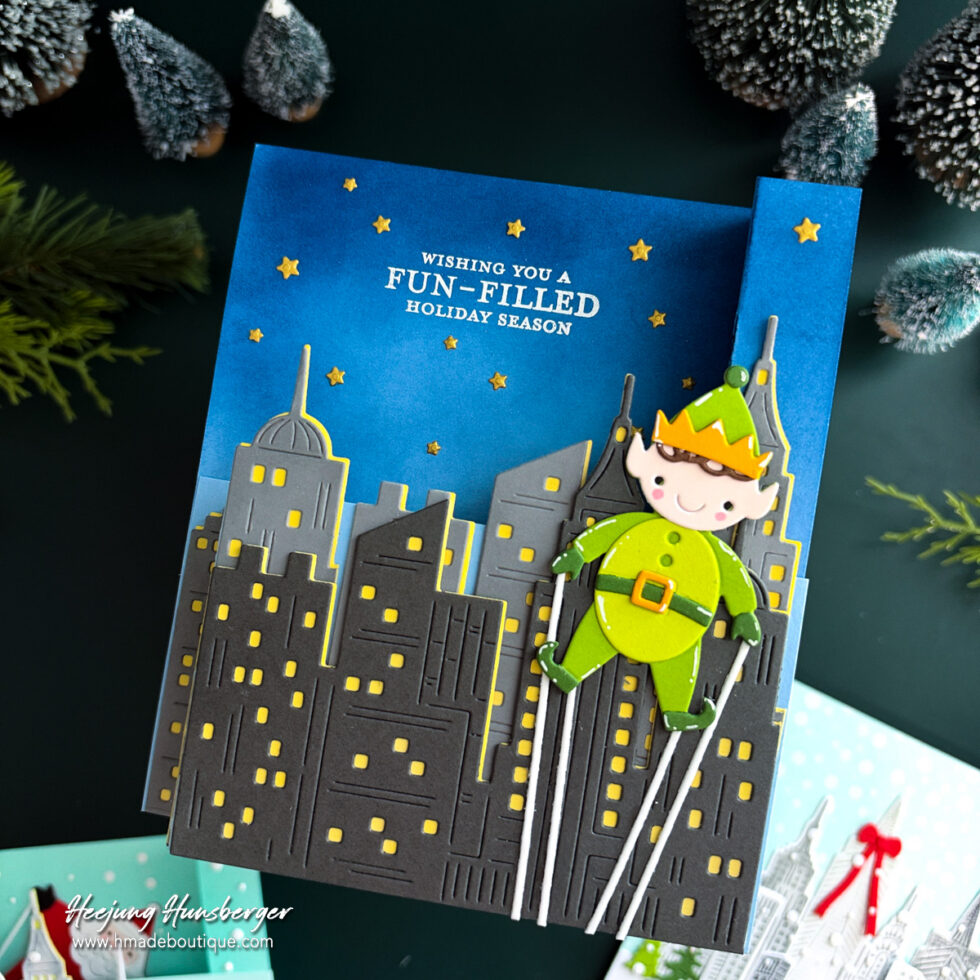
This is a portrait A2 wiper card, and the finished size is 4.25″ x 5.5″. I cut the base from Cascade cardstock, using the portrait sizes from the guide — the back panel at 5.5″ x 5.75″, scored at 3/4″ and 3/4″ from one side, and the front panel at 2.75″ x 5.75″, scored at 3/4″ and 3/4″ from the other side.
To make the night sky, I blended dark navy ink with a blending brush over the top part of the back panel. The deep blue sky makes the buildings and balloons stand out so nicely.
Focal Images:
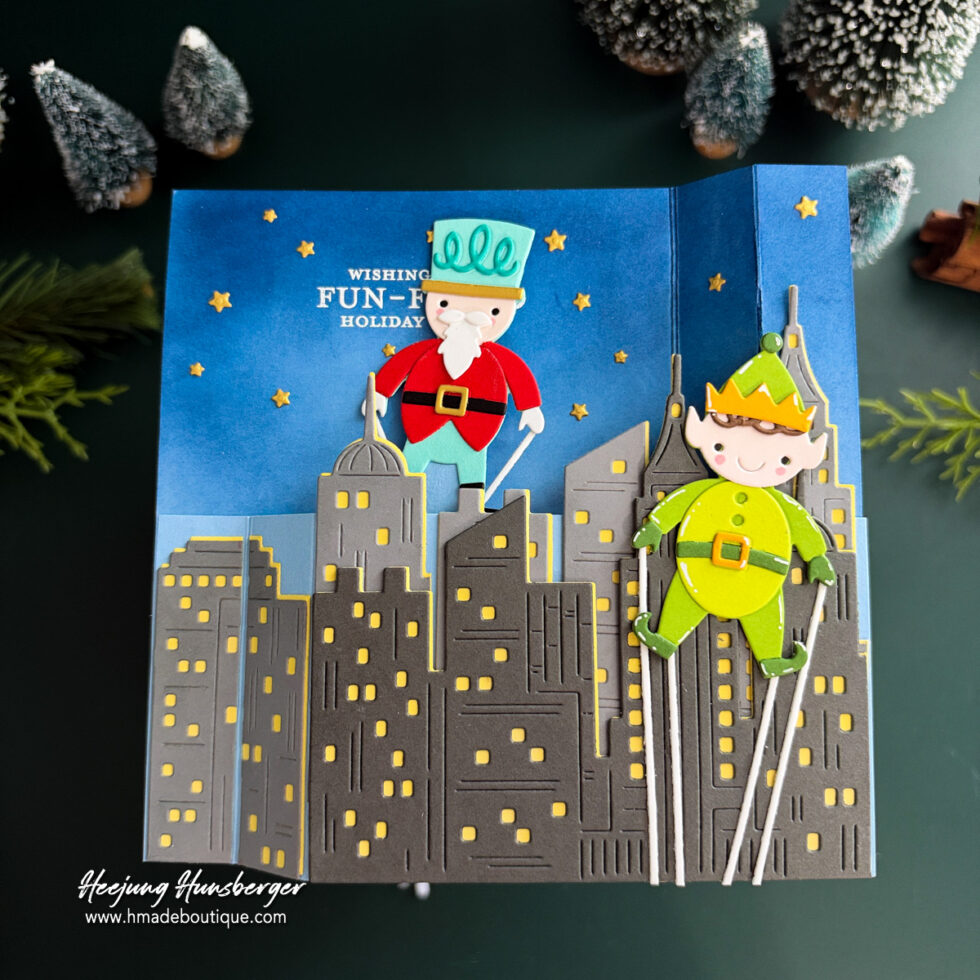
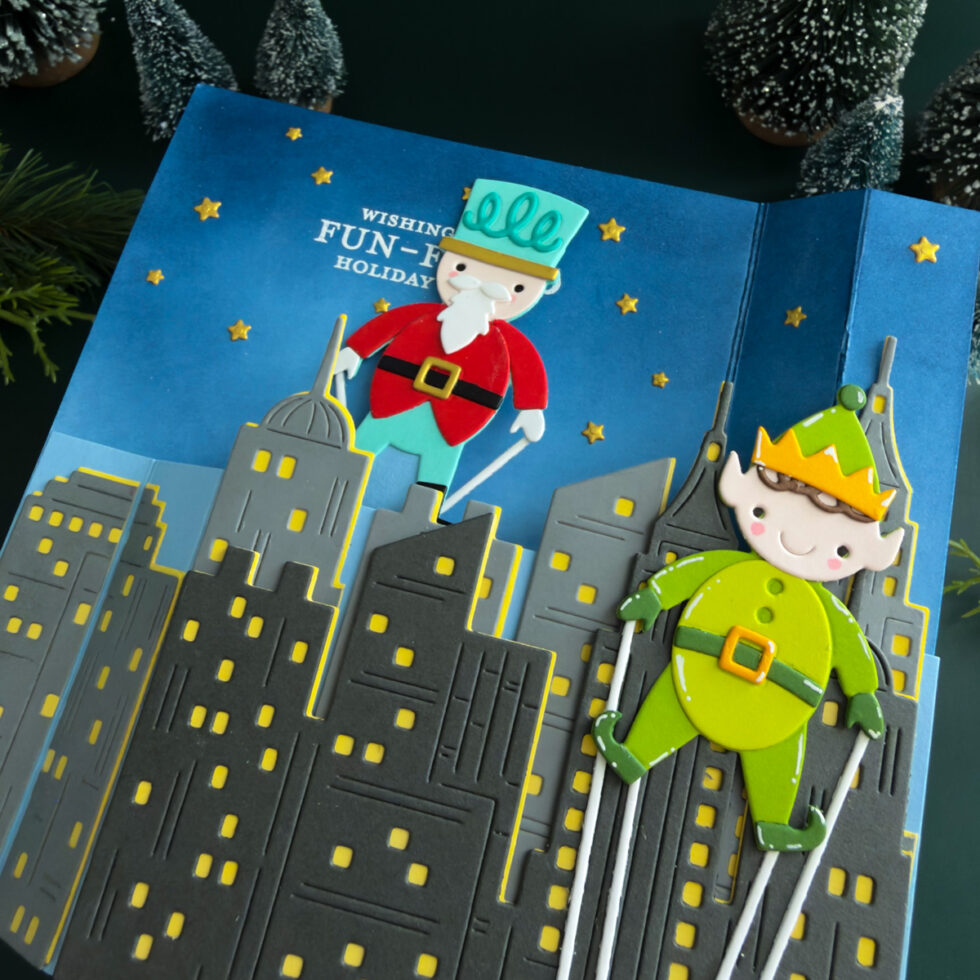
I die-cut the city buildings with October’s “City Skyline” Die Set in Anchor cardstock. I die-cut the skyline twice, because I wanted a full and busy city scene. Then I trimmed the sides of some buildings and arranged them differently in the back row and the front row, so the same buildings do not just repeat on top of each other.
I colored the front buildings darker with black ink, so I have two tones of gray — a medium gray in the back and a deep, dark gray in the front. Like my first card, I placed a white backdrop layer behind the buildings and colored it with yellow inking, so the yellow shows through the windows like light coming from inside the buildings.
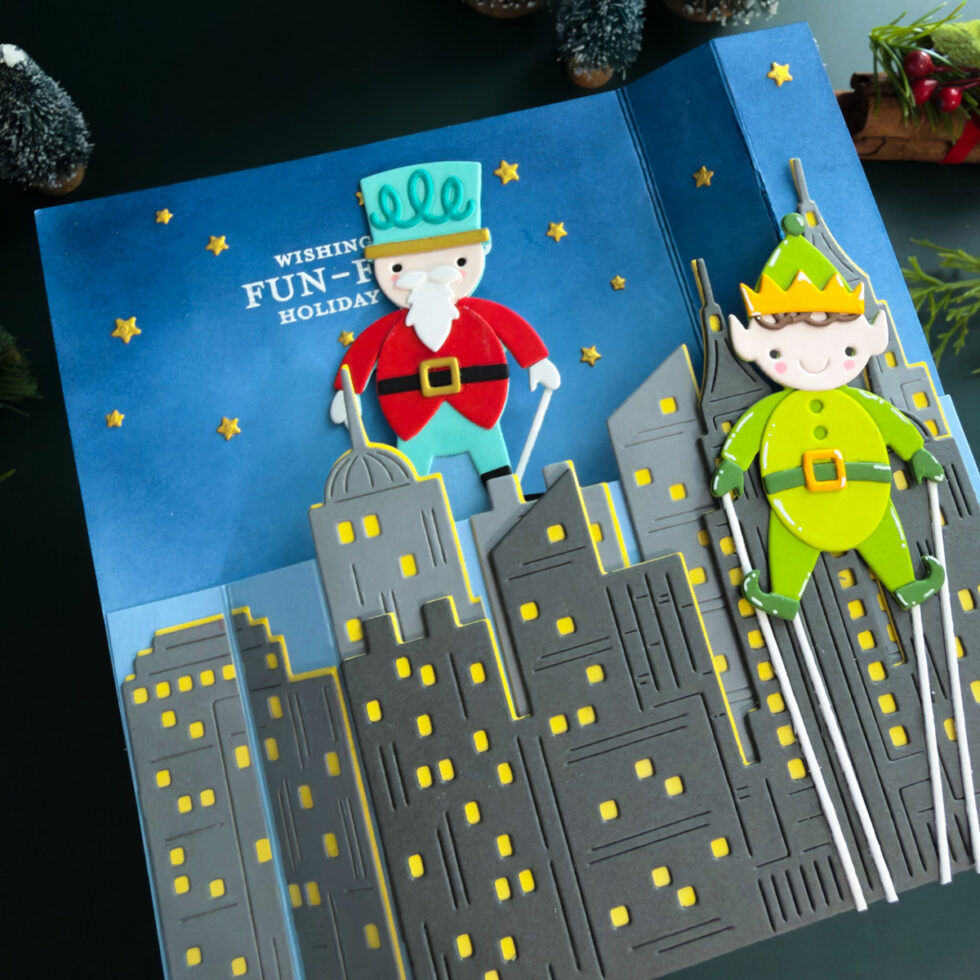
For the stars, I die-cut them from Brushed Gold cardstock with the star die from the City Skyline set and glued them on one by one in the night sky.
Wiper & Sentiment:
There are two parade balloons on this card. The cute elf in green is on the front, holding his thin white strings. The second balloon is the surprise — when you pull the two sides of the card, the gentleman balloon pops up behind the buildings, in his red coat and tall hat. I die-cut both balloons with October’s “Big Fun Add-On” Die Set.
For the sentiment, I used the same method as my first card. I stamped “Wishing you a fun-filled holiday season” from October’s “The Holiday Season” Stamp & Cut Set at the top of the back panel with VersaMark ink, added white embossing powder, and heat-embossed it with my heat tool, right in the middle of the gold stars.
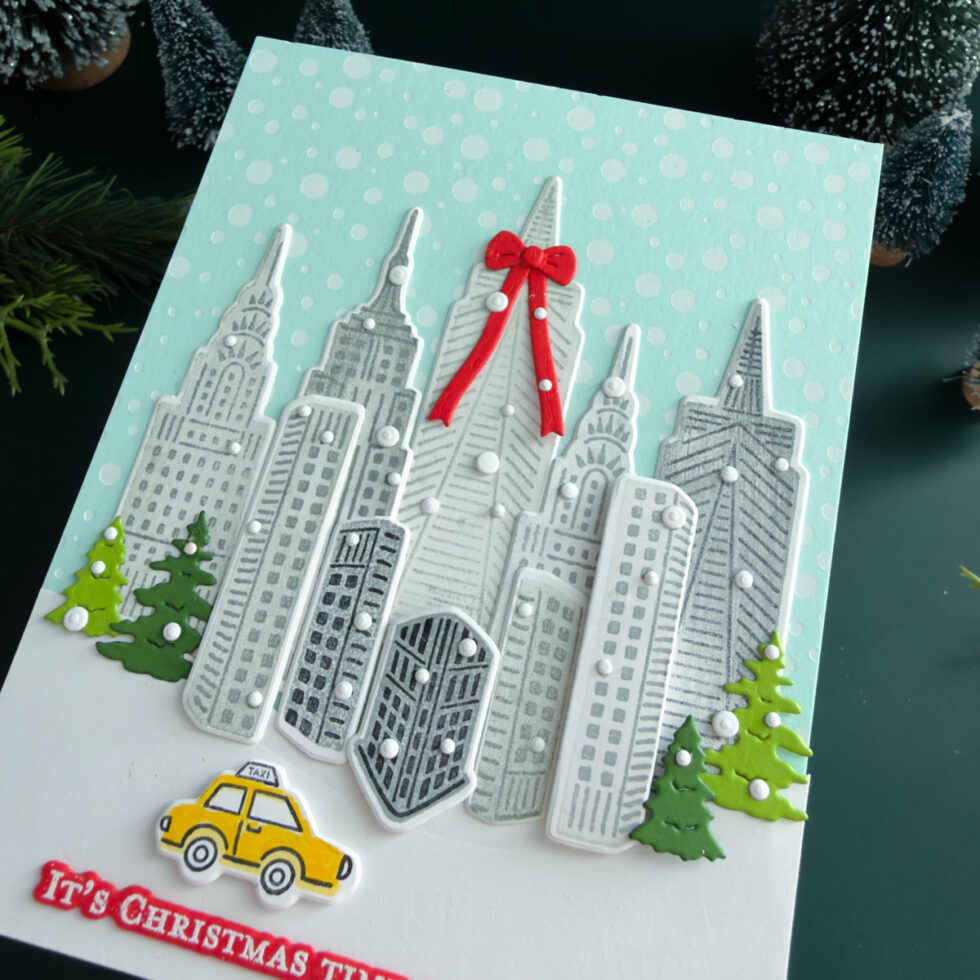
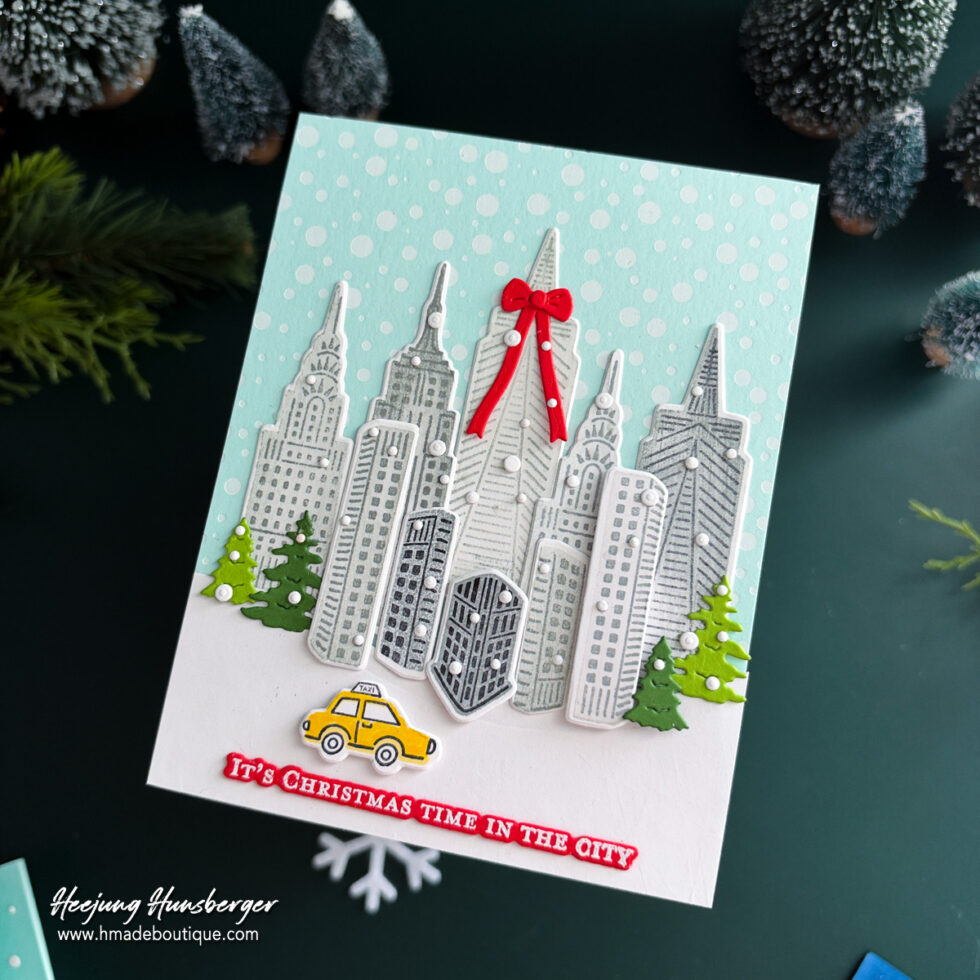
Christmas Time in the City Card
Background:
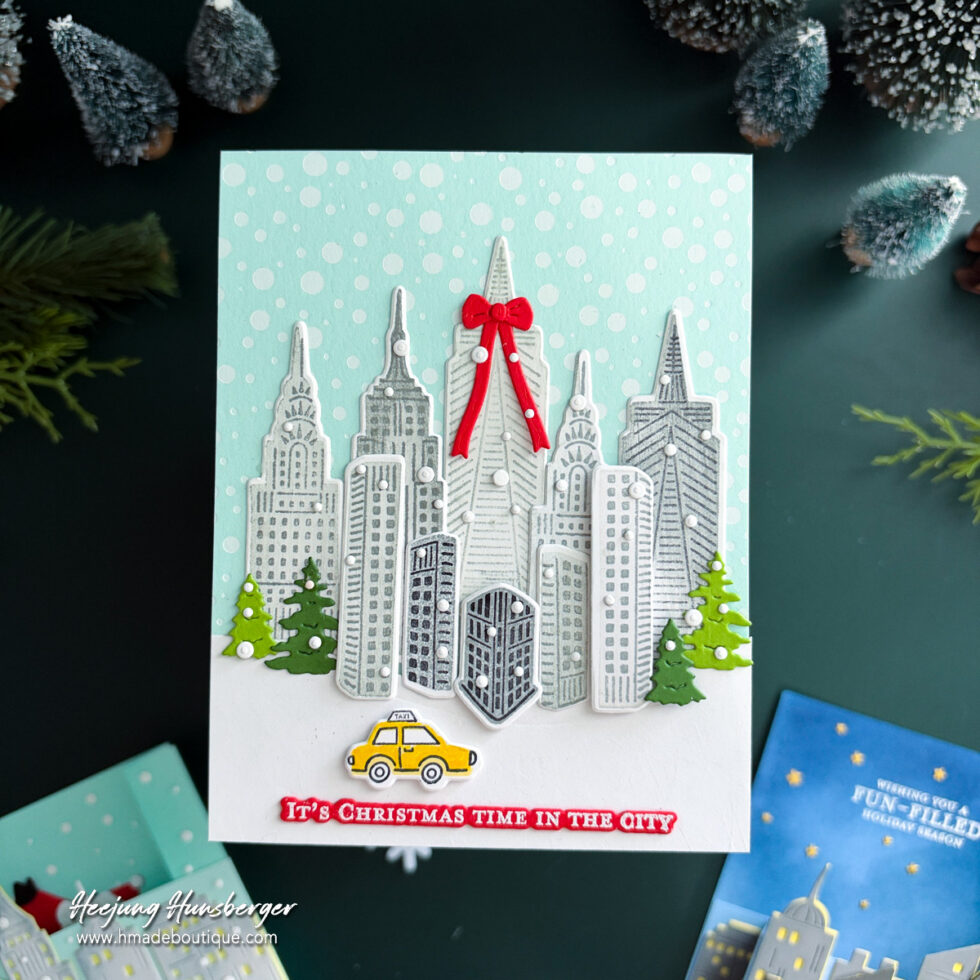
I started with Seaside cardstock and white hot-foiled it with the “Sprinkled Confetti” Press Plate from the Home for the Holidays Collection. The soft white dots look like snow falling over the city.
At the bottom, I die-cut white cardstock with the “Color Block Scenic Scape” Etched Dies from the ’Tis the Season Collection to make the snow-covered ground.
Focal Images:
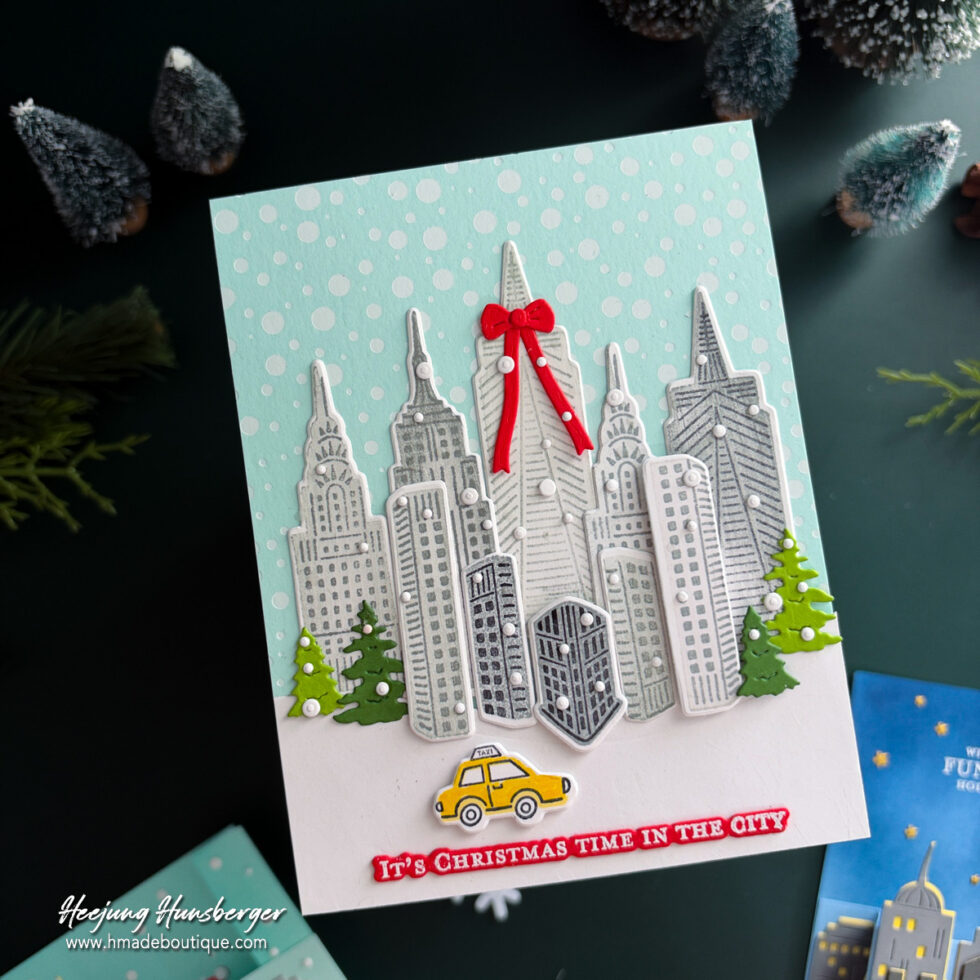
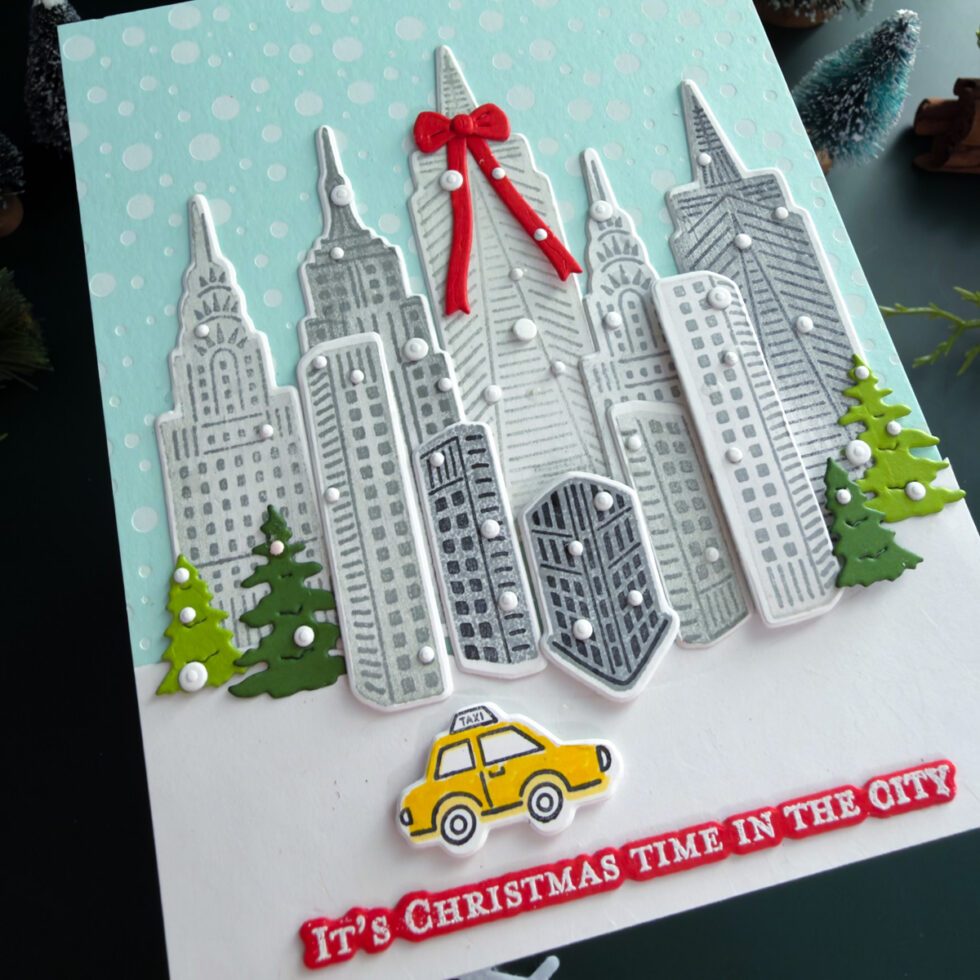
I stamped the buildings with October’s “In the City” Stamp & Cut Set on white cardstock, using four tones of gray ink from the Altenew Rock Collection. I stamped many buildings in different gray tones, die-cut them, and layered them together to make a full and busy city scene. A few of the front buildings are attached with foam adhesive, so the city has nice dimension.
Here is a little tip I learned while making this card: for the two-tone buildings, stamp the dark, detailed stamp with the windows and outlines first, and then stamp the pale, bold solid stamp over it. The pale layer is easy to see through, so you can line it up clearly. If you stamp them the other way, the dark lines are hard to center inside the pale building.
Sentiment & Details:
I stamped the little taxi in two tones, black and yellow, die-cut it, and attached it with foam adhesive on the snowy ground. I die-cut the small trees and the bow withthe Hero Arts “Winter Wreath Accessories” Die Set— the bow in Poppy cardstock, and the trees in Rainforest and Fern cardstock — and placed the bow on the tallest building in the center. I also added snowflakes, die-cut with the same snowflake die as my first card, on top of the buildings, so it looks like snow is falling hard over the city. It reminded me of the snowy city days I used to see when I lived in Seoul. For the sentiment, I did the same as my first card: I stamped “It’s Christmas time in the city” from October’s “The Holiday Season” Stamp & Cut Set on Poppy cardstock, heat-embossed it with white embossing powder, die-cut it, and attached it at the bottom.
Thank you so much for stopping by today. I hope these cards give you a fun idea for your holiday cards, especially if you want to try a wiper card this year!
Happy Crafting, Heejung
SUPPLY LIST
When you make purchases through affiliate links, it won’t cost you anything extra. Thank you so much for your support! 🩷