Spellbinders-Take Note Collection
Take Note of These Creative Cards! Featuring Spellbinders’ Latest Collection
Hello crafty friends!
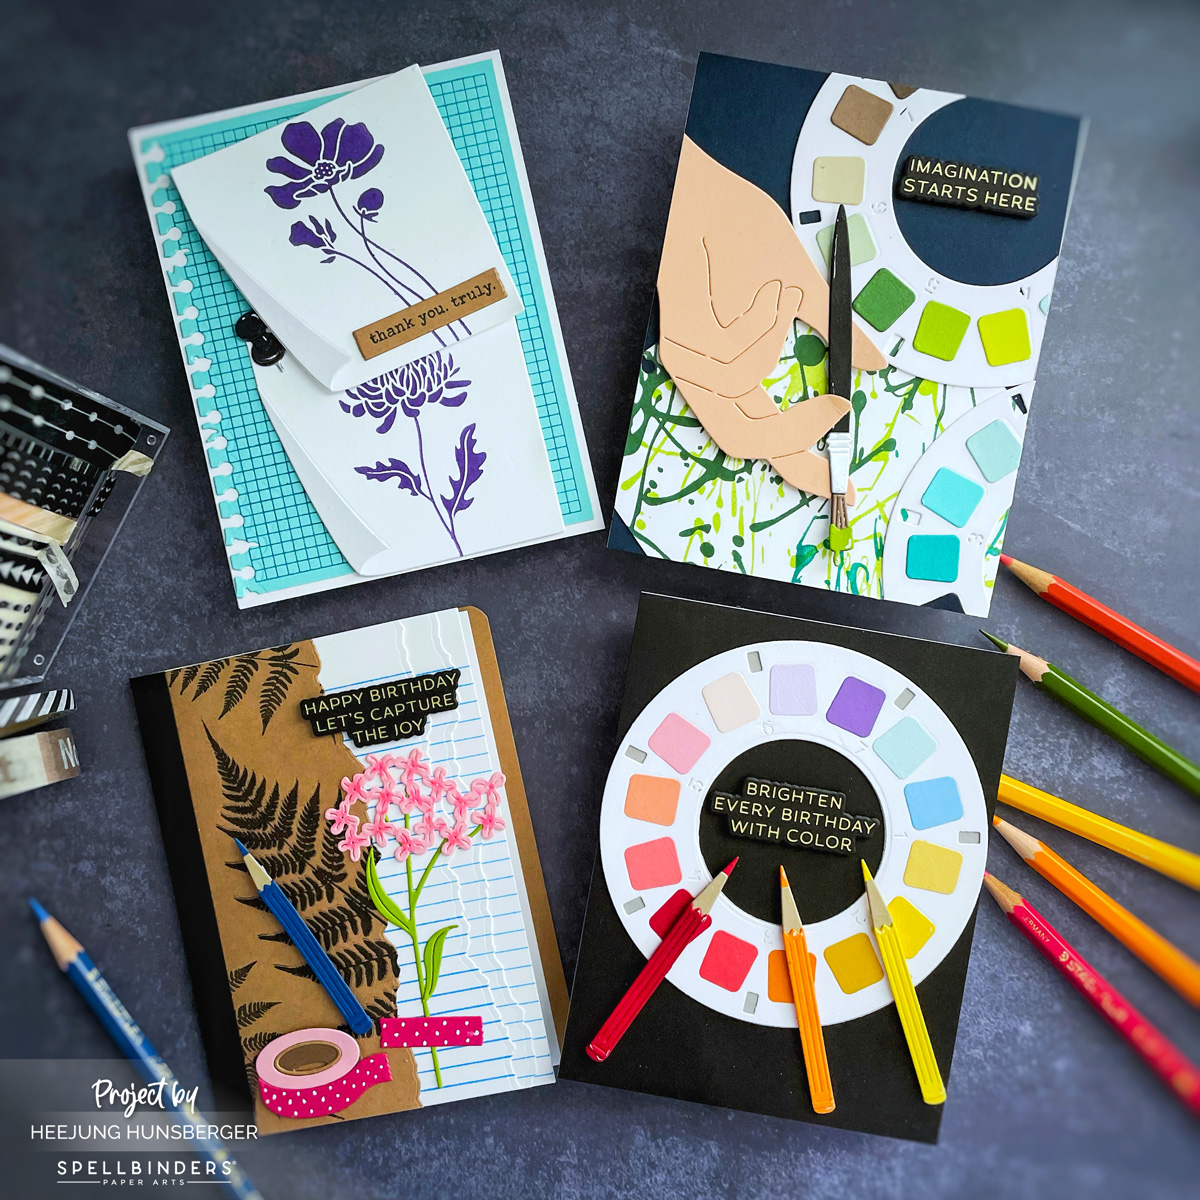
I’m thrilled to share four new cards I’ve created using the fantastic May release from Spellbinders – the “Take Note Collection.” This collection is packed with versatile dies and press plates that inspire endless possibilities for paper crafting.
The “Take Note Collection” includes:
Let’s dive into each card!
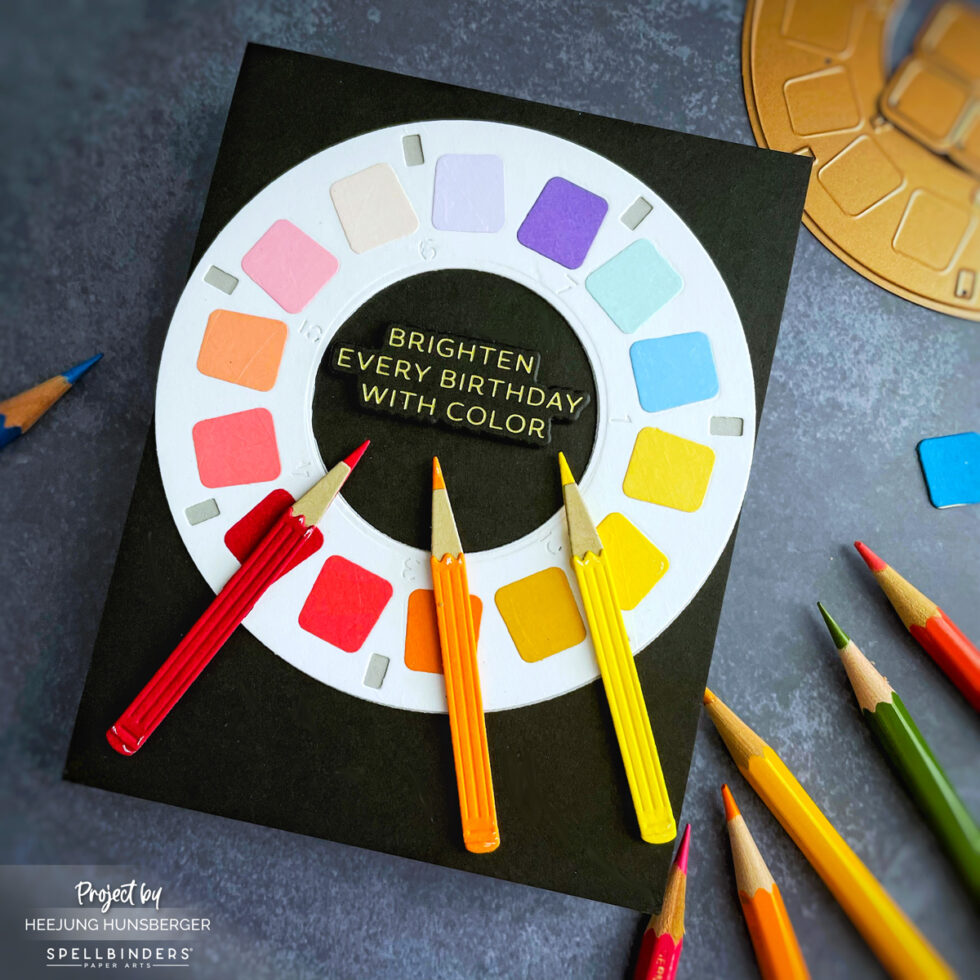
Card 1: Brighten Every Birthday with Color

This vibrant card features a fun color wheel design, perfect for sending colorful birthday wishes.


Step-by-step:
- Start with a
Ravencardstock as your card base. - Using the
Reel Color Etched Dies, cut-out the circular color wheel frame. - For the sentiment, hot foil
Matte GoldontoRavencardstock using theReel Color Sentiments BetterPress Plate & Die Set, then die-cut and adhere with foam adhesive for dimension. - Create the colored pencils by die-cutting
Beewax,Poppy, andCarrotcolored cardstock with the Field Notes Tools Etched Dies from the Field Notes Collection Adhere them around the color wheel. - Die-cut various colors of cardstock using the individual color squares from the
Reel Color Etched Diesto fill in the color wheel.
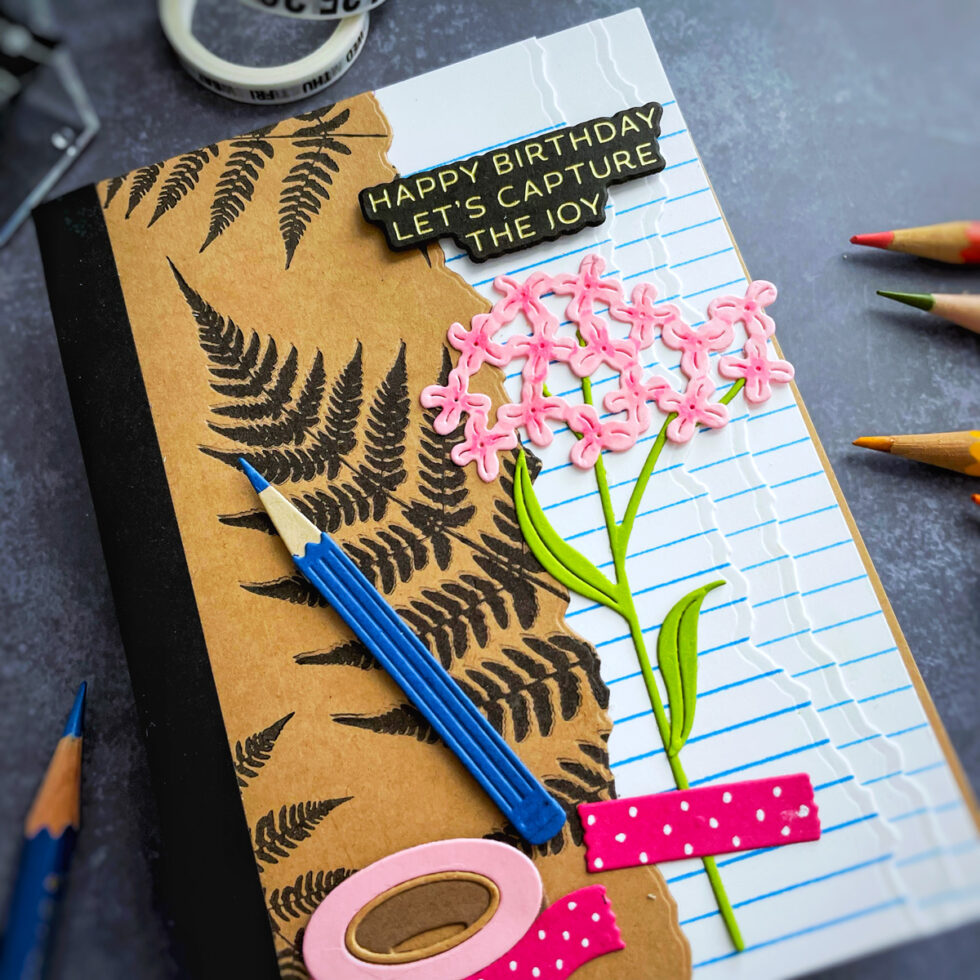
Card 2: Capture the Joy of a Notebook

This card captures the essence of a well-loved journal, complete with charming botanical and crafty elements.

Supplies You’ll Need:
- Fawn Color Cardstock
- Lush Ferns BetterPress Plate
- Black Ink
- BetterPress System
- Torn Paper Edges Etched Dies
- Take Note Registration Press Plate
- Blue Ink
- Field Notes Wildflowers Etched Dies Set
- Field Note Tools Etched Dies
- Crafty Tools Etched Dies from the Crafty Babe Collection
- White Gel Pen
- The Full 48 ColorWheel Cardstock Pack 8.5″ x 11


Step-by-step:
- On
Fawncolored cardstock, use theLush Ferns BetterPress Platewith black ink to create a pressed background. - Cut the edge of the fern-pressed cardstock with the
Torn Paper Edges Etched Diesto create a torn look. - On white cardstock, use the
Take Note Registration Press Platewith blue ink to create a lined notebook paper pattern. - Cut both sides of the notebook paper with the
Torn Paper Edges Etched Diesto mimic ripped notebook pages. Adhere the two pieces together to form the notebook surface on the card. - Die-cut the wildflowers from the
Field Notes Wildflowers Etched Diesset and adhere them to the card. - Die-cut the masking tape from the
Crafty Tools Etched Diesand the pencil from theField Notes Toolsdie set, then adhere them. - Hot foil
Matte GoldontoRavencardstock using theReel Color Sentiments BetterPress Plate & Die Set, then die-cut and adhere for the sentiment. - Add polka dot patterns to the masking tape using a white gel pen for an extra touch of detail.
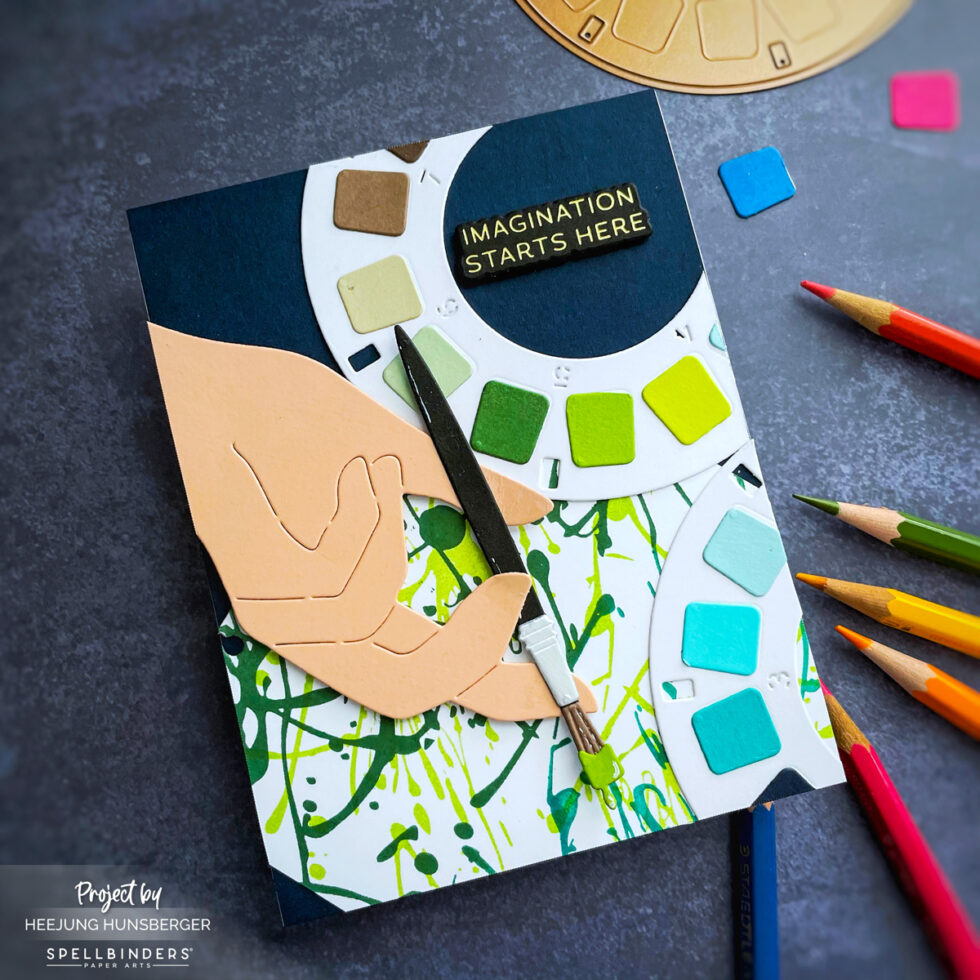
Card 3: Imagination Starts Here

This artistic card celebrates creativity with a paint palette and a hand holding a brush, all set against a dynamic splattered background.

Supplies You’ll Need:
- Memo Splatter BetterPress Plate
- Two tones of Green Ink
- Torn Paper Edges Etched Dies (specifically the spiral notebook edge die)
- Reel Color Etched Dies
- Bestie Heart in Hand Etched Dies
- Crafty Tools Etched Dies (for the paintbrush)
- Silver Metallic Cardstock
- The Full 48 ColorWheel Cardstock Pack 8.5″ x 11


Step-by-step:
- On white cardstock, use the
Memo Splatter BetterPress Platewith two different tones of green ink. Press each tone separately to create a layered, two-tone splattered background. - Die-cut the edge of this background paper using the spiral notebook edge die from the
Torn Paper Edges Etched Dies. - Die-cut the various color squares from the
Reel Color Etched Diesin shades of green, blue, and brown. Arrange them on an A2-sizedIndigocardstock and trim to fit the card dimensions. - Create the hand using the
Bestie Heart in Hand Etched DiesonBellini Cardstock. - Die-cut the paintbrush from the
Crafty Tools Etched Dies, usingSilver Metallic Cardstockfor the ferrule. - Hot foil
Matte GoldontoRavencardstock using theReel Color Sentiments BetterPress Plate & Die Set, then die-cut and adhere for the sentiment.
Card 4: Thank You Truly

This elegant card features beautifully pressed floral designs and a unique “torn paper” memo pad effect, perfect for expressing gratitude.

Supplies You’ll Need:
- Journal Grid Registration Press Plates
- Blue Ink
- Torn Paper Edges Dies (specifically the torn paper edge die)
- November Chrysanthemum Press Plates
- October Cosmos Press Plates
- Purple Ink
- Push Pin Notes Etched Dies
- Silver Cardstock
- Holding Your Heart Sentiments BetterPress Plates & Die Set
- Betterpress Black Ink
- The Full 48 ColorWheel Cardstock Pack 8.5″ x 11


Step-by-step:
- On
Waterfallcardstock, use theJournal Grid Registration Press Plateswith blue ink to create a pressed grid pattern. - Die-cut one side of this grid paper using a spiral note edge die from the
Torn Paper Edges Etched Dies. - On two separate pieces of white cardstock, press one with the
November Chrysanthemum Press Platesand the other with theOctober Cosmos Press Plates, both using purple ink. - Die-cut these pressed floral pieces using the
Push Pin Notes Etched Diesto create the memo paper shapes. - Die-cut the push pins from
RavenandSilver Metallic Cardstockusing thePush Pin Notes Etched Dies. - On
Fawncardstock, use theHolding Your Heart Sentiments BetterPress Plates & Die Setwith black ink, then die-cut and adhere for the sentiment.

I hope you enjoyed this look at the versatility of the Spellbinders “Take Note Collection”! Which card is your favorite? Let me know in the comments below!
SUPPLIES LIST
When you make purchases through affiliate links, it won’t cost you anything extra. I am grateful for your support!


