Get Your Engines Ready! Cruisin’ with Spellbinders Classic Road Legends!
Hey there, fellow crafters! Get ready to take a nostalgic drive down memory lane with the latest release from Spellbinders, the Classic Road Legends collection designed by the incredibly talented Mindy Eggen! This collection is packed with everything you need to create vintage vehicle-themed cards that are perfect for birthdays, thank yous, or just sending a “wheel-y” great day to someone special.
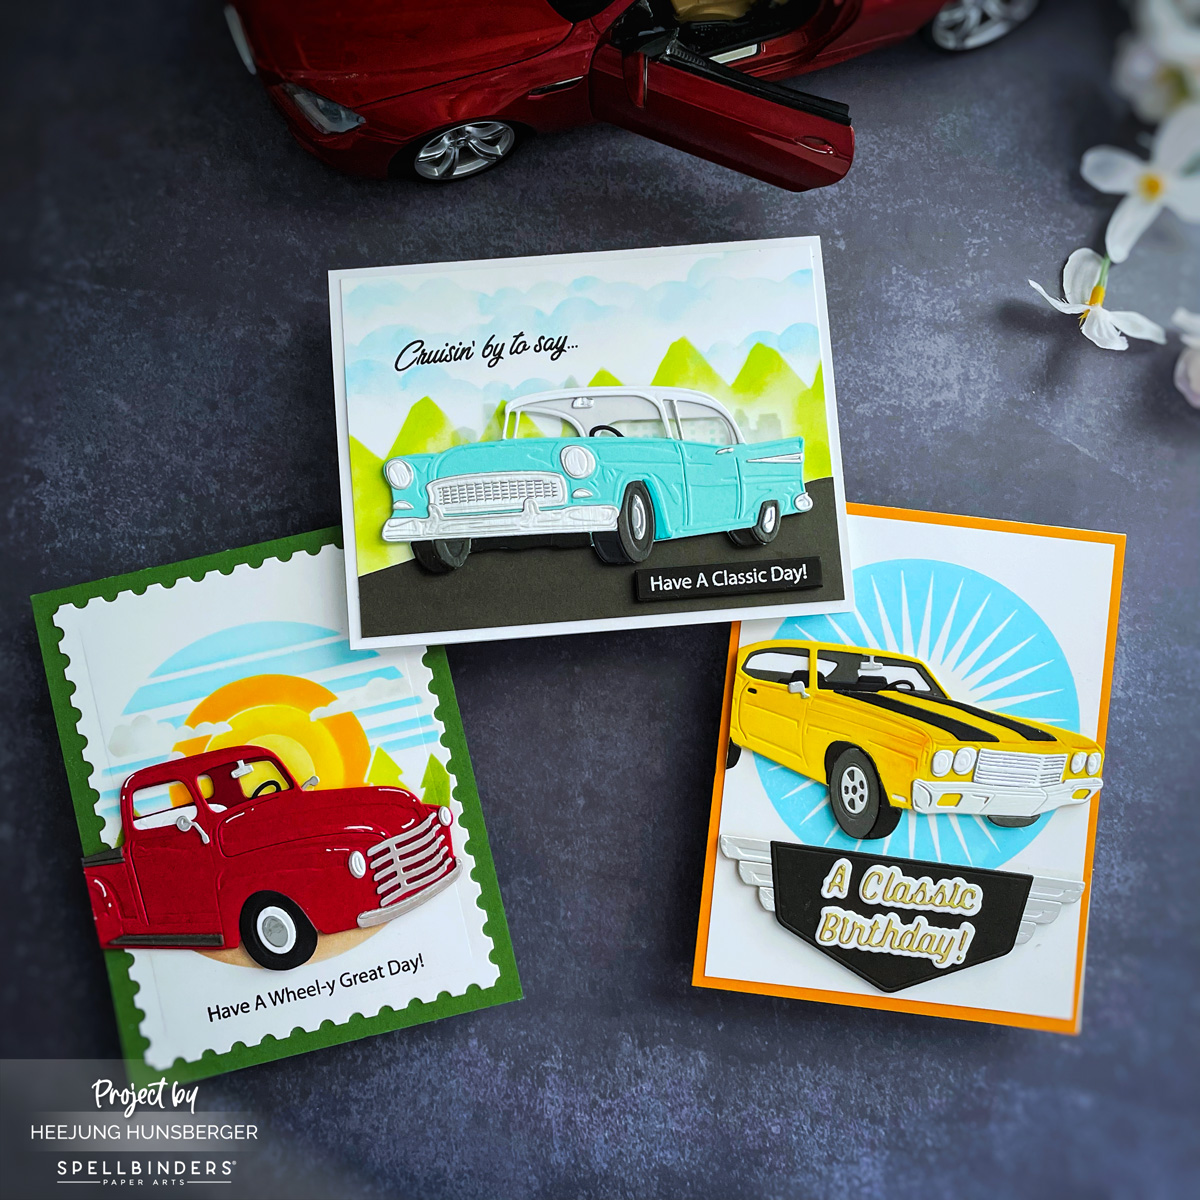
Today, I’m excited to share three different card designs I created using various elements from this fantastic collection, including the Muscle Car die, Classic Car die, Timeless Truck die, Radiant Starburst BetterPress Plate, Classic Sentiments die, Scenic Drive Stencil, and the Cruisin’ By Sentiments Clear Stamp & Die Set. Buckle up, because we’re about to hit the crafting highway!
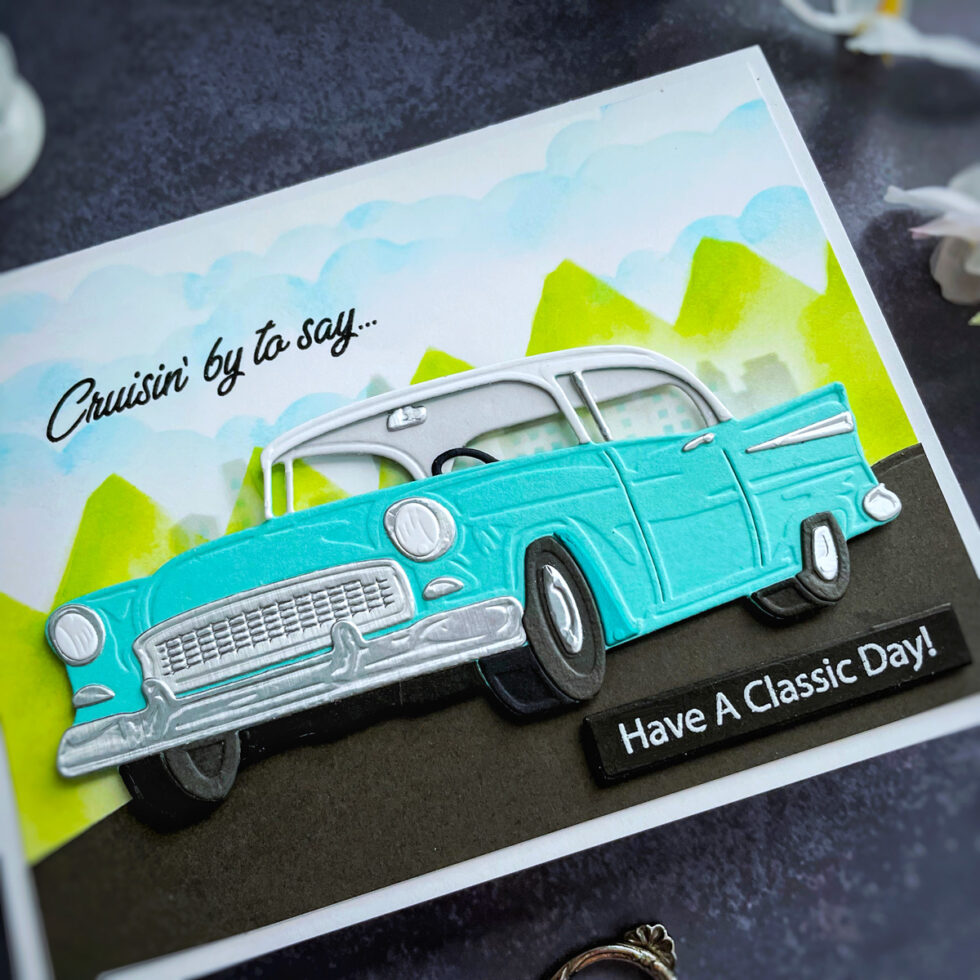
Card 1: Cruisin' By to Say... (Classic Car)
This card features the elegant lines of the Classic Car die and creates a serene, vintage vibe.
Create the Background: Use Background Scapes stencils and apply a light wash of blue ink above the hills to create a sky effect. Die-cut anchor cardstock using the landscape edges die to create soft, rolling hills.
Die-Cut the Car: Die-cut the Classic Car from waterfall, silver, and Raven cardstock. Assemble the car by layering the pieces and adding adhesive where needed.
Stamp and die-cut the sentiment: Using the Cruisin’ By Sentiments Clear Stamp & Die Set, stamp “Cruisin’ by to say…” onto the background in black pigment ink, then apply clear heat embossing powder and heat set it.
**White Heat Embossing Sentiments:
To use the Cruisin’ By Sentiments Clear Stamp & Die Set, stamp the phrase “Have A Classic Day!” on black cardstock with VersaMark ink. Next, apply white embossing powder and heat set it. Finally, cut out the stamped image using the coordinating die.
Assemble the Card: Adhere the stenciled background to a white card base. Position the assembled classic car onto the card front using adhesive and foam squares for dimension.
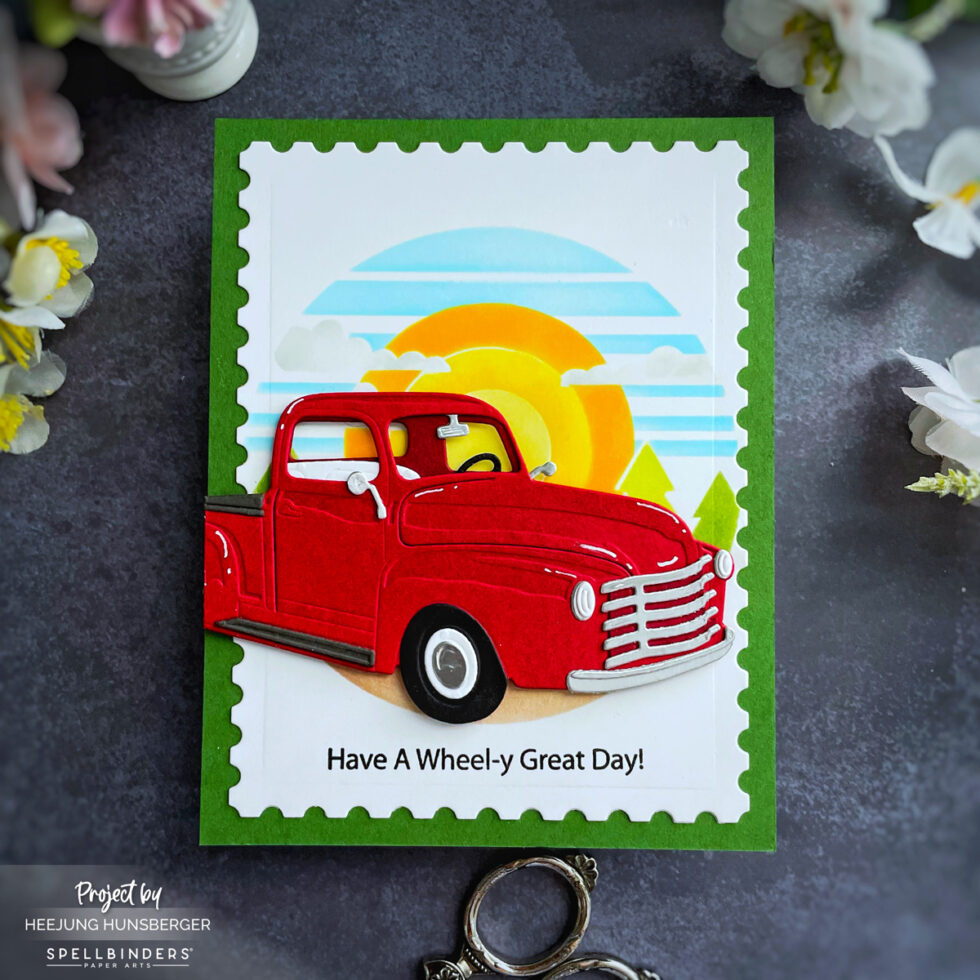
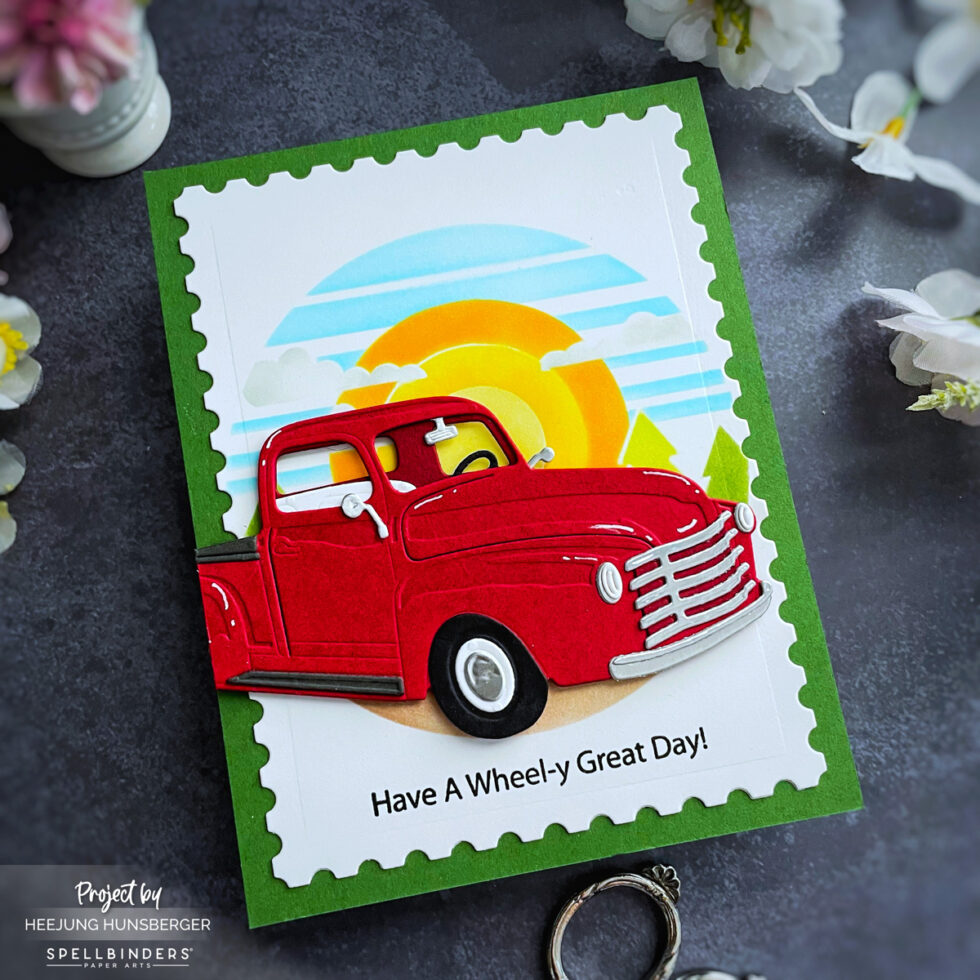
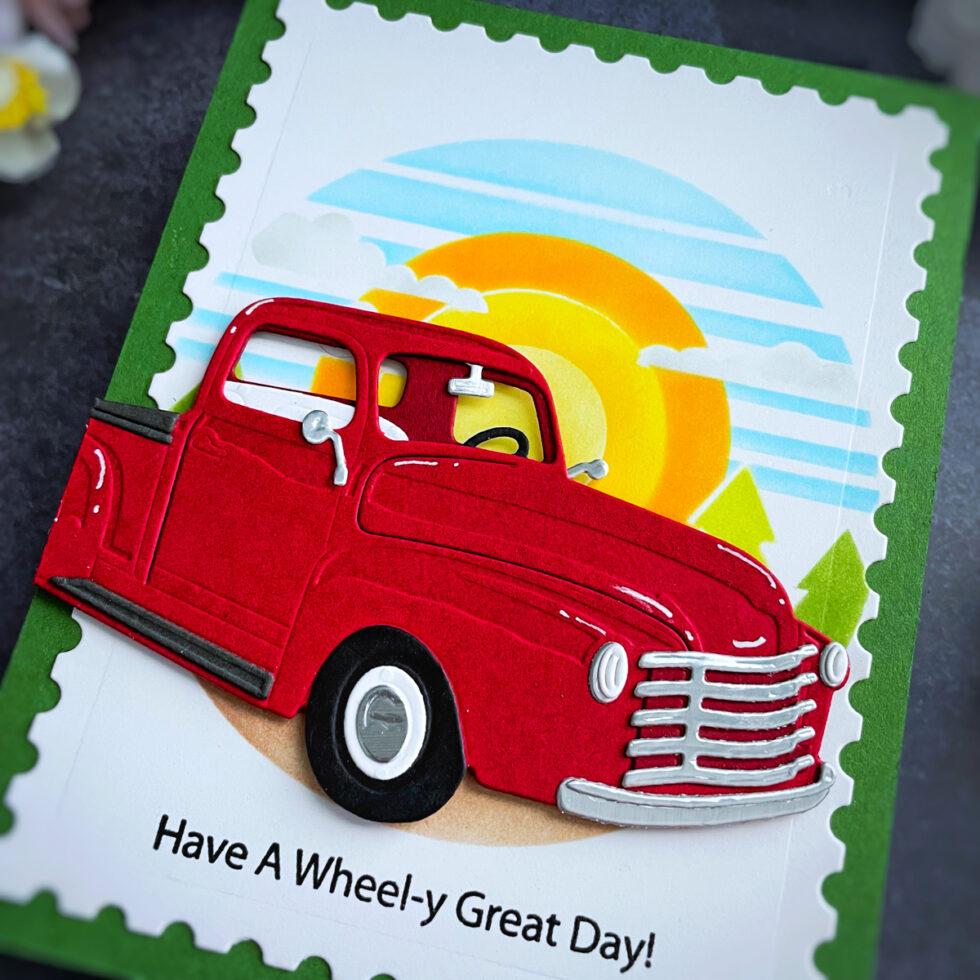
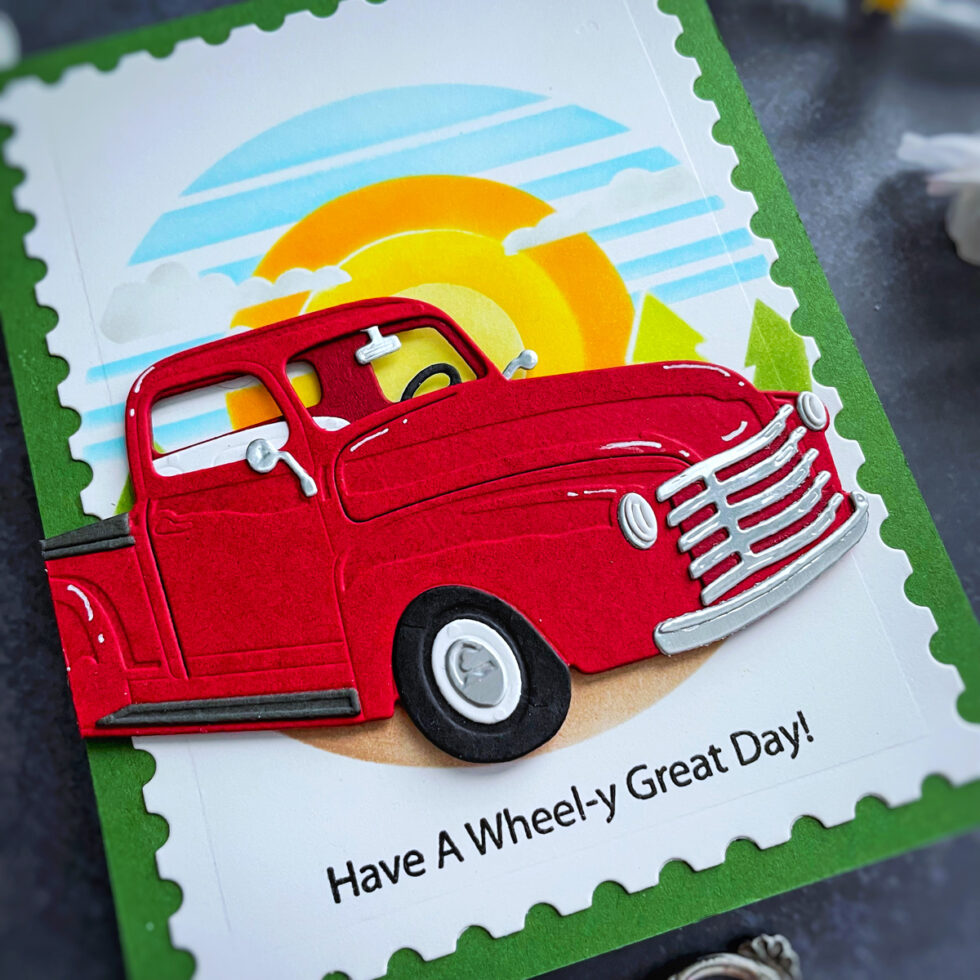
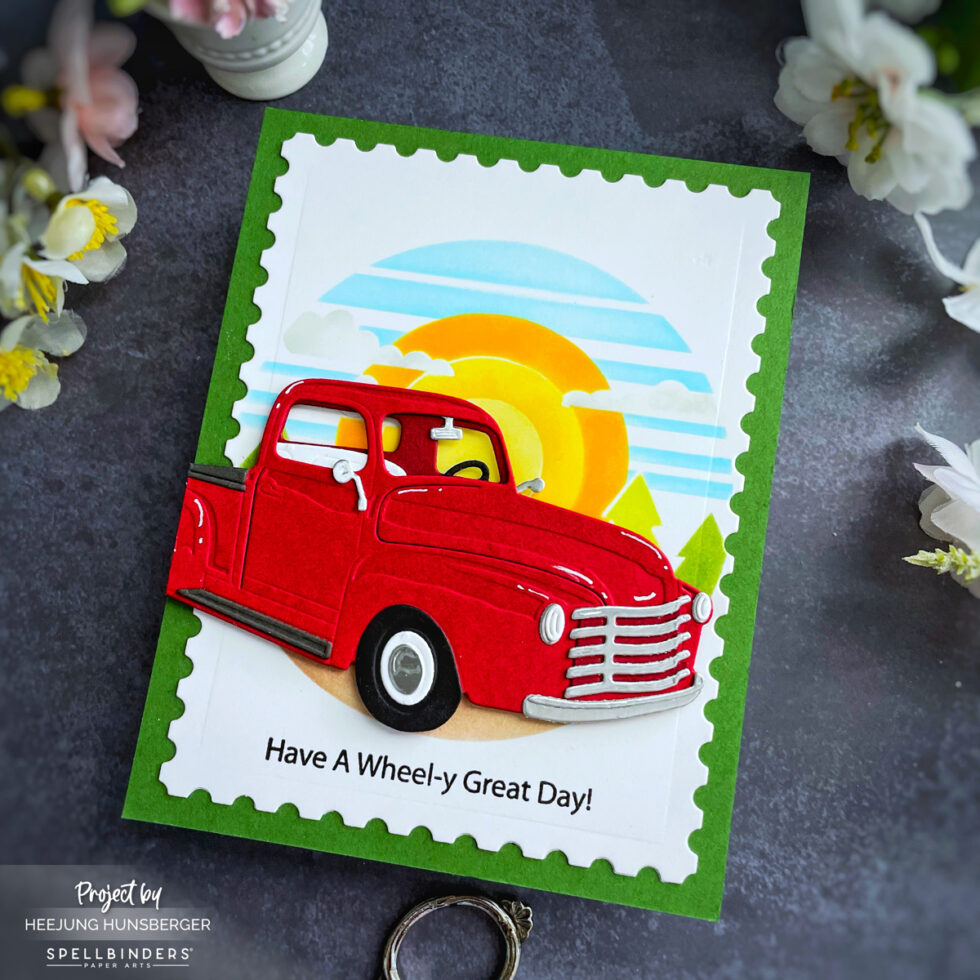
Card 2: Have A Wheel-y Great Day! (Timeless Truck)
This card showcases the charming Timeless Truck die against a sunny backdrop, perfect for a cheerful greeting.
Create the Background: Die-cut a piece of white cardstock with a postage edge die for a fun border. Use the Scenic Drive Stencilto create a sunburst effect with yellow and orange inks. Add a strip of light blue ink for the sky and some simple green triangles for stylized trees.
Die-Cut the Truck: Die-cut the Timeless Truck from Poppy, Raven, and silver cardstock. Assemble the truck by layering the pieces.
Assemble the Card: Adhere the stenciled and postage-edged background to a green card base. Position the assembled truck onto the card front using adhesive and foam squares.
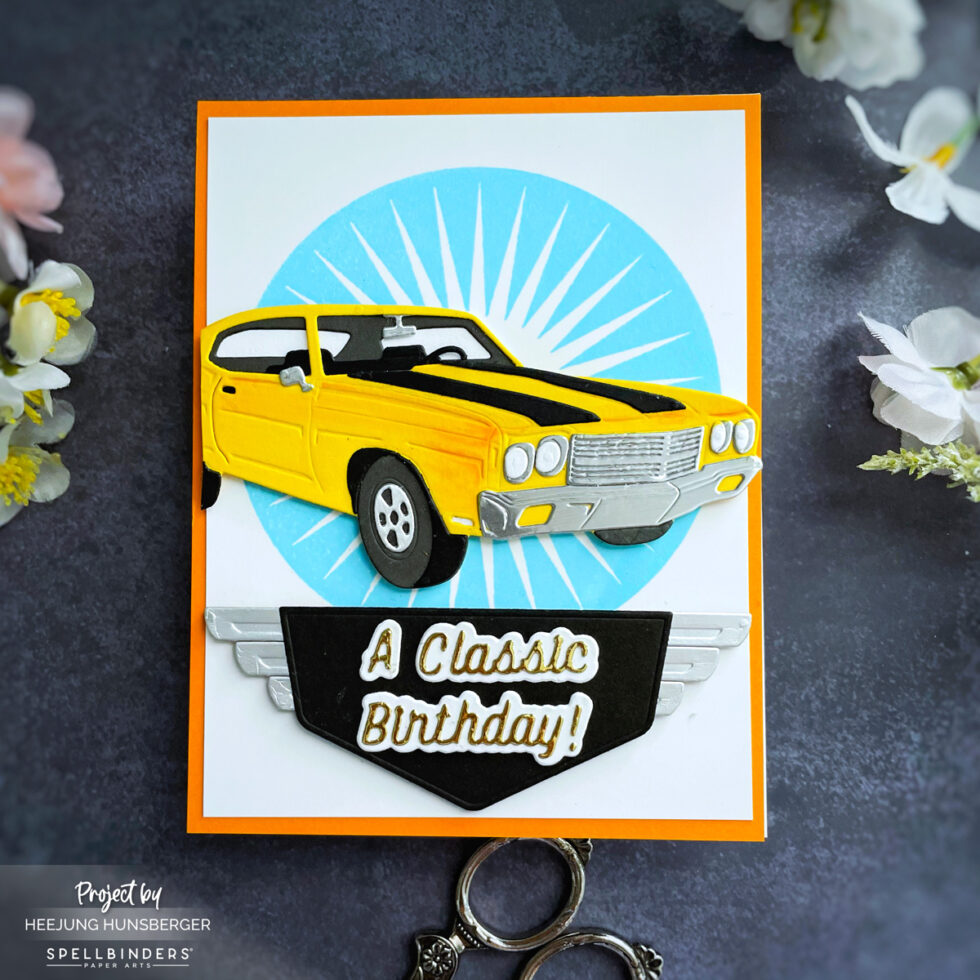
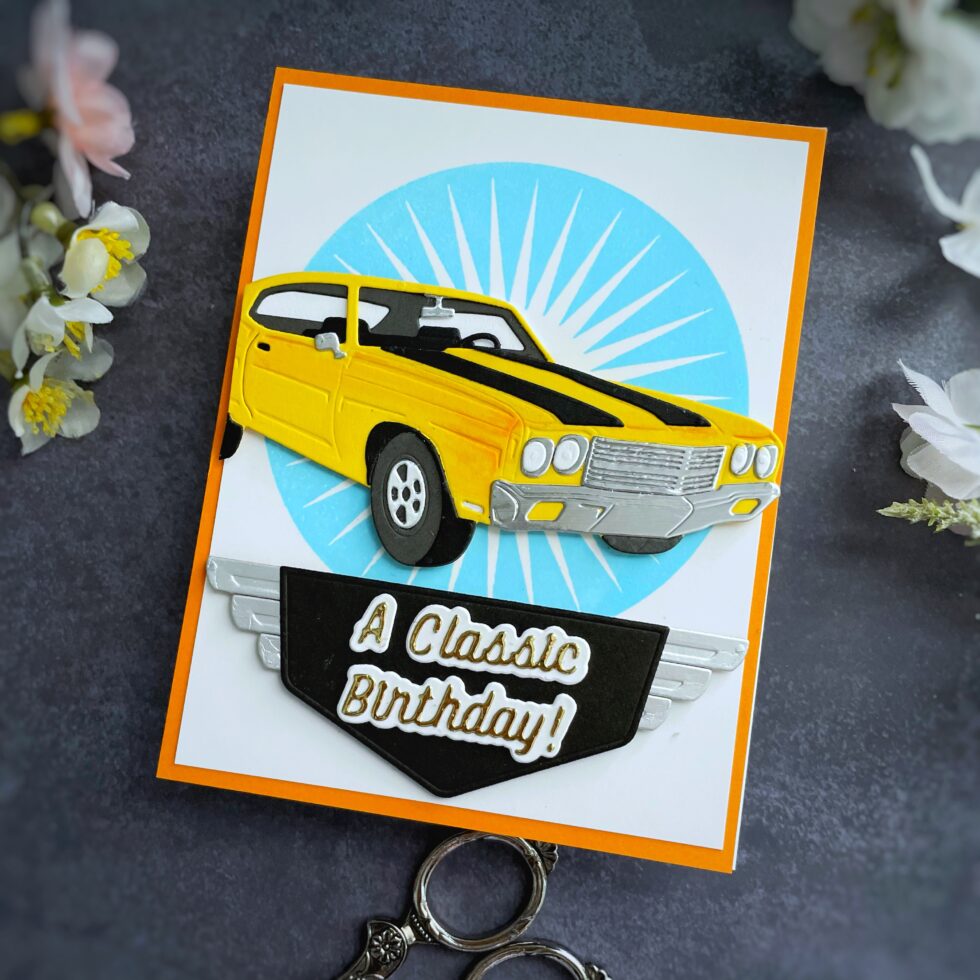
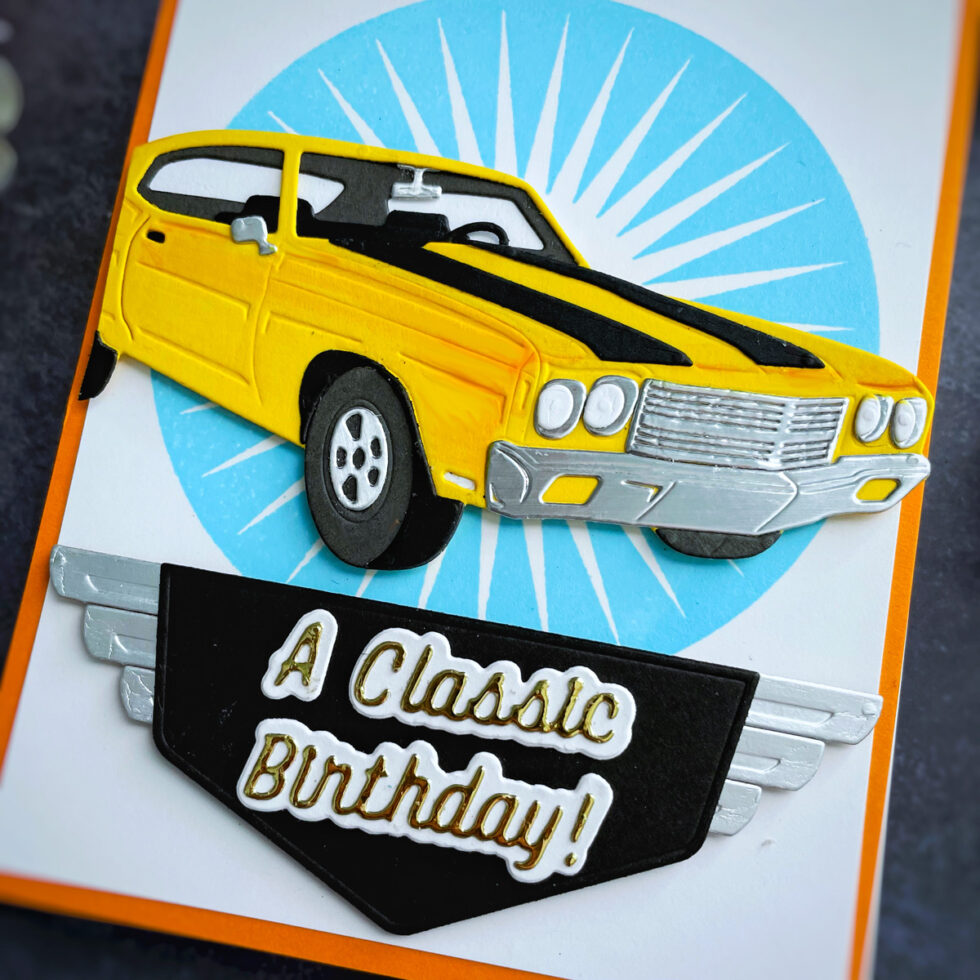
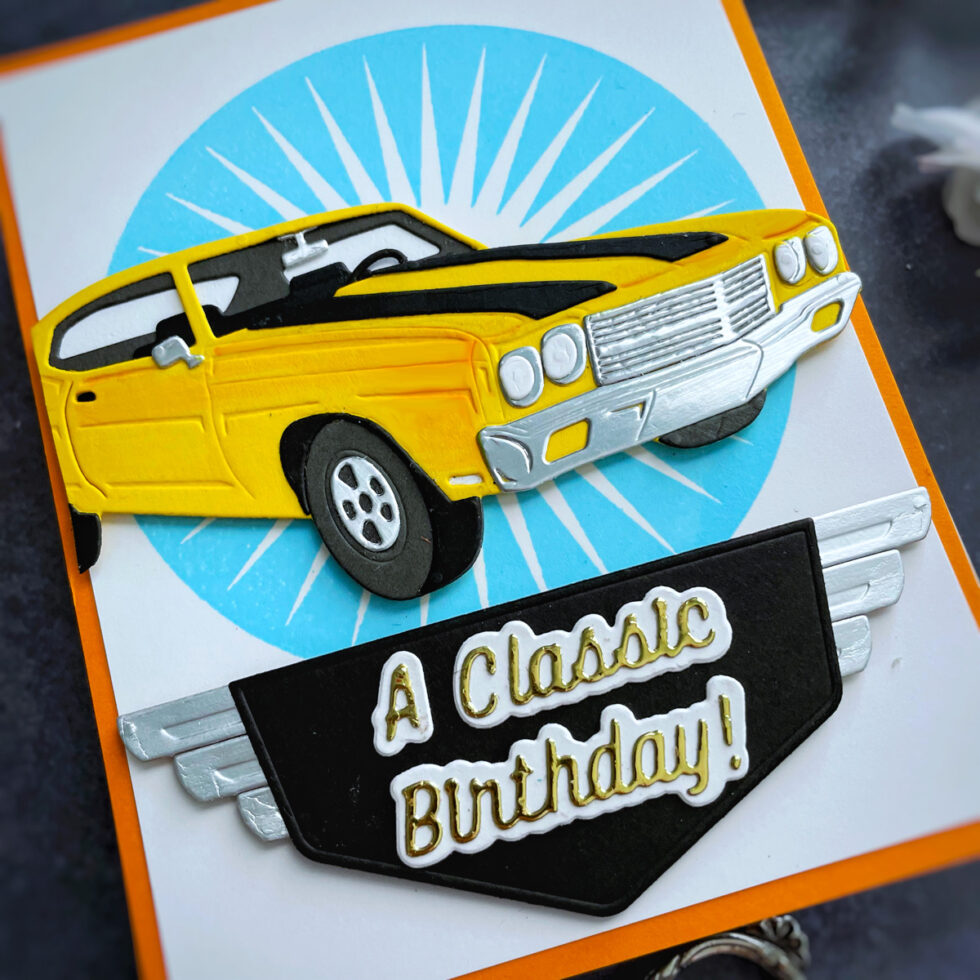
Card 3: A Classic Birthday! (Muscle Car)
This card brings the power and style of the Muscle Car die to life with a dynamic BetterPress background.
Create the BetterPress Background: Betterpress the Radiant Starburst BetterPress Plate onto white cardstock using light blue BetterPress ink. Trim it to fit your card front.
Die-Cut the Car: Die-cut the Muscle Car from Beewax, Raven, and silver cardstock. Assemble the car by layering the pieces.
Die-Cut the Sentiment: Use the Classic Sentiments die to cut out the banner shape from black cardstock and “A Classic Birthday!” from silver or white cardstock. Layer and adhere the sentiment onto the banner.
Add Wing Accents: Use the Speedometer Etched Dies to create die-cut wind accents from silver, Raven cardstock.
Assemble the Card: Adhere the BetterPressed background to an orange card base. Position the assembled muscle car onto the card front using adhesive and foam squares. Arrange the “A Classic Birthday!” sentiment banner below the car.
The Classic Road Legends collection from Spellbinders truly offers something for every car enthusiast! Whether you prefer the sleek lines of a classic car, the power of a muscle car, or the charm of a vintage truck, this collection has you covered. The coordinating sentiments and stencils make it easy to create cohesive and eye-catching cards for any occasion.
What’s your favorite ride from this collection? Let me know in the comments below!
Happy crafting, and may your day be filled with classic inspiration!
XOXO,
Heejung
SUPPLIES LIST
When you make purchases through affiliate links, it won’t cost you anything extra. I am grateful for your support!