Spellbinders- Simple Vintage Flower Shoppe Collection

Hello friends,

I waited a long time for the Simple Vintage Flower Shoppe Collection, and I finally created cards featuring it.

Flower Cart pop-up Card

First, cut the card base to 11 x 4 1/4 inches using Beeze color cardstock. Score it at 5 1/2 inches and then fold it.

I die-cut the flower cart from the Flower Cart Dies using white and Beewax color cardstock.

I die-cut the Flower Cart Dies flowers in white, Teal, Fairy Tale, Lavendar, and Blush card stock.

I also die-cut the basket in Fog card stock and the leaves in Rainforest card stock.

I cut the pop-up element to 2 1/2 x 4 3/4 inches, scored it at 3/4, 2 1/4, 3, and 4 1/2 inches, then folded and attached it to the back of the cart.

I colored the flowers with the markers.

embellished the curved Everyday Sentiments Glimmer hot foil plate with gold hot foil and then die-cut it with the coordinating die.


Flower shoppe door pop-up card

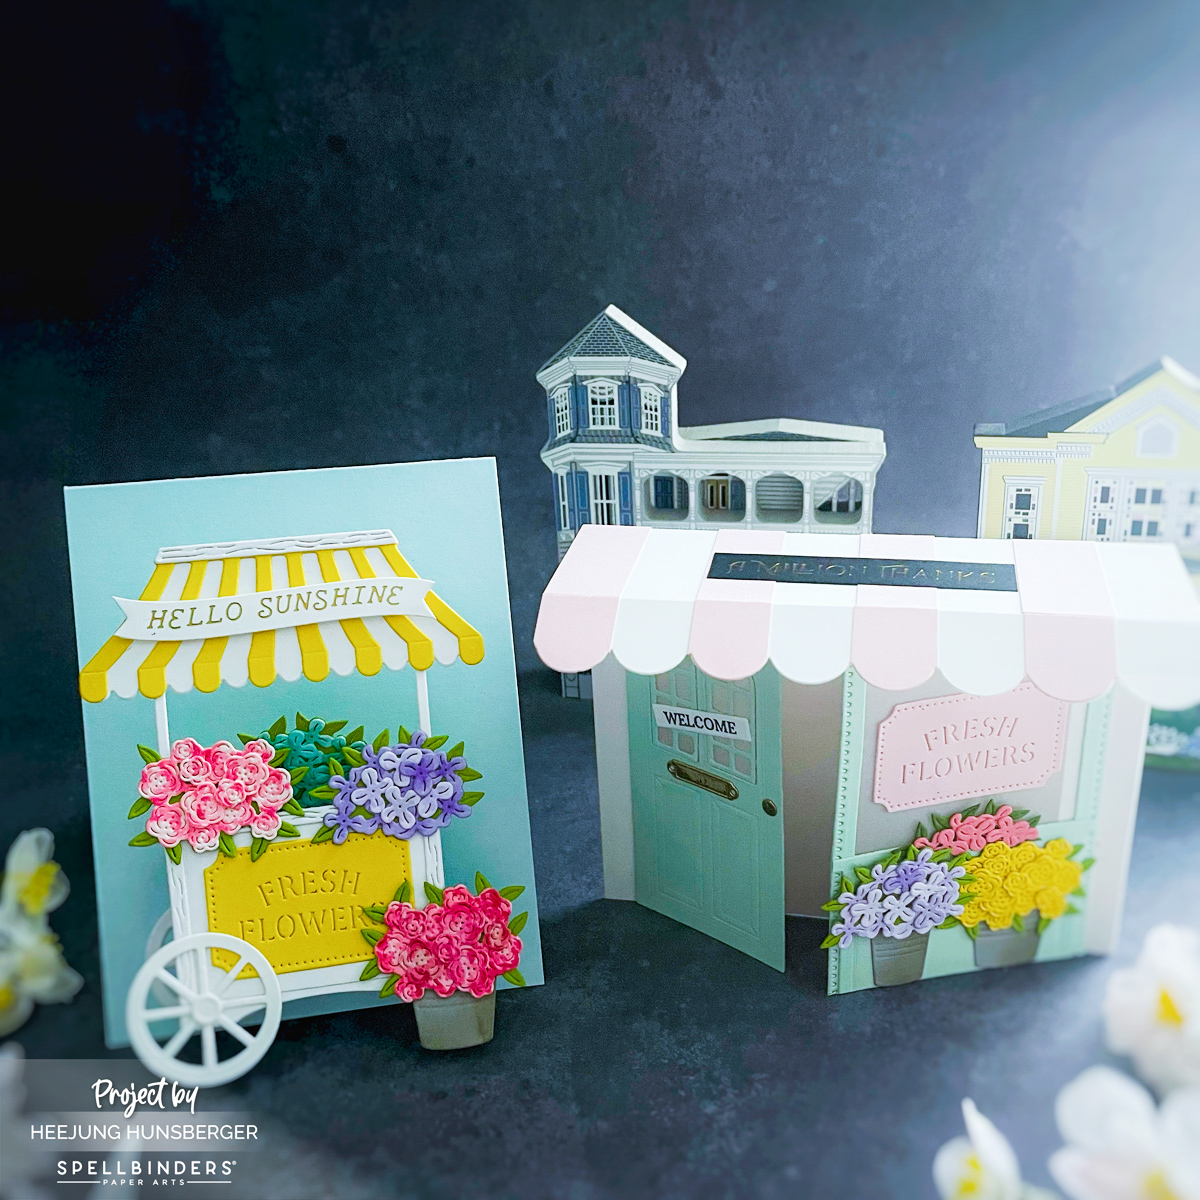
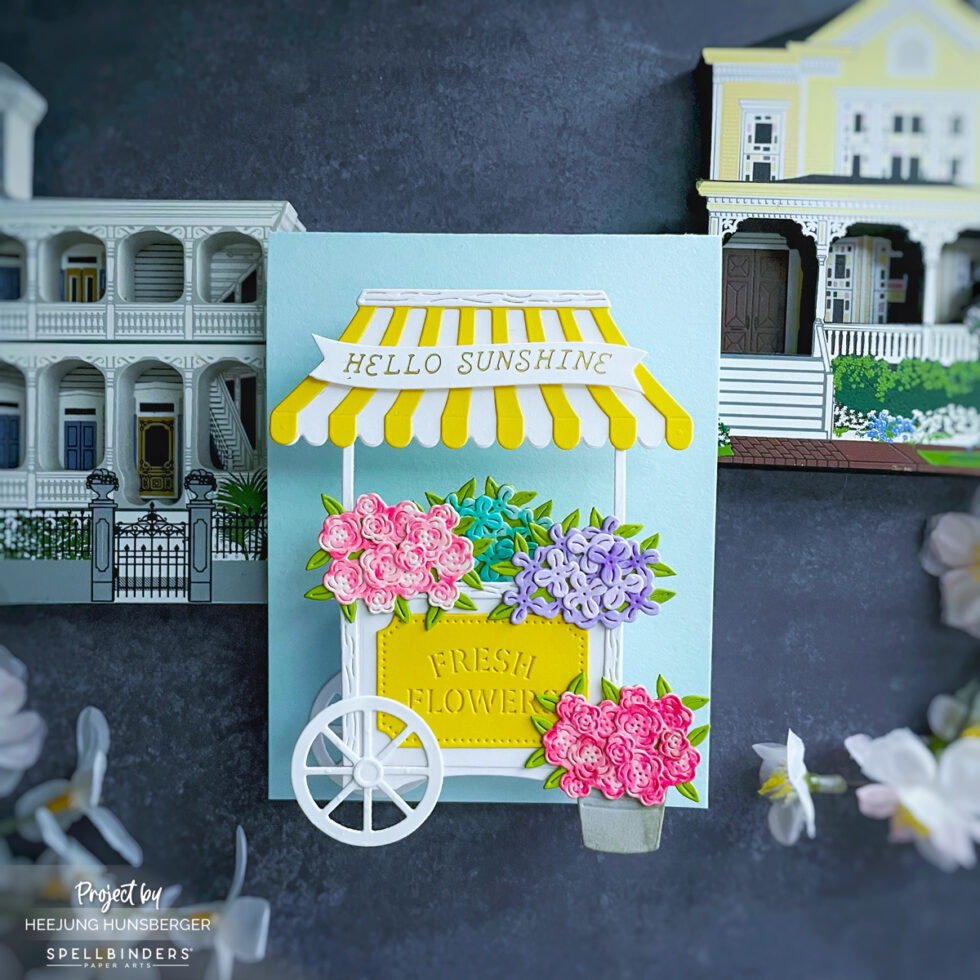
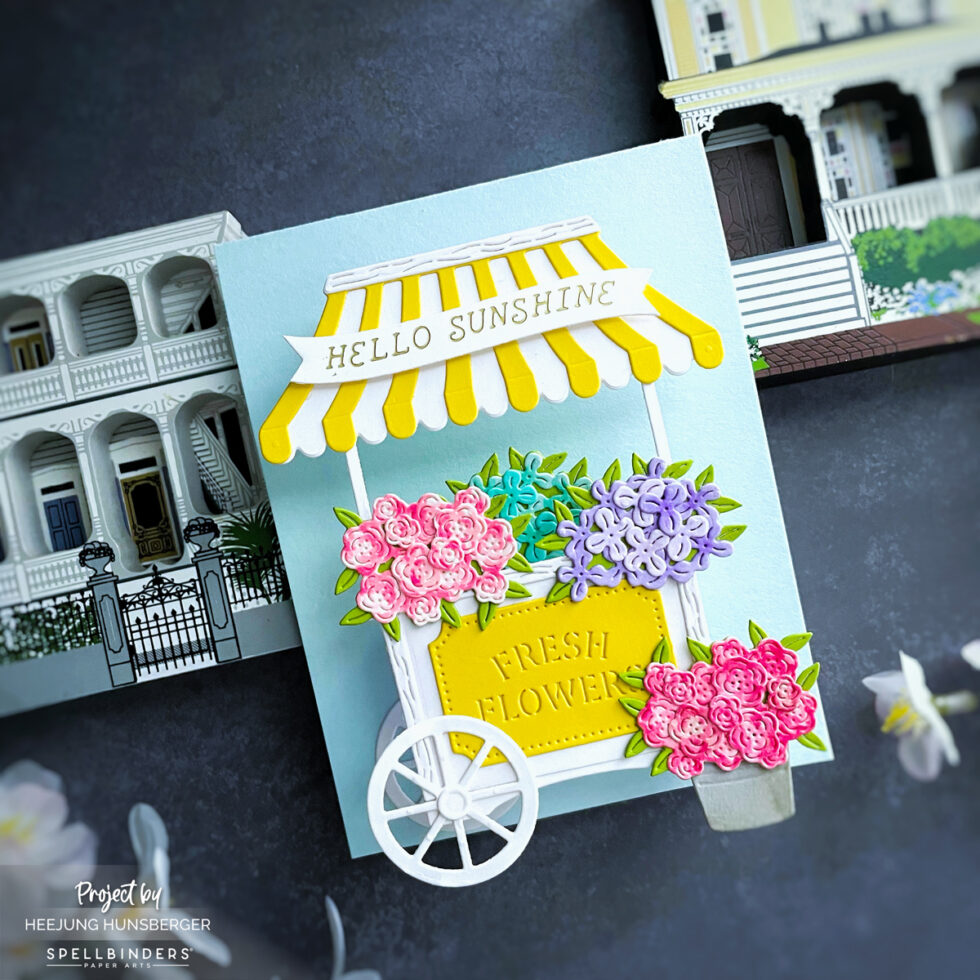
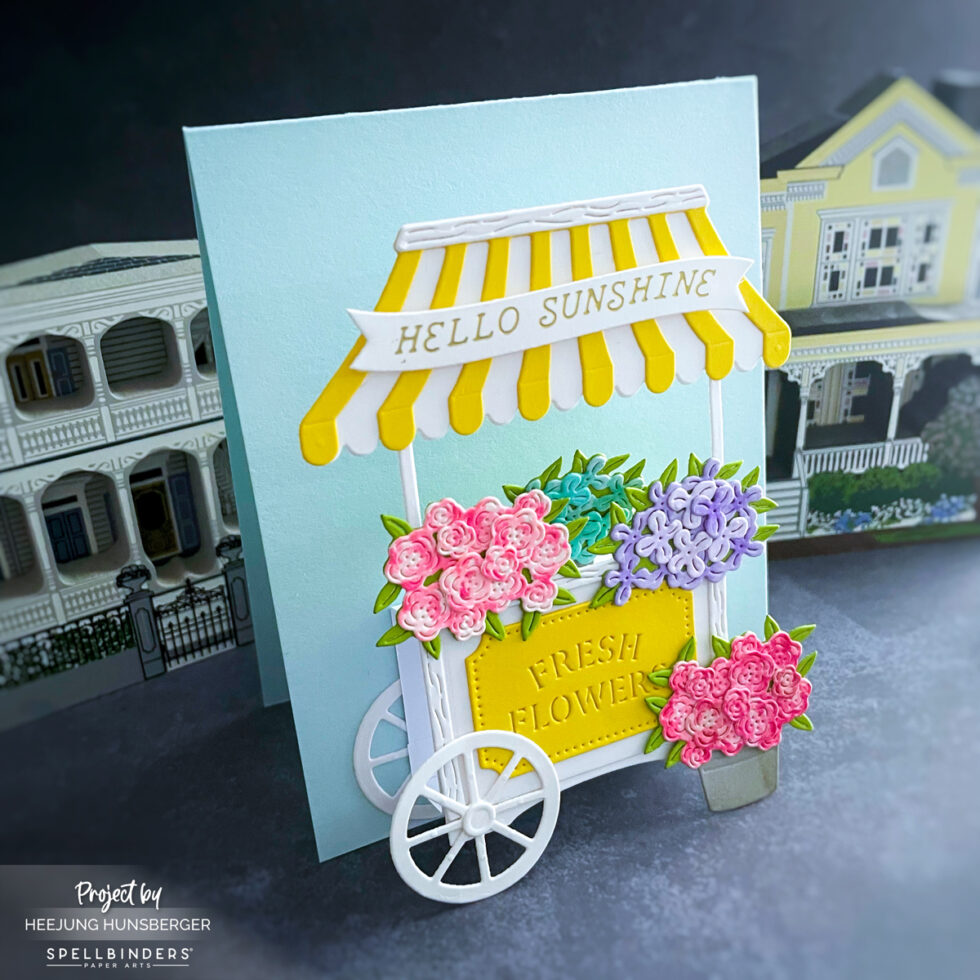
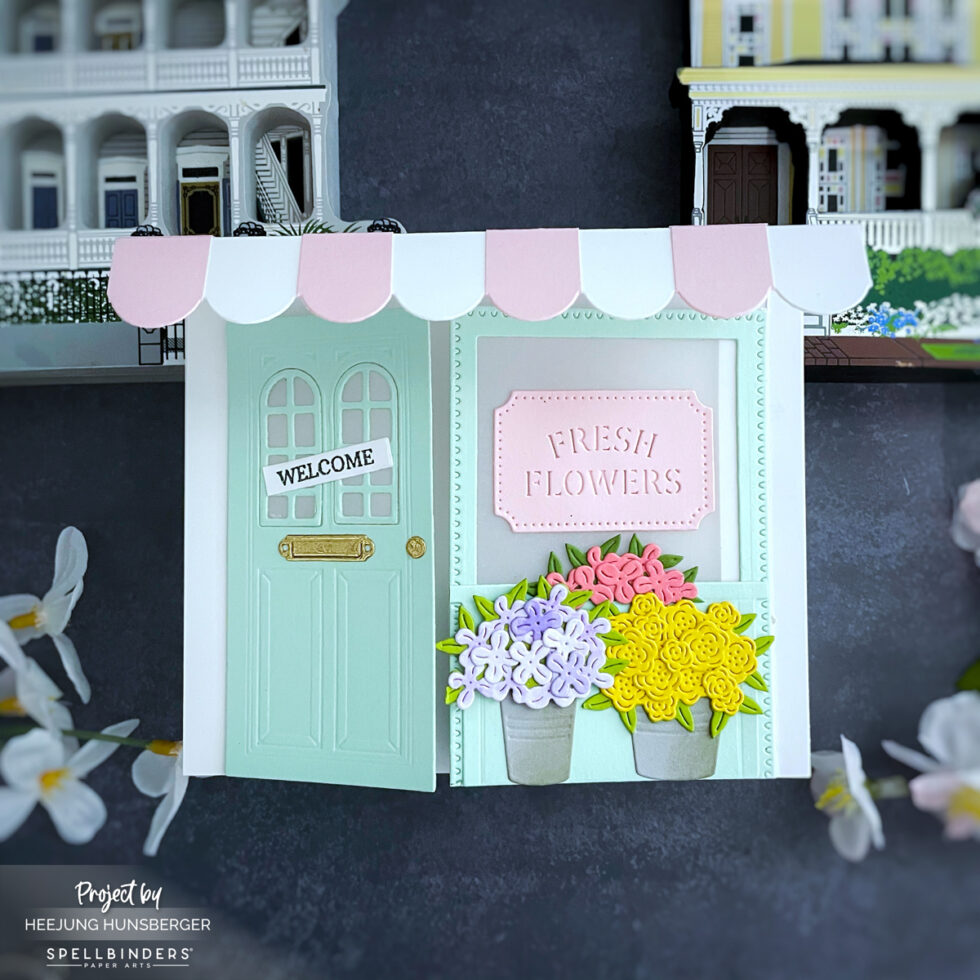
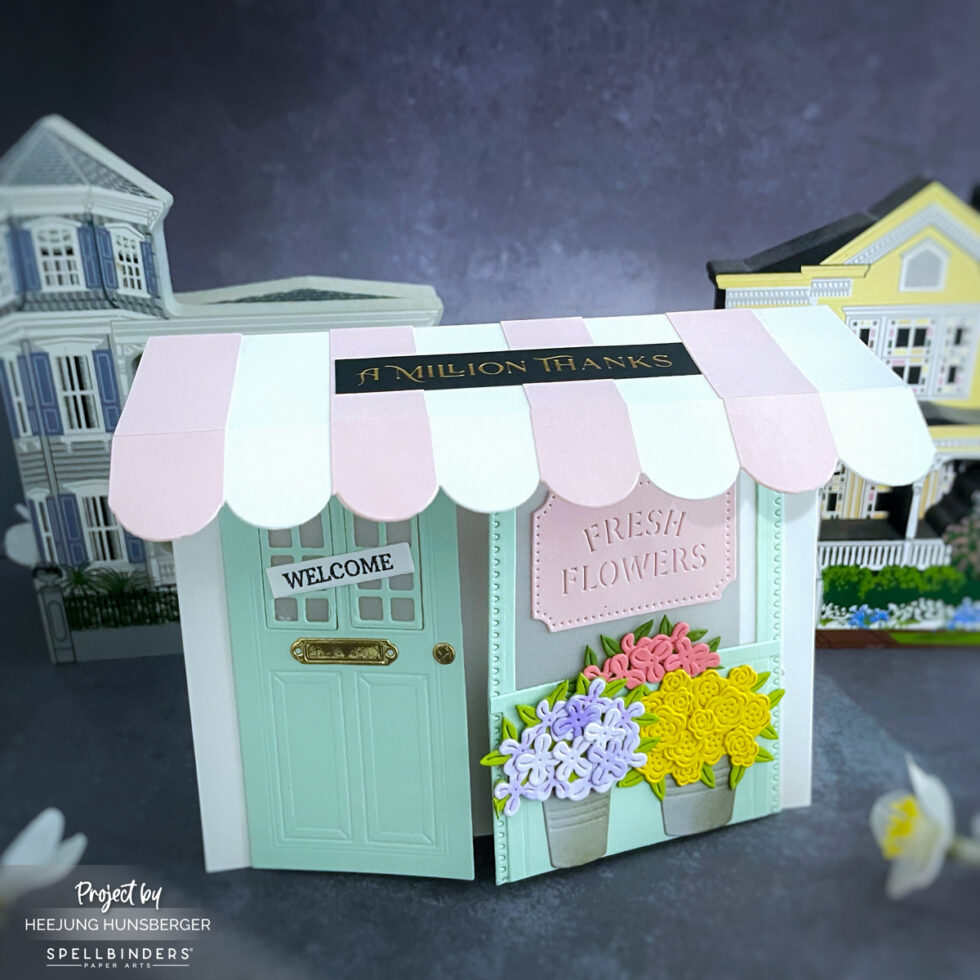
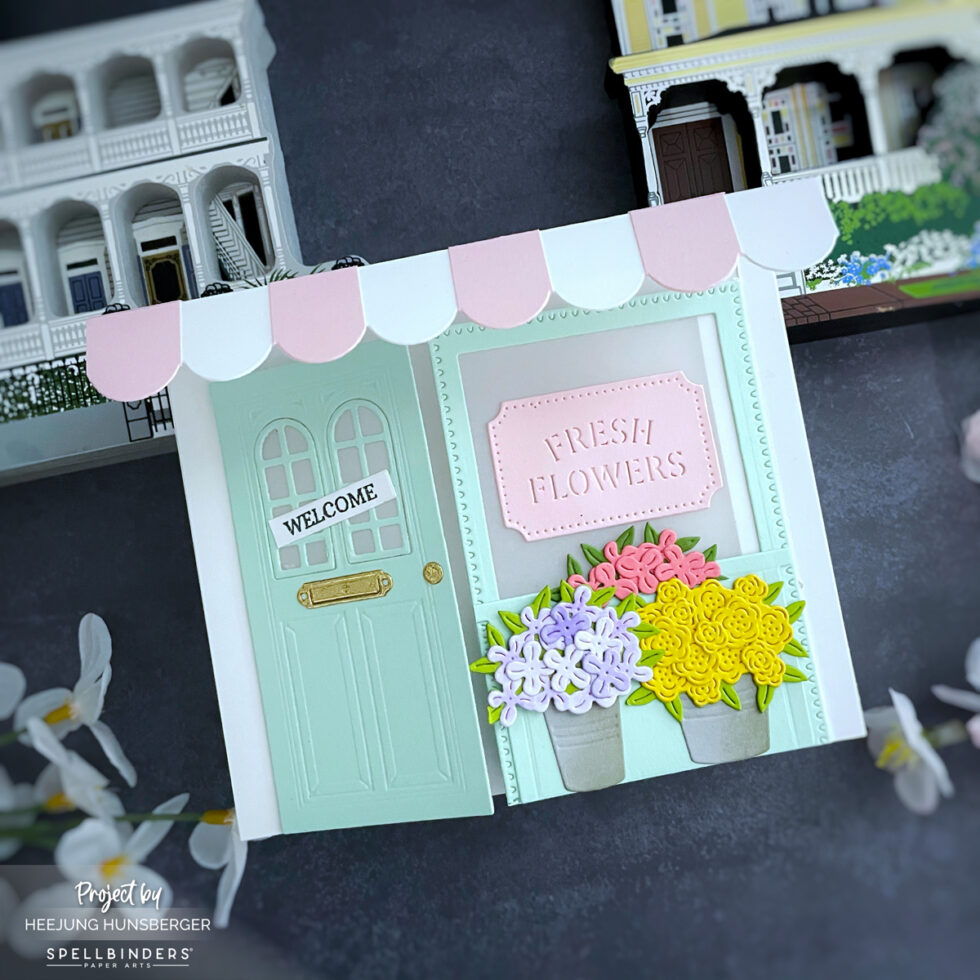
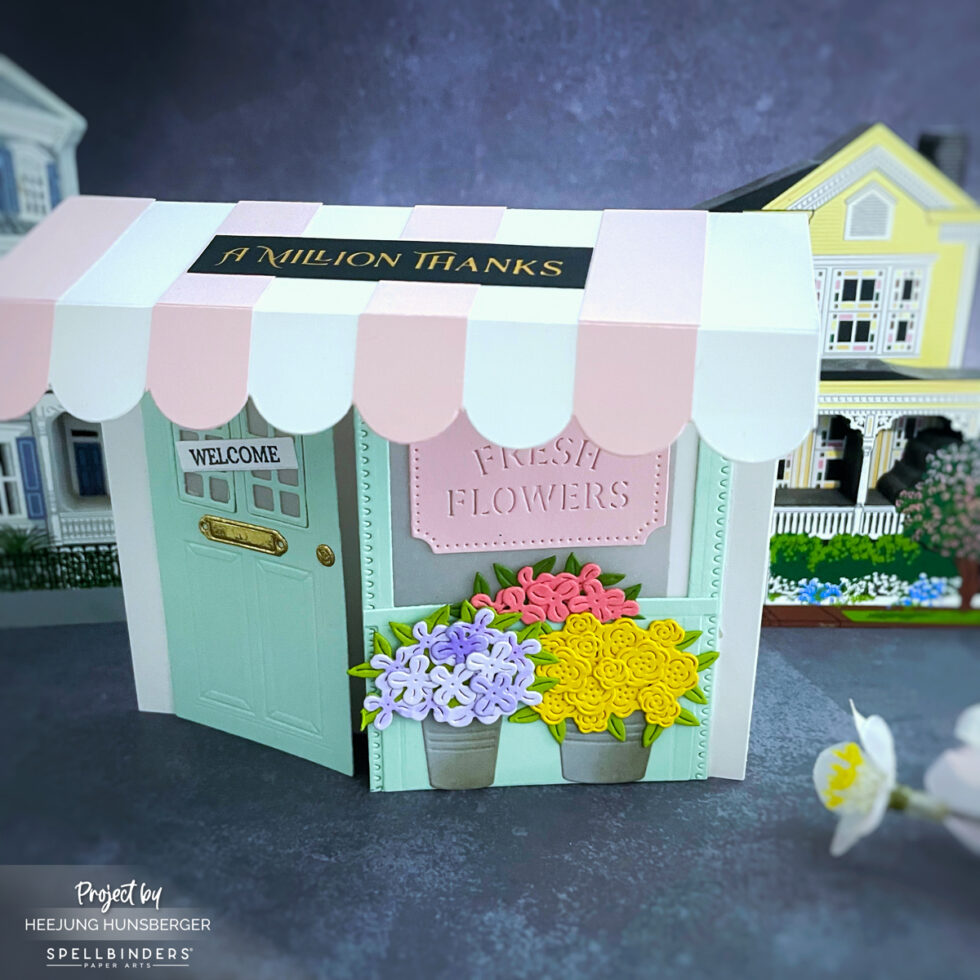
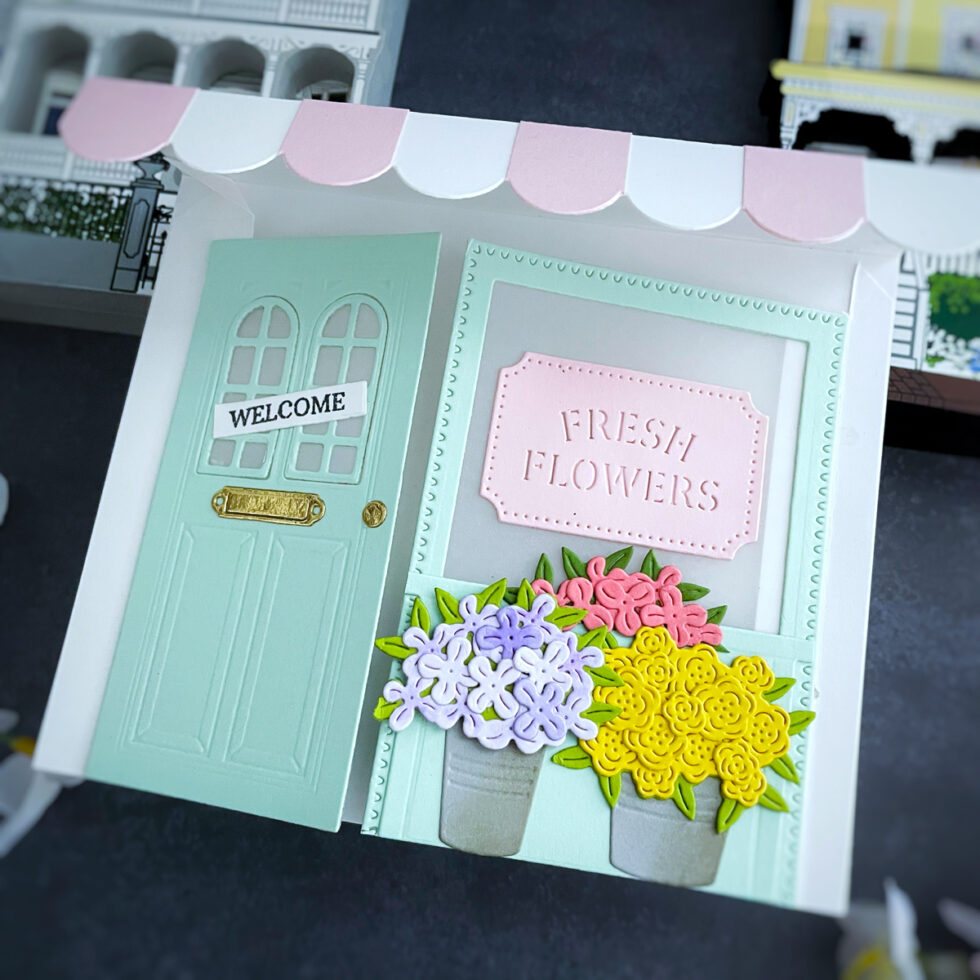
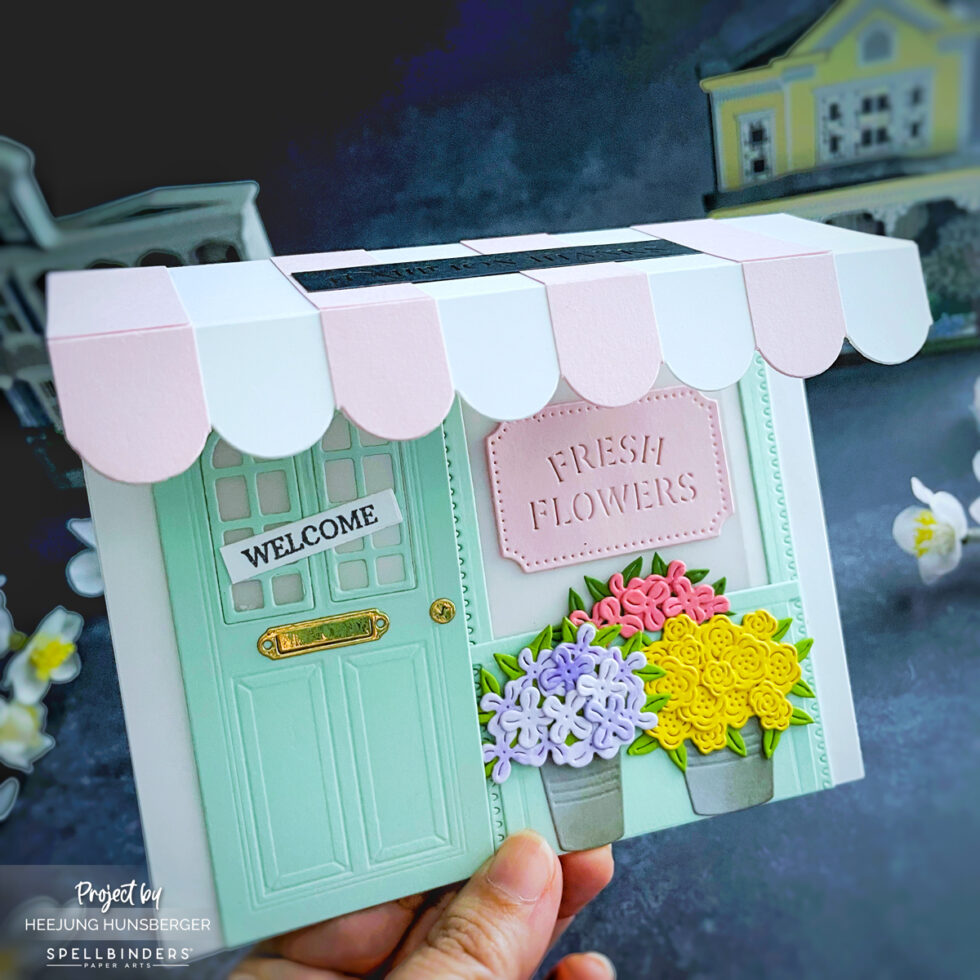
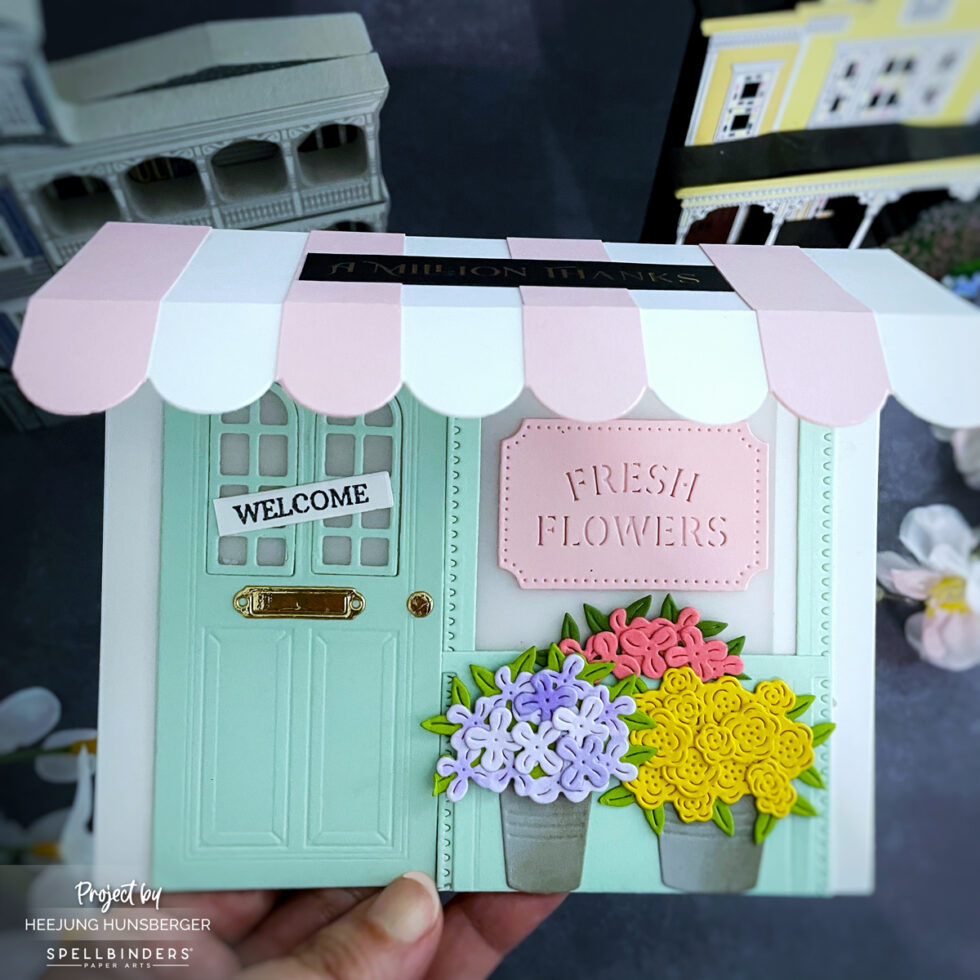
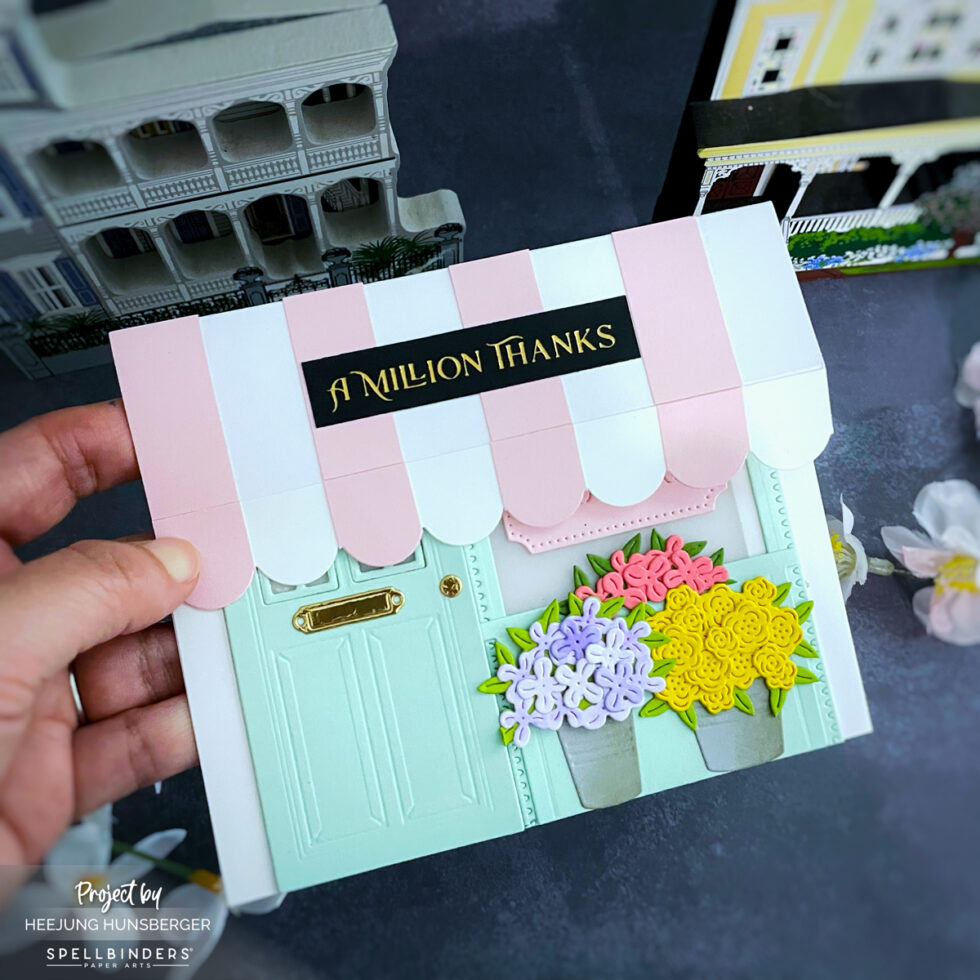
I trimmed the white cardstock for the card base to 5 3/8 x 6 1/2 inches and scored it at 1/2 inch and 2 inches along the 6 1/2 inch length.

I die-cut the Stitch & Dots scalloped borders die on white cardstock, and I cut four strips measuring 11/16 inches wide and 2 1/2 inches long in blush card stock.

I attached the scalloped edges along the 1/2-inch scored line underneath.


I attached the brush strips to the scalloped edge pieces.

I used the Fancy Sentiments Strips Press Plate & Die to gold hot-foil it on Raven card stock.

I die-cut the Flower Cart Dies flowers in Fog, Beewax, Fairy Tale, Tutu, and Rainforest card stock.

I die-cut the door from the Open House Door Base die in Mint Card Stock.

I attached the vellum paper underneath the window of the door and the display window.


I created a welcome sign on the door using the welcome stamp from the Welcome Sign & Sentiments Clear Stamp.

I applied the dual pop-up door card mechanism, but it only opens one door.

Die-cut a rectangle from the Perfect Touch Rectangle die using mint cardstock. Then, die-cut the window with the Flower Cart die on the rectangle panel and attach the vellum paper underneath the window.

I am glad you took the time to read this post. I hope it has motivated you to unleash your creativity. Do not hesitate to contact me if you have any questions or feedback.

I’m looking forward to sharing more content with you soon.

Love,

Heejung

SUPPLIES

When you make purchases through affiliate links, it won’t cost you anything extra. I am grateful for your support!