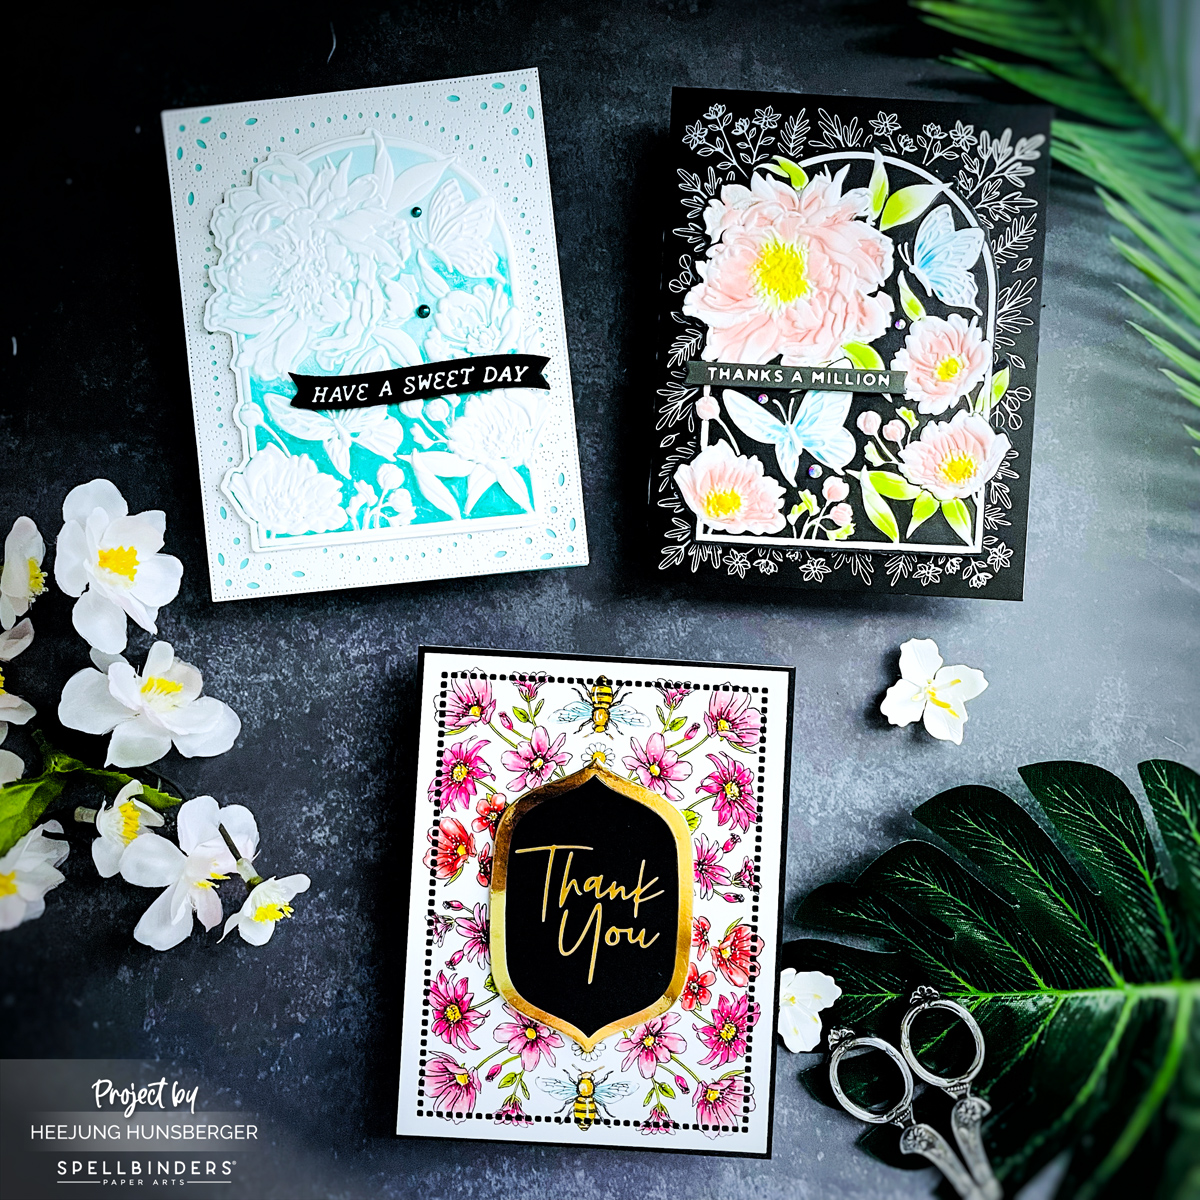
I have made three cards using the Sealed 3D Botanical Collection, and some die and stamps from my stash.
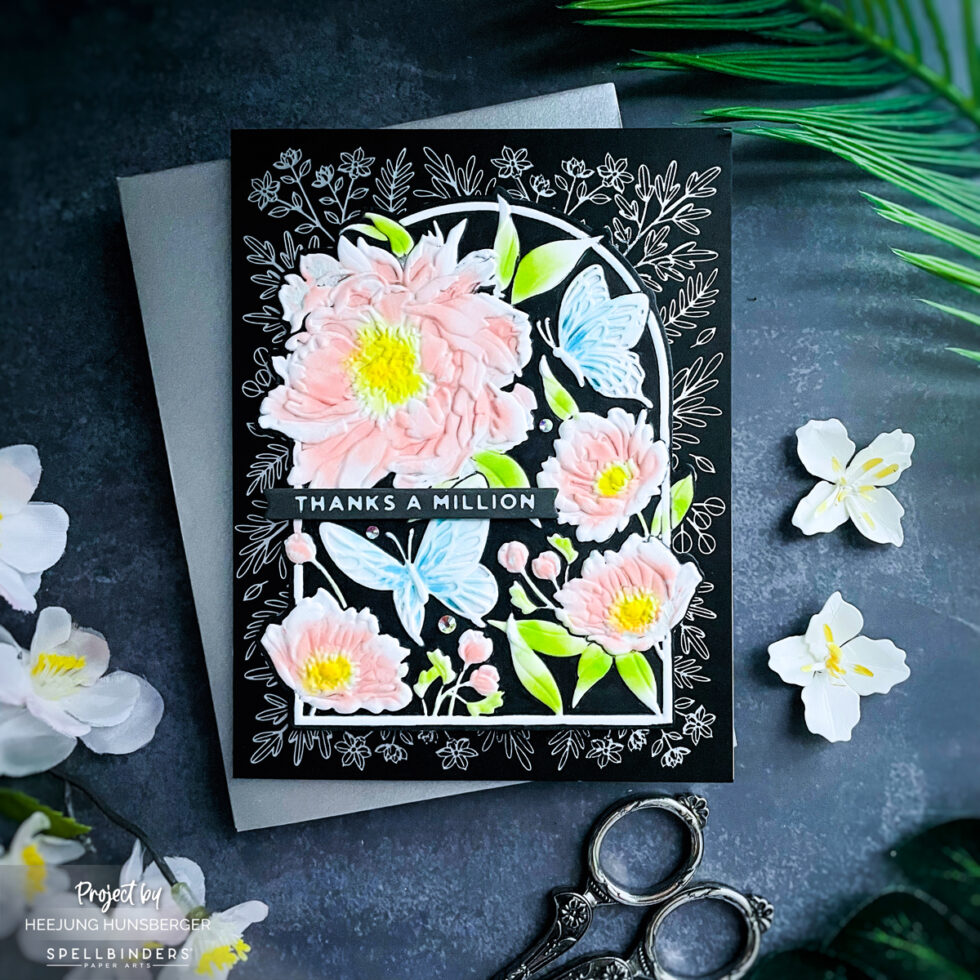
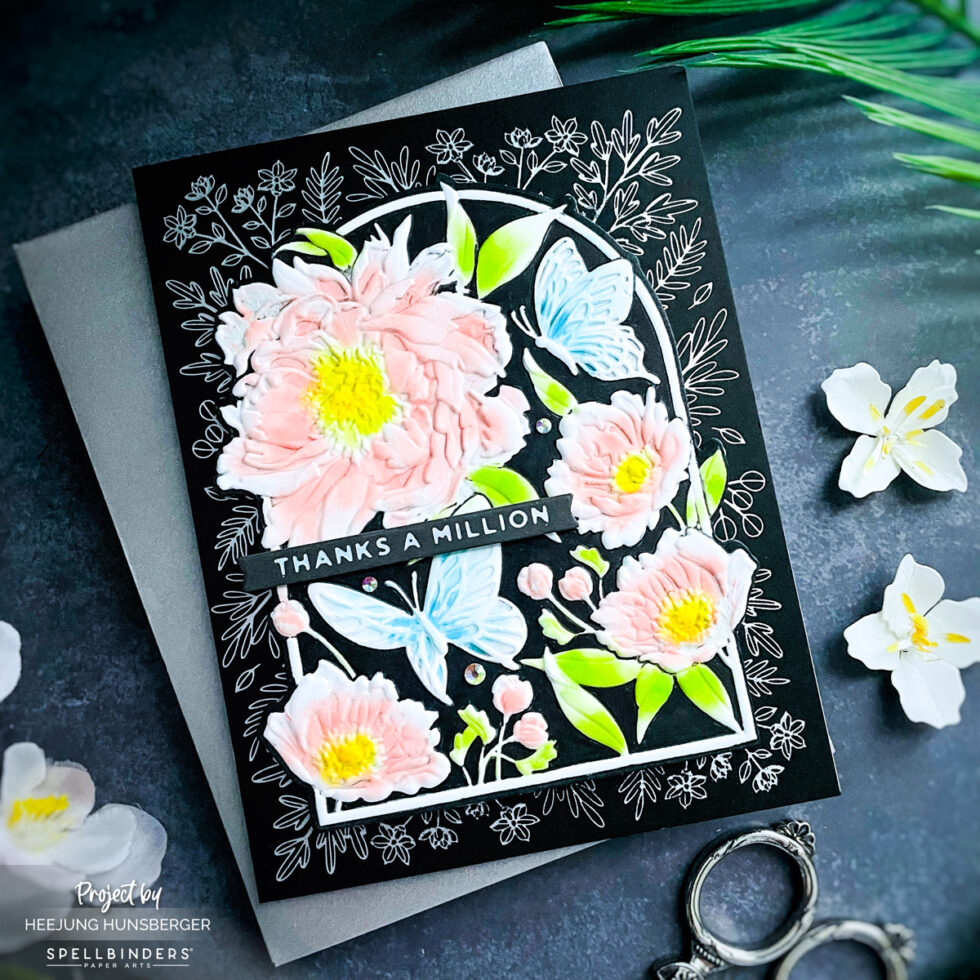
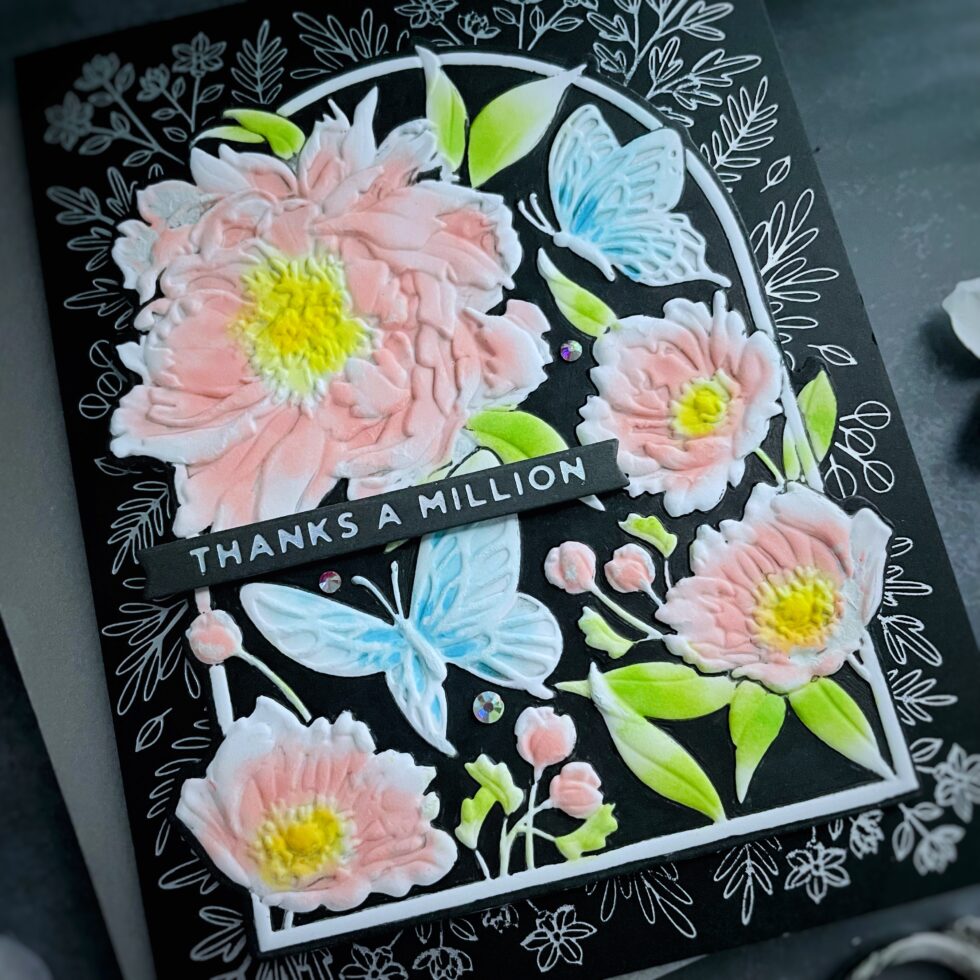
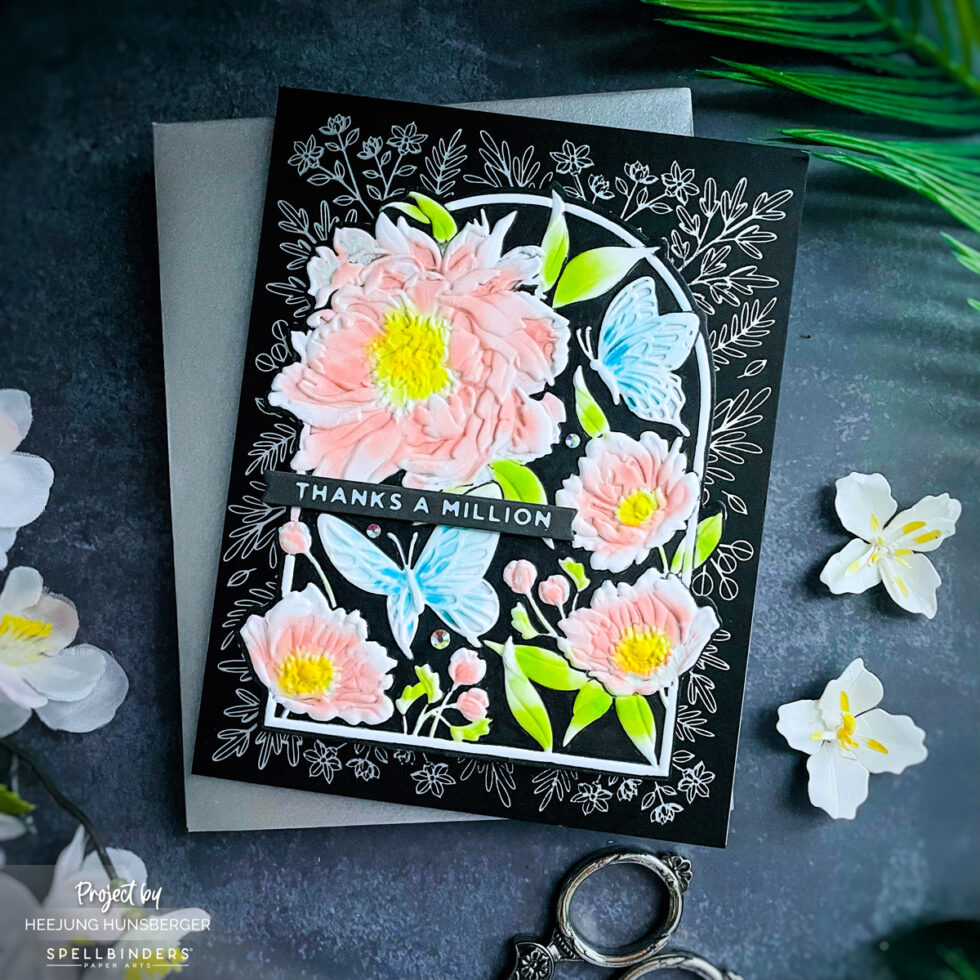
Thanks a Million Card
I used the Mirrored Arch Nested Sprigs Press Plate with silver hot foil on black cardstock for the background. I embossed the Floral For You 3D Emboss & Cut folder. Before embossing it and die-cutting the coordinated floral arch on white card stock, I used a brayer to apply gray ink to the 3D embossing folder. Then, I sandwiched the die-cut pieces on the embossing folder; the result inked the negative area of the embossed florals.
I used mini blending brushes to color embossed flowers and butterflies, and then I added black markers to the grey inked area to match the background color.
If I use black ink on the brayer for the embossing folder, the flowers and butterflies might end up being inked black, so I used gray instead.
I used the Mini Everyday Hot Foil Sentiments with silver foil on the dark gray.
CARD RECIPE:
Floral For You 3D Emboss & Cut Folder from the Sealed 3D Botanical Collection | Spellbinders
Mirrored Arch Nested Sprigs Press Plate from the Mirrored Arch Collection | Spellbinders
Mini Everyday Sentiments Glimmer Hot Foil Plate & Die Set from Simply Perfect Collection
Spectrum AB Color Essentials Gems
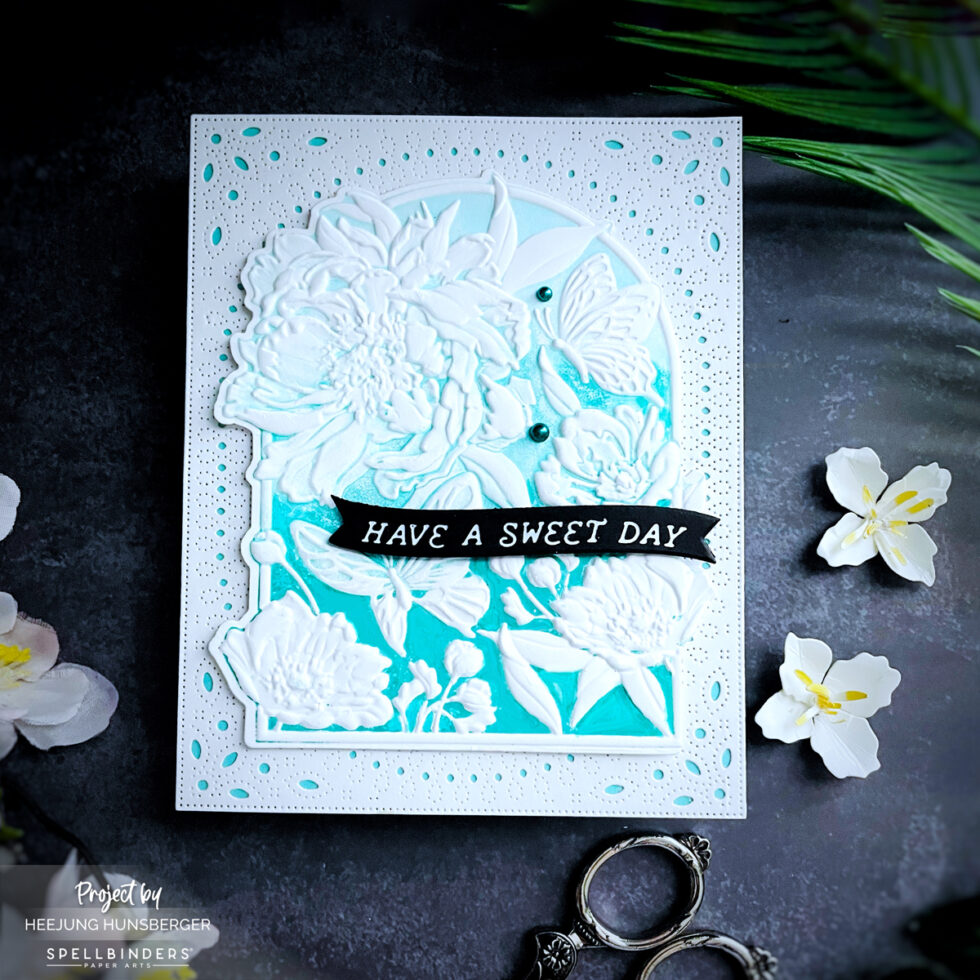
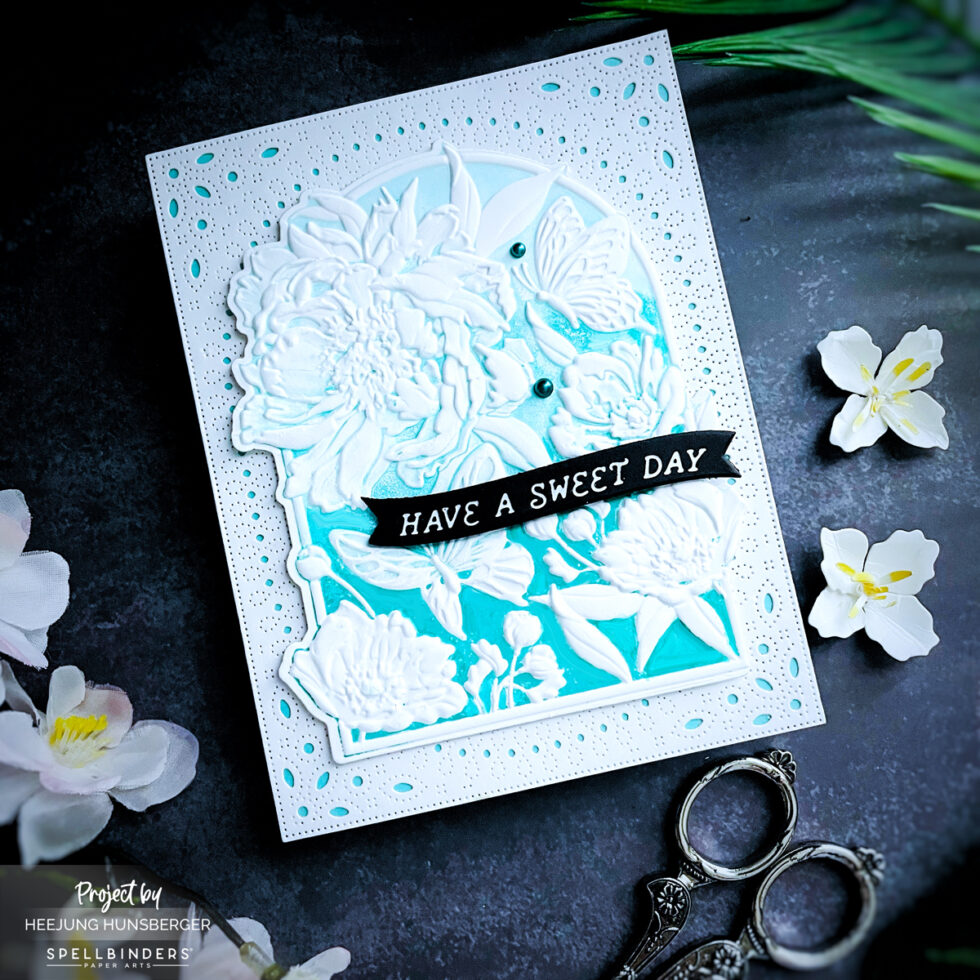
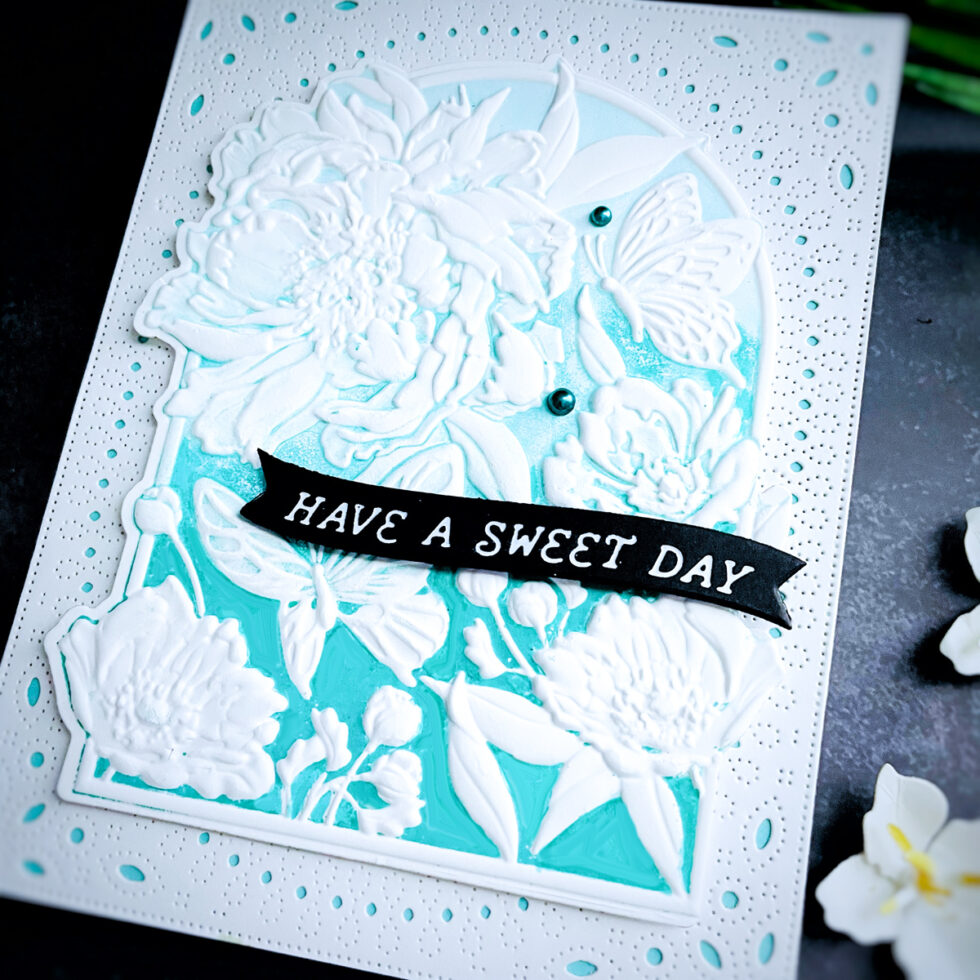
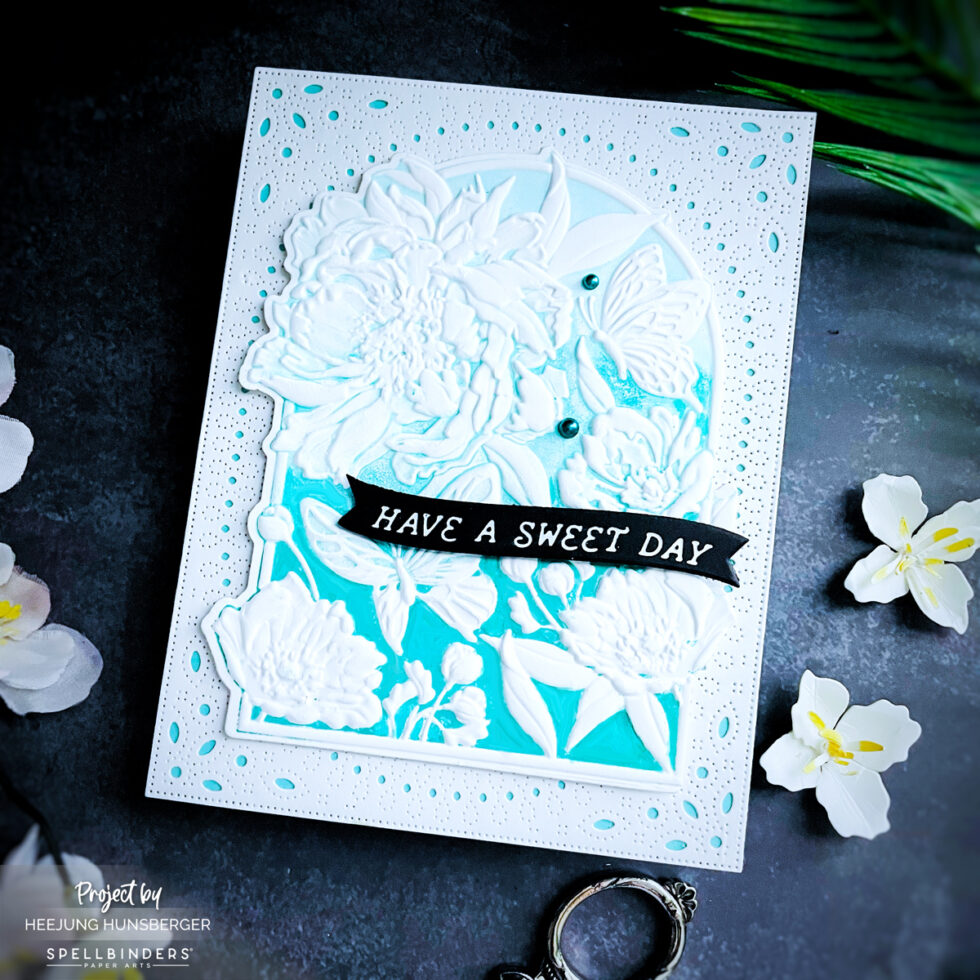
Have A Sweet Day
I made another version of the card using the Floral For You 3D Emboss & Cut Folder. First, I cut the Floral For You coordinating die from white cardstock. Then I used a brayer to apply Aquatini ink to the embossing folder and placed the die-cut piece inside. This resulted in embossed flowers and butterflies in white, while the rest of the design was in the Aquatini color.
I die-cut the infinity Punch & Pierce Plate Die on white card stock.
I attached it to the Lagoon Color Card stock card base.
I used the Curved Everyday Sentiments Glimmer Plate to hot foil with white foil on black cardstock.
I embellished it with spruce pearl dots to finish up the card.
CARD RECIPE:
Floral For You 3D Emboss & Cut Folder from the Sealed 3D Botanical Collection | Spellbinders
Infinity Punch & Pierce Plate Etched Dies from theStylish Ovals Collection | Spellbinders
Curved Everyday Sentiments Glimmer Plate & Die Set from the Glimmering Flowers Collection | Spellbinders
Fashion Spruce Color Essentials Pearl Dots – Spellbinders Paper Arts
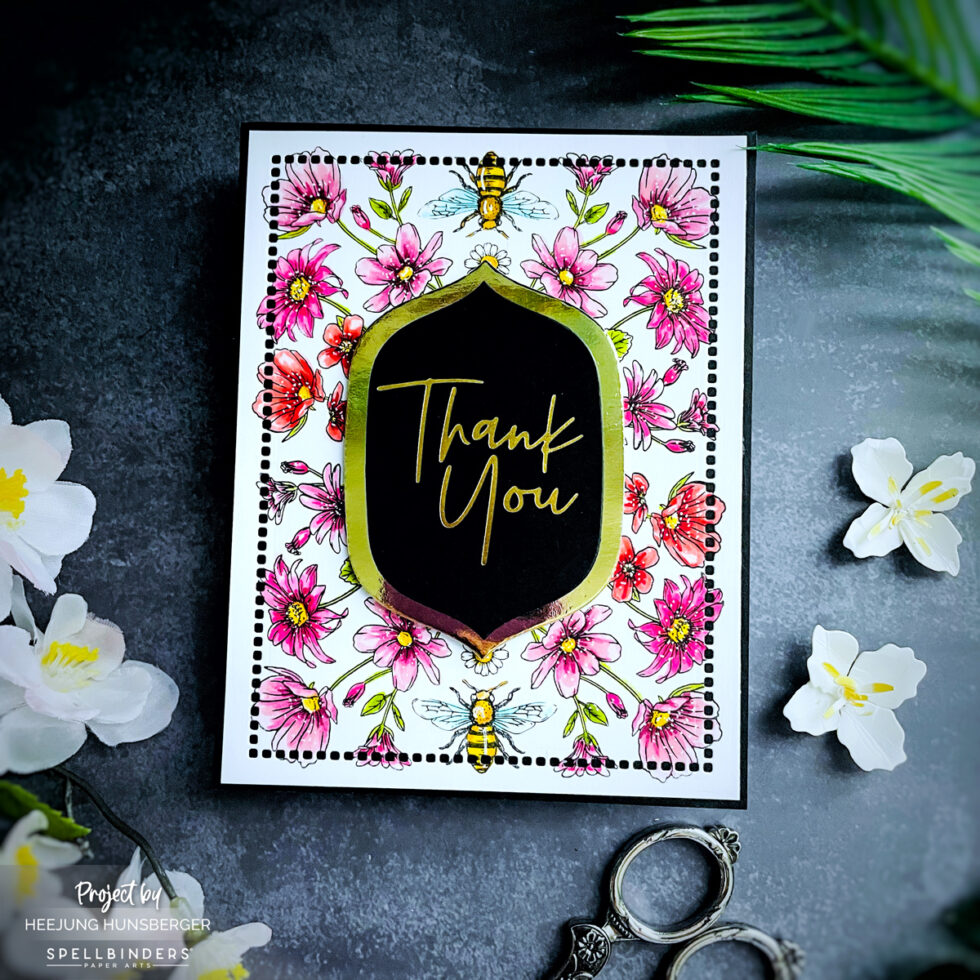
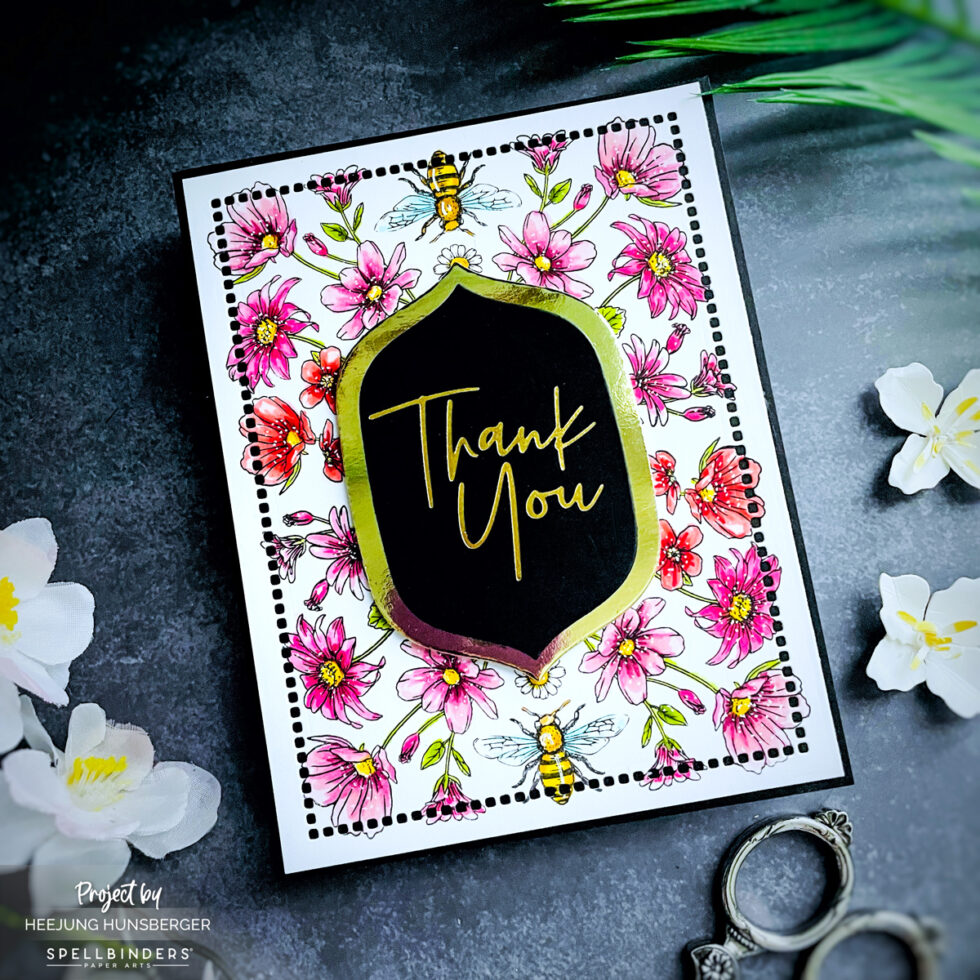
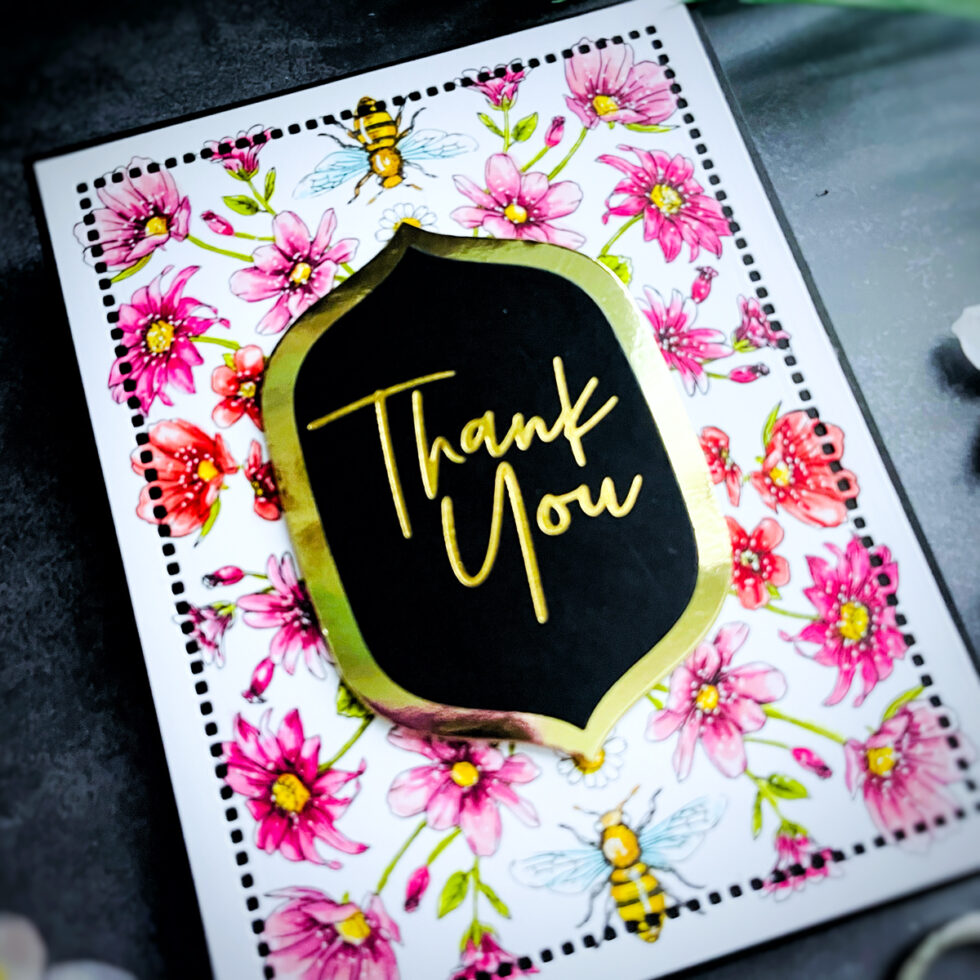
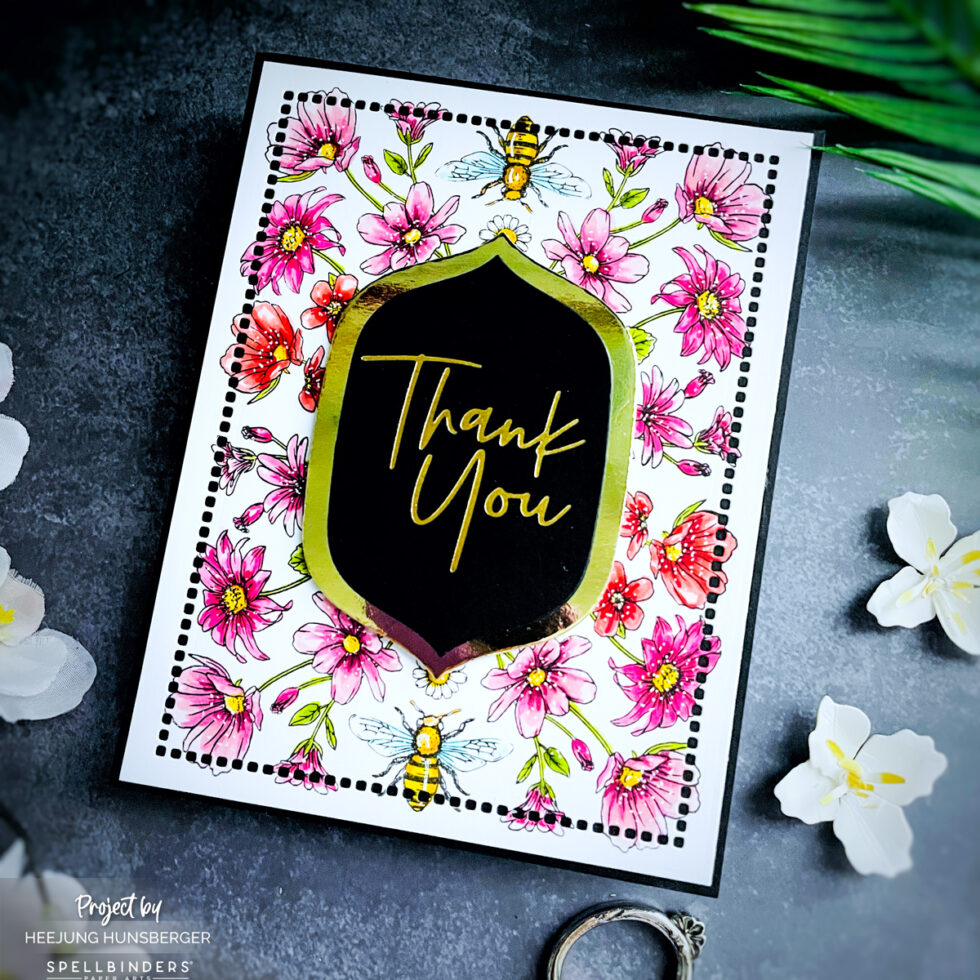
Thank you Card with the Fresh Picked Label Card
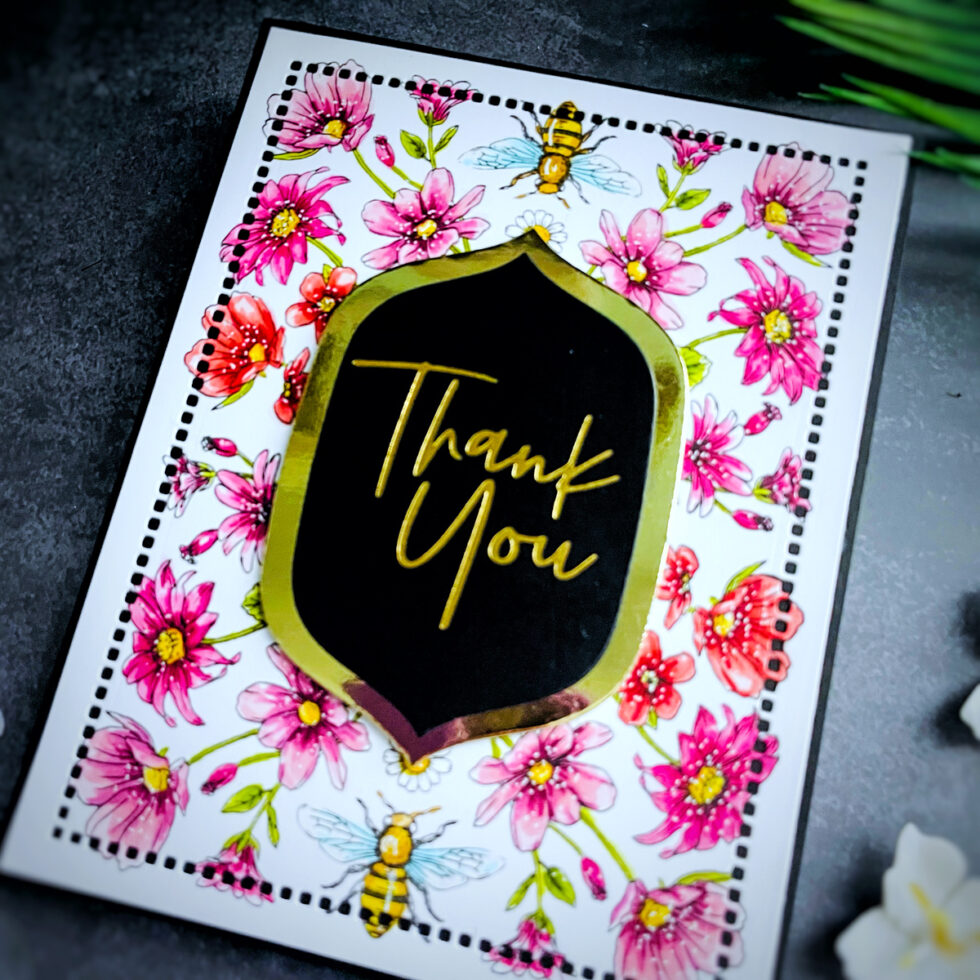
For the background, I stamped the “Just Bee-Cause” Clear Stamp (CDOM Jan 2024) on white card stock and colored it with markers.
I die-cut the colored images with the Nestablitities Hemstitch Rectangle Die.
I used gold foil to hot foil the “Thank You & Happy Birthday” Glimmer Hot foil plate on black card stock. Then, I used the Fresh Picked Labels and Tags Dies (from the Sealed 3D Botanical Collection) to die-cut it. I also die-cut a larger size of the same die on gold mirror card stock.
I attached the sentiment with a foam sticker to the center of the card.
CARD RECIPE:
Fresh Picked Labels and Tag Etched Dies from the Sealed 3D Botanical Collection | Spellbinders
Thank You & Happy Birthday Glimmer Hot Foil Plate Set from the Stylish Script Collection
Just Bee-Cause – Clear Stamp of the Month – Spellbinders Paper Arts
Nestabilities Hemstitch Rectangles Etched Dies Venise Lace by Becca Feeken
I am glad you took the time to read this post. I hope it has motivated you to unleash your creativity. Do not hesitate to contact me if you have any questions or feedback. I’m looking forward to sharing more content with you soon.
Love,
Heejung
SUPPLIES
When you make purchases through affiliate links, it won’t cost you anything extra. I am grateful for your support!